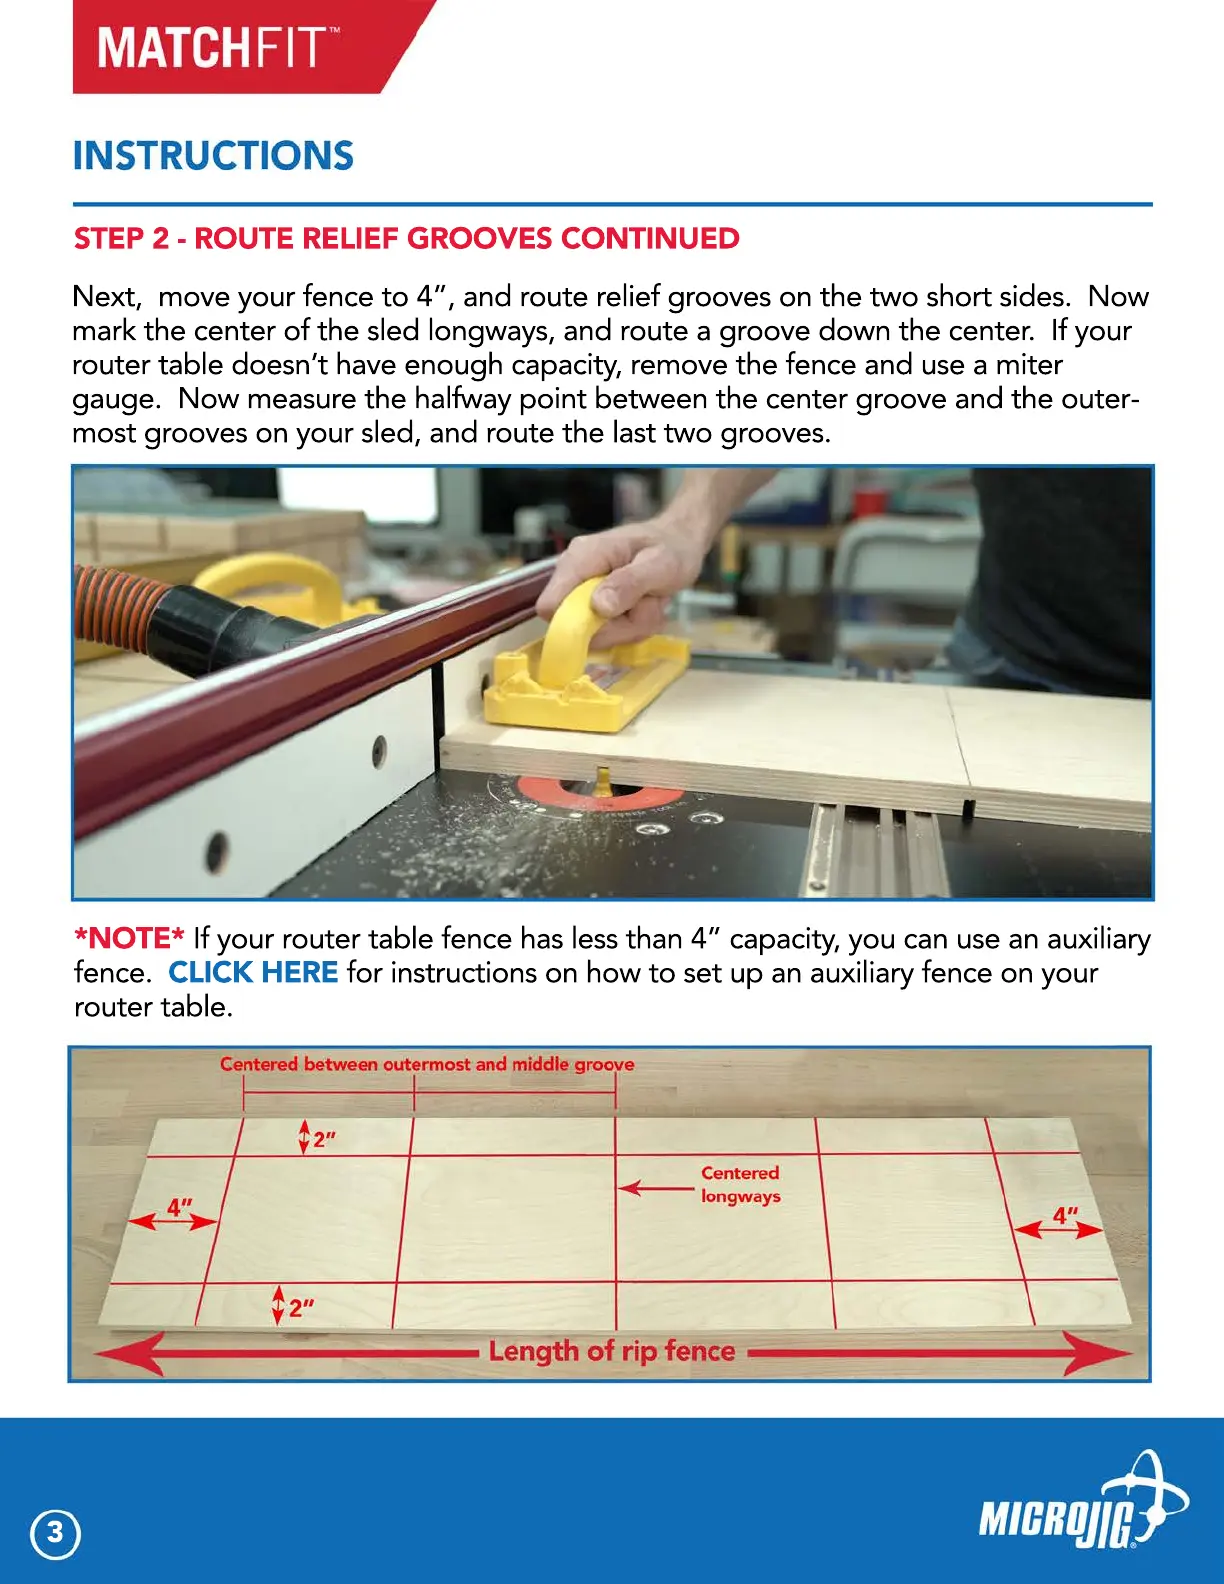
Next, move your fence to 4”, and route relief grooves on the two short sides. Now
mark the center of the sled longways, and route a groove down the center. If your
router table doesn’t have enough capacity, remove the fence and use a miter
gauge. Now measure the halfway point between the center groove and the outer-
most grooves on your sled, and route the last two grooves.
3
STEP 2 - ROUTE RELIEF GROOVES CONTINUED
*NOTE* If your router table fence has less than 4” capacity, you can use an auxiliary
fence. CLICK HERE for instructions on how to set up an auxiliary fence on your
router table.