Rotary Microtome HM 340 E
MICROM International GmbH
Robert-Bosch-Str. 49
D- 69190 Walldorf 386 200 - English
2-11 ADAPTERS FOR SPECIMEN CLAMPING
2-11-1 ADAPTER, NON-ORIENTING
This adapter serves for the non-orienting fastening
of the specimen clamps directly on the cylinder
(fig. 5.5).
2-11-2 ADAPTER, ORIENTING,
SPECIMEN ORIENTATION
Using the orienting adapter (fig. 7.4 and 7.5)
fasten the specimen clamps on the cylinder head
(fig. 12). This allows the specimen to be aligned in
relation to the knife.
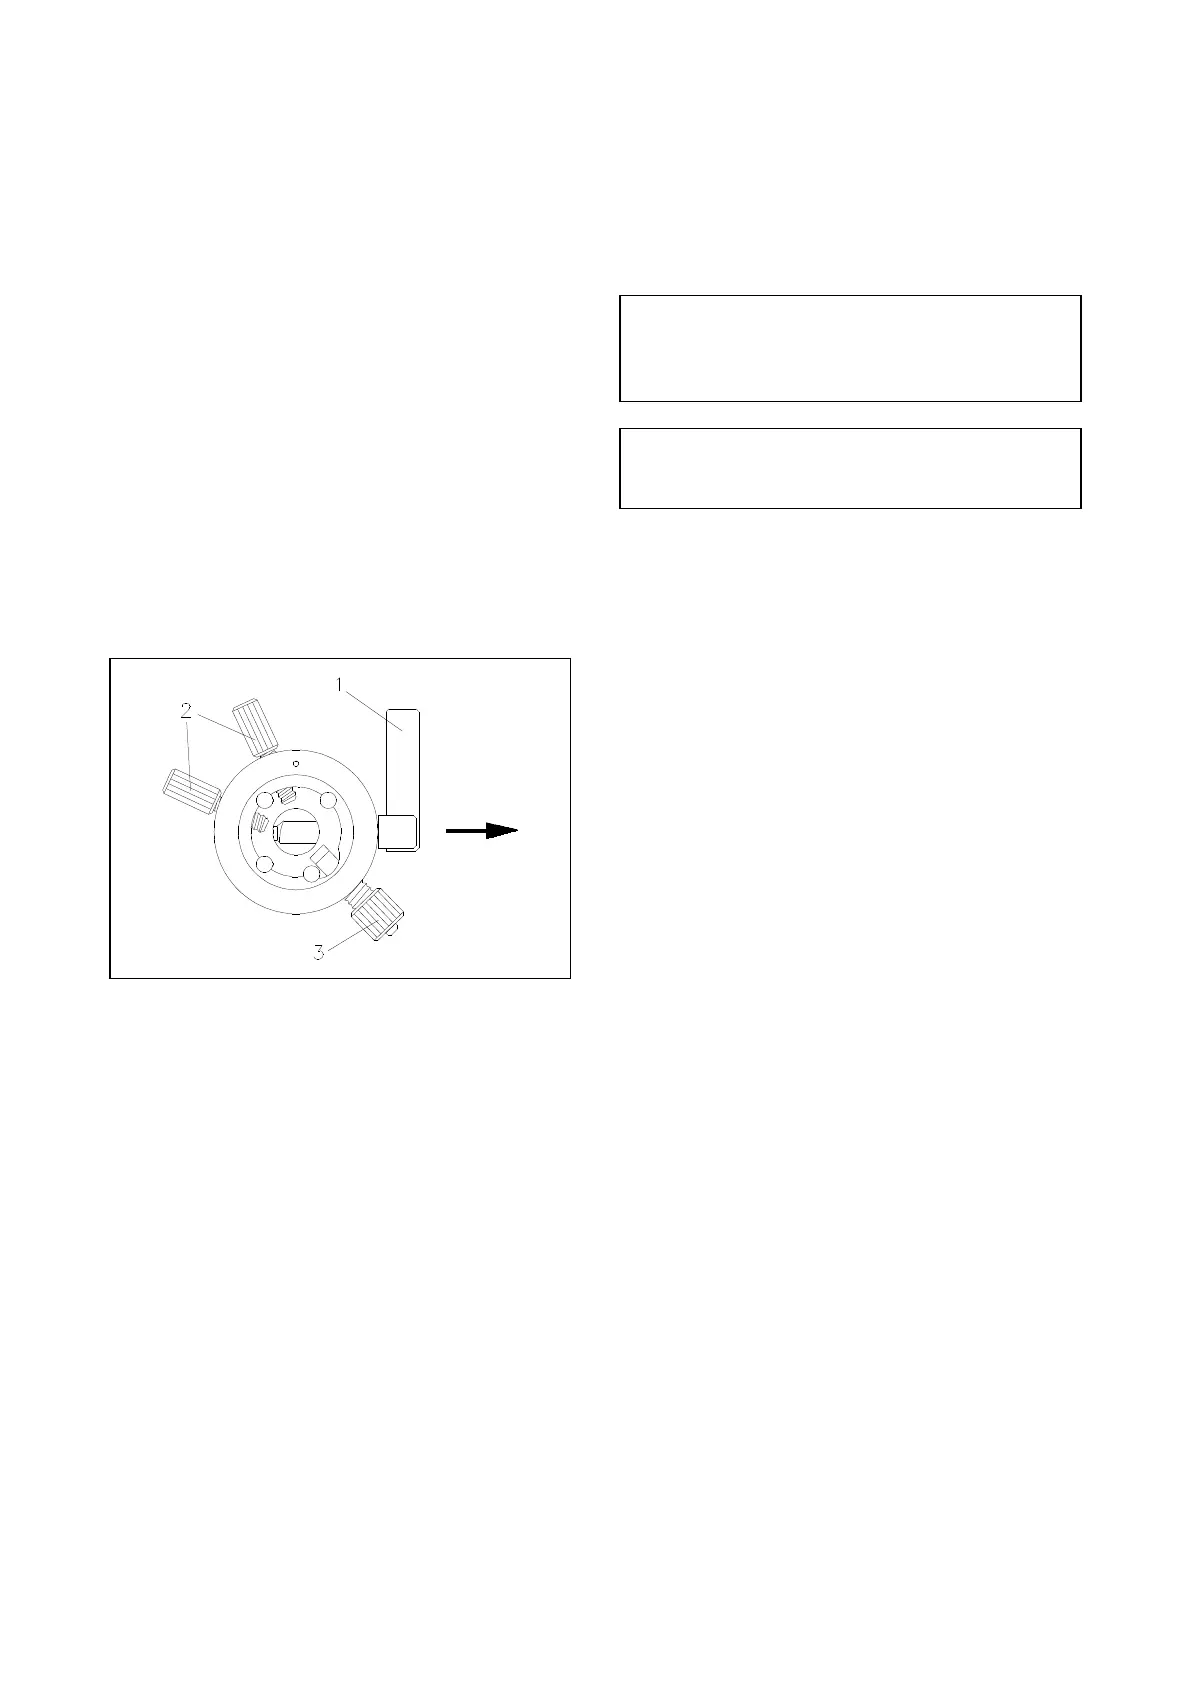
Fig. 12
To bring the specimen into the desired position,
turn the eccentric lever (fig. 12.1) to the front. This
will loosen the specimen clamp and a rotation of
360° on the cylinder axis (Z-axis) is possible. With
the two adjusting screws (fig. 12.2) the specimen
clamp can be oriented by 8° in each direction on
the X-axis and Y-axis. Before starting cutting,
press the eccentric lever (fig. 12.1) upwards to fix
the orientation of the specimen.
NOTE! To avoid undesirable movement while
adjusting the specimen, press the eccentric lever
upwards slightly. This will lightly hold the
specimen clamp.
CAUTION! The spring bolt (fig. 12.3) must
always be tightened to keep the adjusting screws
under constant tension.
2-11-3 CHANGING AND/OR CLAMPING
SPECIMEN CLAMPS
The available specimen clamps are all clamped or
removed in the same way.
To change a specimen clamp, press the eccentric
lever (fig. 12.1) downwards and pull it sideways in
the direction of the arrow. Slightly unscrew the
two adjusting screws (fig. 12.2) as well as the
spring bolt (fig. 12.3).
Now the specimen clamp can be pulled out and
can be replaced with another specimen clamping
system.
Insert the new specimen clamp into the cylinder
head so that the clamping lever can be put through
the hole of the adapter (fig. 7.5) from the right side
all the way through. Tighten spring bolt (fig. 12.3).
Then align the specimen clamp by means of the
orienting screws (fig. 12.2). Then press the
clamping lever (fig. 12.1) upwards (see 2-11-4,
readjusting specimen clamps).