Rotary Microtome HM 340 E
MICROM International GmbH
Robert-Bosch-Str. 49
D- 69190 Walldorf 386 200 - English
2-16-2 AUTOMATIC APPROACH SYSTEM
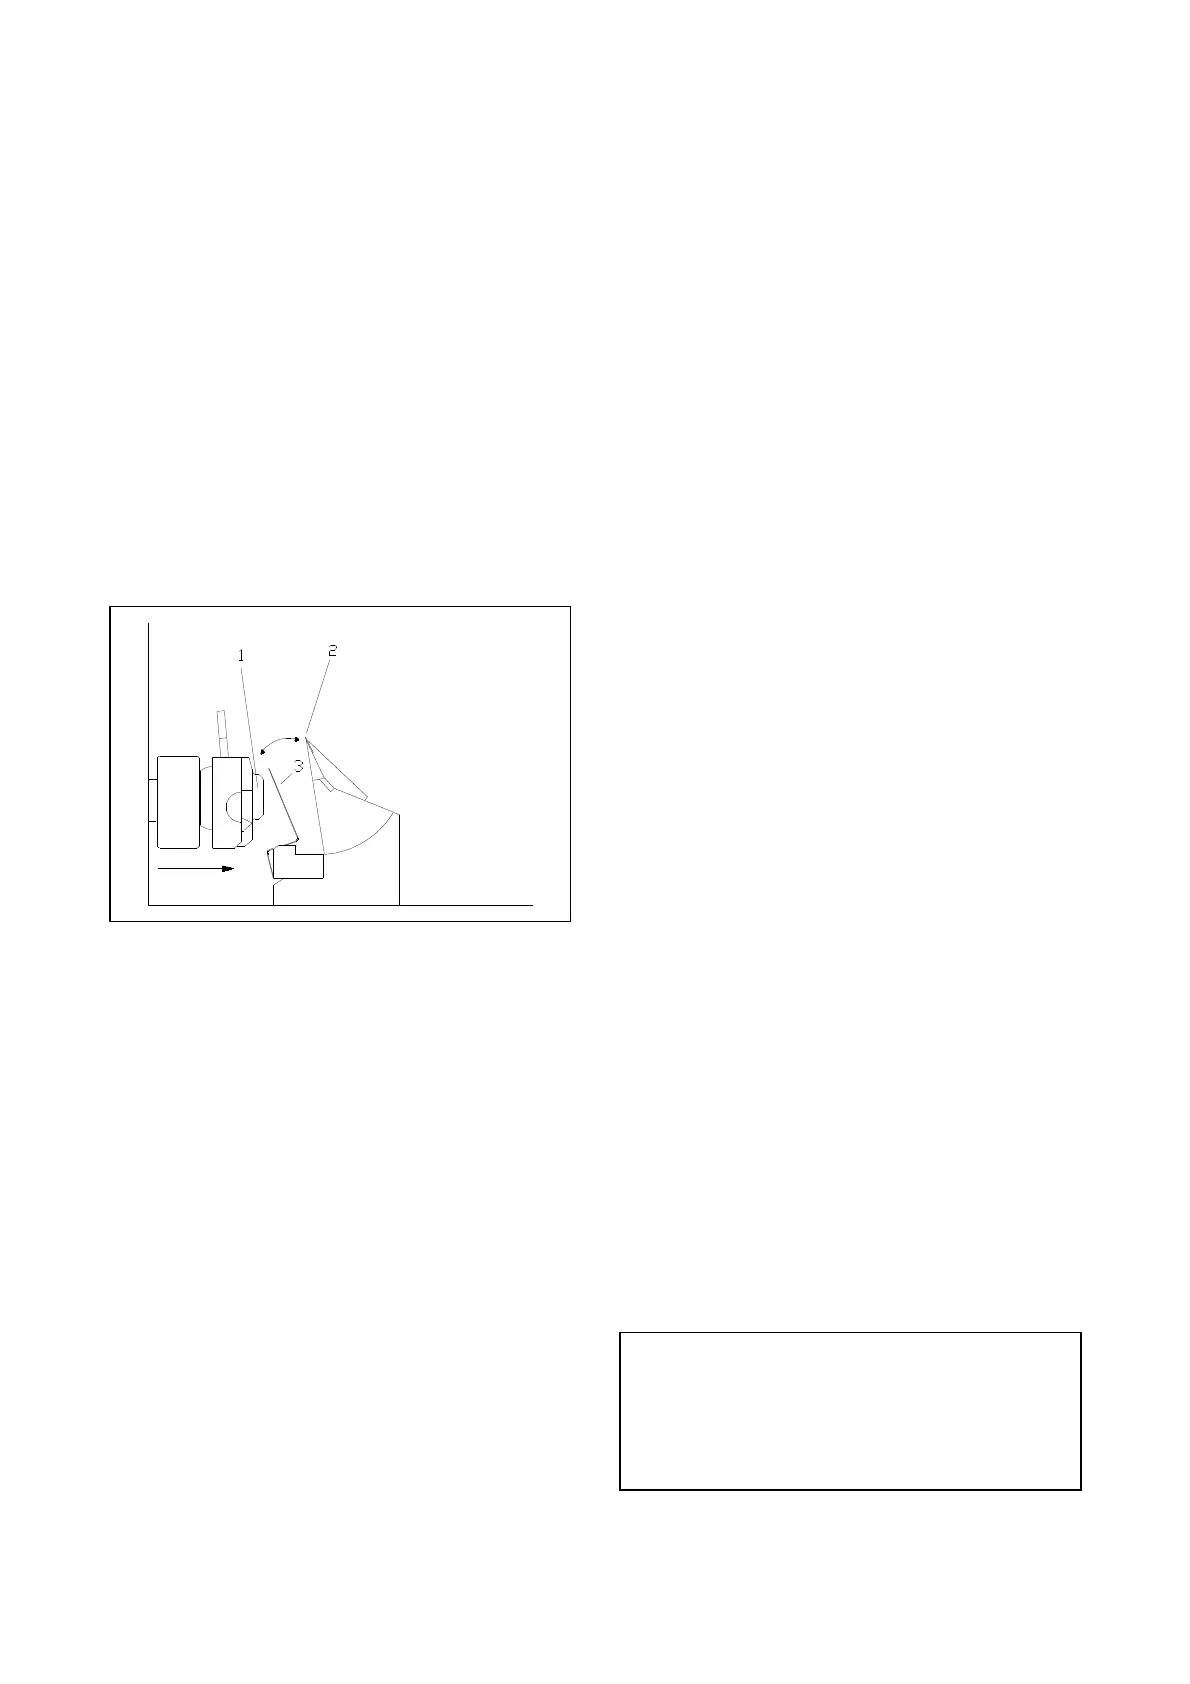
The automatic approach system is used for the fast
and exact approach of the specimen (fig. 24.1)
towards the knife edge (fig. 24.2). Fig. 24 shows
the position of the sensor (fig. 24.3) at the
beginning of the automatic approach process.
Install the automatic approach system by means of
the two visible screws on the back of the knife
carrier base (alternatively same installation
position as the backlighting system) and connect it
to the socket on the right front side of the
instrument.
Clamp the specimen, adjust the knife carrier and
check all clamping levers.
Fig. 24
Now, turn the handle of the handwheel to the
lower position, i.e. the specimen holder together
with the specimen is also in the lower position.
Press button A on the operating panel (fig. 6.9) to
start the automatic approach process. The red LED
in button (fig. 6.9) lights up continuously. If the
LED in button (fig. 6.9) flashes only, this means
that the automatic approach was selected, but not
yet started. In this case, turn the handwheel further
until the LED in button (fig. 6.9) lights
continuously.
Now the specimen holder together with the
specimen moves forwards until a certain point is
reached. The automatic approach system turns off
automatically.
After this process, turn the handwheel and thus the
specimen holder into the upper position. Then the
automatic coarse feed moves again forwards to
carry out a certain correction value.
The distance between specimen and knife edge is
now very small. When the automatic approach is
finished, the instrument switches automatically
over to the function <trimming>. This way,
trimming can be continued immediately.
The user can determine the above-mentioned
correction value at any time again.
This might be necessary when the automatic
approach system was removed, knife carriers has
been changed or if the knife was adjusted in a
different way.
To determine the correction value again, turn the
handwheel handle into the lower position. Press
button A (fig. 6.9). The specimen holder is now
moved forwards to a switching point by means of
the coarse feed. After having reached the
switching point, the coarse feed turns off
automatically. Then turn the handwheel to bring
the specimen holder together with the specimen
into the middle position.
If required use the functions <coarse feed
forwards> (fig. 6.3), <trimming> (fig. 6.6) as well
as <coarse feed backwards> (fig. 6.4) to carry out
a specific approach up to the desired distance
between specimen and knife edge.
Then turn the handwheel handle into the upper
position. In this case, further forward movements
of the specimen holder are not carried out. The
sum of the forward and backward movements,
which were carried out by means of the above-
mentioned functions, is now stored as a new
correction value. This value is now valid for all
future automatic approaches until a new correction
value is stored again.
CAUTION! The permanent functionality of the
automatic approach system is only guaranteed
when the working process is not disturbed by
section waste. Therefore, keep the automatic
approach system itself as well as the direct
surrounding area clean.
 Loading...