5 Software
Although the device’s internal registers can be accessed via three different interfaces, MDIO, two-wire
serial, or SPI, the software makes use of the MDIO port. On the evaluation board a SiLabs F340
microcontroller acts as the MDIO master which controls the PHY. Other board resources are accessed
through other interfaces, such as SPI for the FPGA and two-wire for the SPF+ modules. The
microcontroller translates commands from the PC to the hardware slaves. The PC communicates with
the microcontroller via a USB connection.
5.1 USBXpress® Driver Installation
First, the USBXpress development kit needs to be downloaded from the Silicon Labs website (URL:
). Follow the installation directions after http://www.silabs.com/products/mcu/Pages/USBXpress.aspx
downloading the development kit.
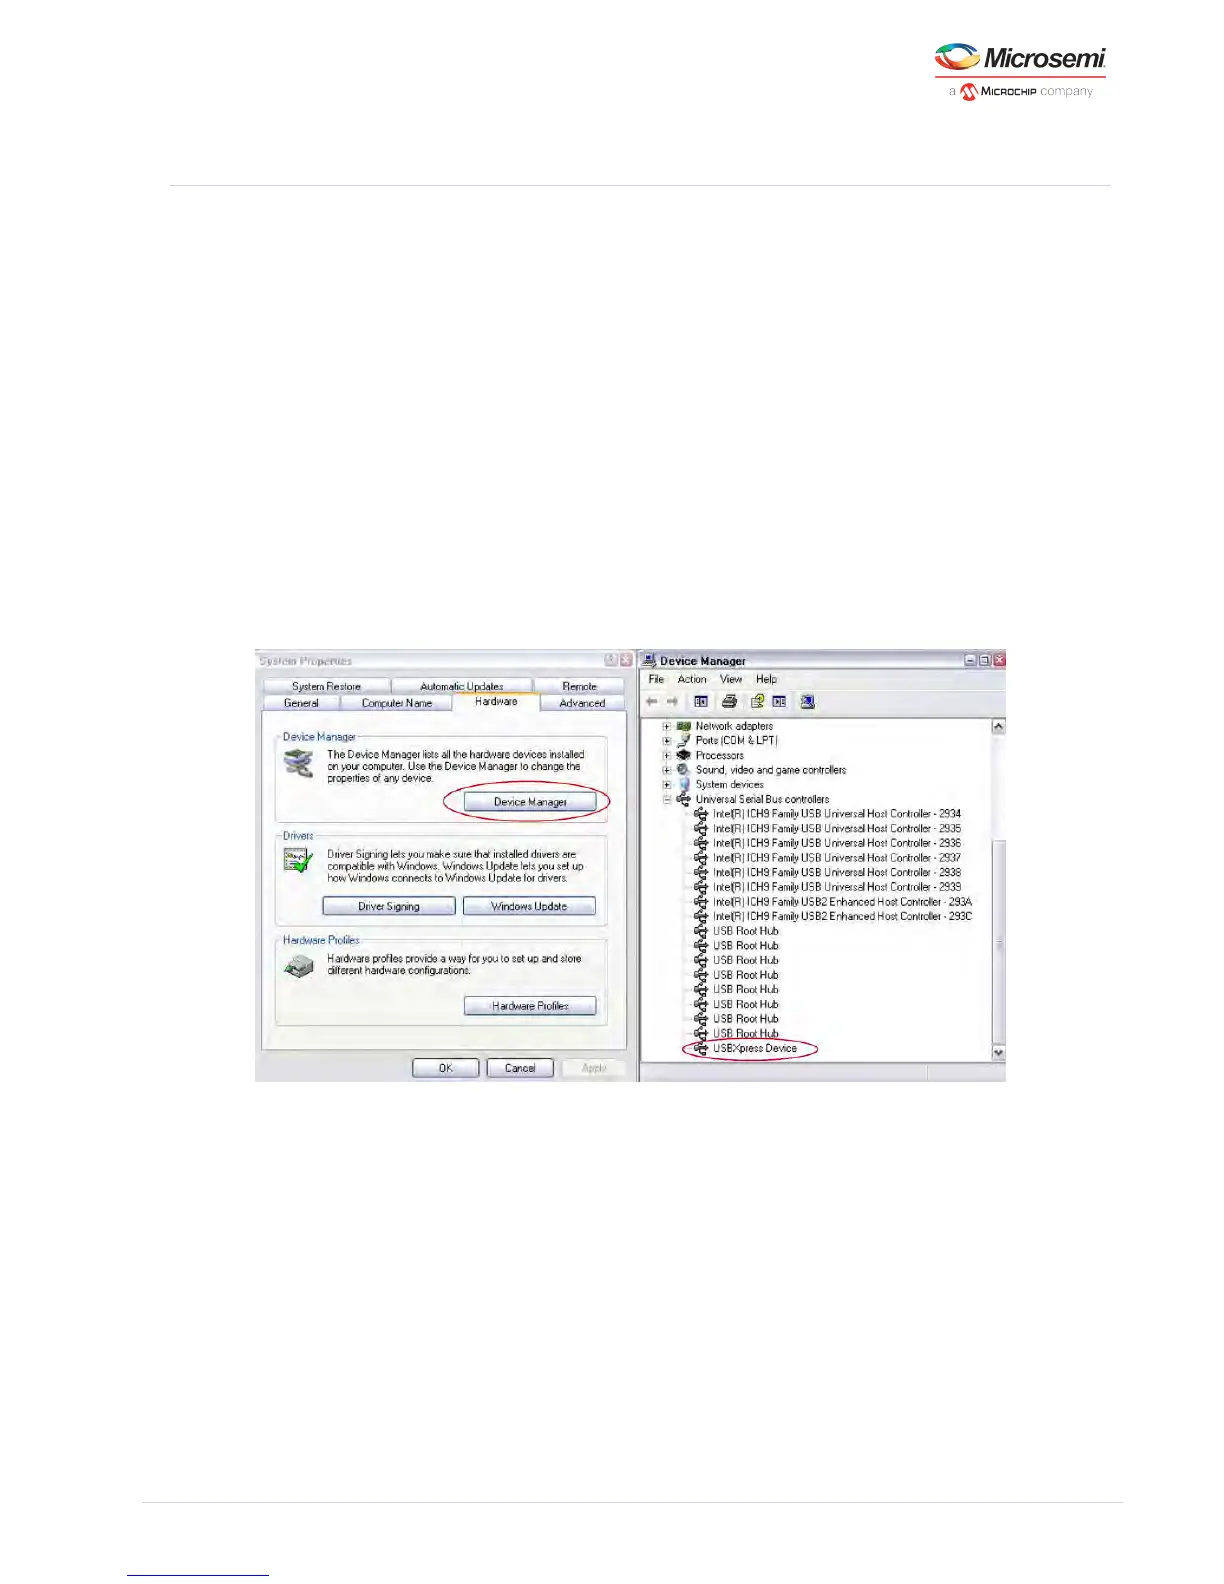
Once the USBXpress driver is installed, connect the USB cable to the EVB and the PC. In order to double
check that the USBXpress driver is installed and recognizing the evaluation board, go to the Control
Panel, and click on System > Hardware > Device Manager. Inspect the Universal Serial Bus controllers
listed to see if “USBXpress Device” appears. The figure below shows the PC has recognized a connect
USBXpress device.
Figure 2 • USBXpress in PC’s Device Manager
5.2 GUI Setup
Run the setup file to install the GUI. Once installed, the user should launch the GUI which will bring up
an initial window as shown in Figure 3. The GUI will detect the serial number of the connected
evaluation board(s). If there are multiple boards connected on the same PC, click on the drop down
menu, and select the desired EVB serial number. The two status lights will turn green when the F340
microcontroller is detected and the appropriate device is present. Click .Launch GUI
If the device indicator (e.g., “VSC8490 Present”) does not turn green, first check the position of the on
/off switch, SW2. If correct, check the voltage rails with a multimeter to ensure the VDD rails reached
the proper levels, thus ruling out current limiting as the cause.