Setting up a mix 43
PRO6 Control Centre
Quick Reference Guide
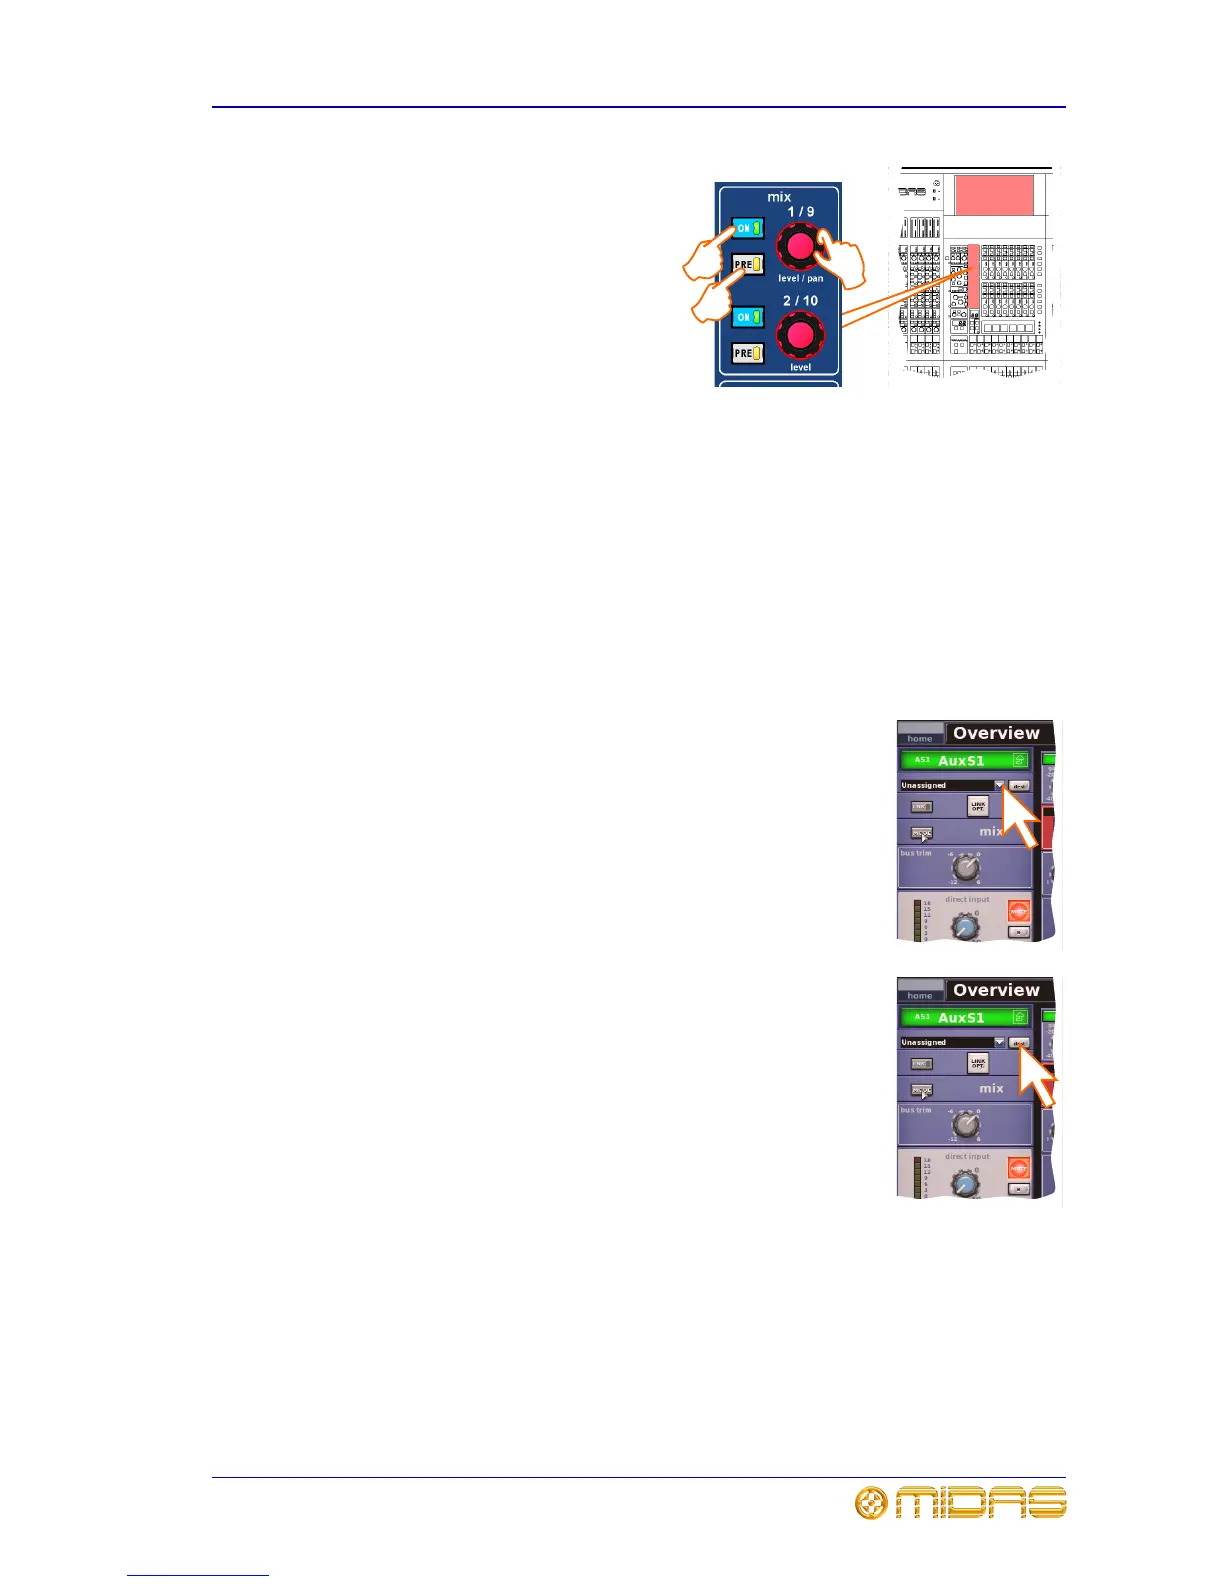
4 In the mix (upper) section, do the
following:
• Press PRE to select pre-fader
(on) or post-fader (off). Button
status is only available on the
GUI (see Figure 10 on page 41).
• Press ON to route the aux mix
from input to aux output.
• Adjust the level control knob to
change the signal level. You
have the option to adjust them
using the pan/fader controls in the input fast zone (12-channel input bay);
this is known as “flip” mode. (You can also adjust them in the GUI channel
strip — overview or processing area — using drag.)
Mix bus routing
You can route an aux or matrix (or even master output) to an effect or output. This is
a GUI-only operation, which is done via the GUI channel strip or Patching screen (see
Chapter 5 “Patching”).
>> To route an aux or matrix to an effect or output
Do one of the following:
• In the processing area of the channel strip, click the required
mix bus destination from the drop-down list. For details of how
to open the processing area, refer to “To select the mix bus
mode” on page 42.
• In the processing area of the channel strip, click dest (shown
right). This will open the Patching screen and the appropriate
tab. For details of how to open the processing area, refer to
“To select the mix bus mode” on page 42.
•Open the Patching screen and route the aux/matrix from
there. For information on patching, see Chapter 6 "Basic
Operation" on page 31.
Linking
You can link two mixes together. Pairs can only be created from adjacent mix buses of
the same colour. To link a pair of mix buses, click the LINK button of the lower (odd)
numbered mix bus (even numbered mix buses do not have a LINK button). The LINK
button can found in the GUI channel strip (refer to “To select the mix bus mode” on
page 42). You can choose linking options for the pair after pressing the adjacent
LINK OPT. button.
 Loading...

