Midea 50Hz AC Fan Coil Unit Two-pipe Wall-mounted Series MCAC-UTSM-201606
- 47 -
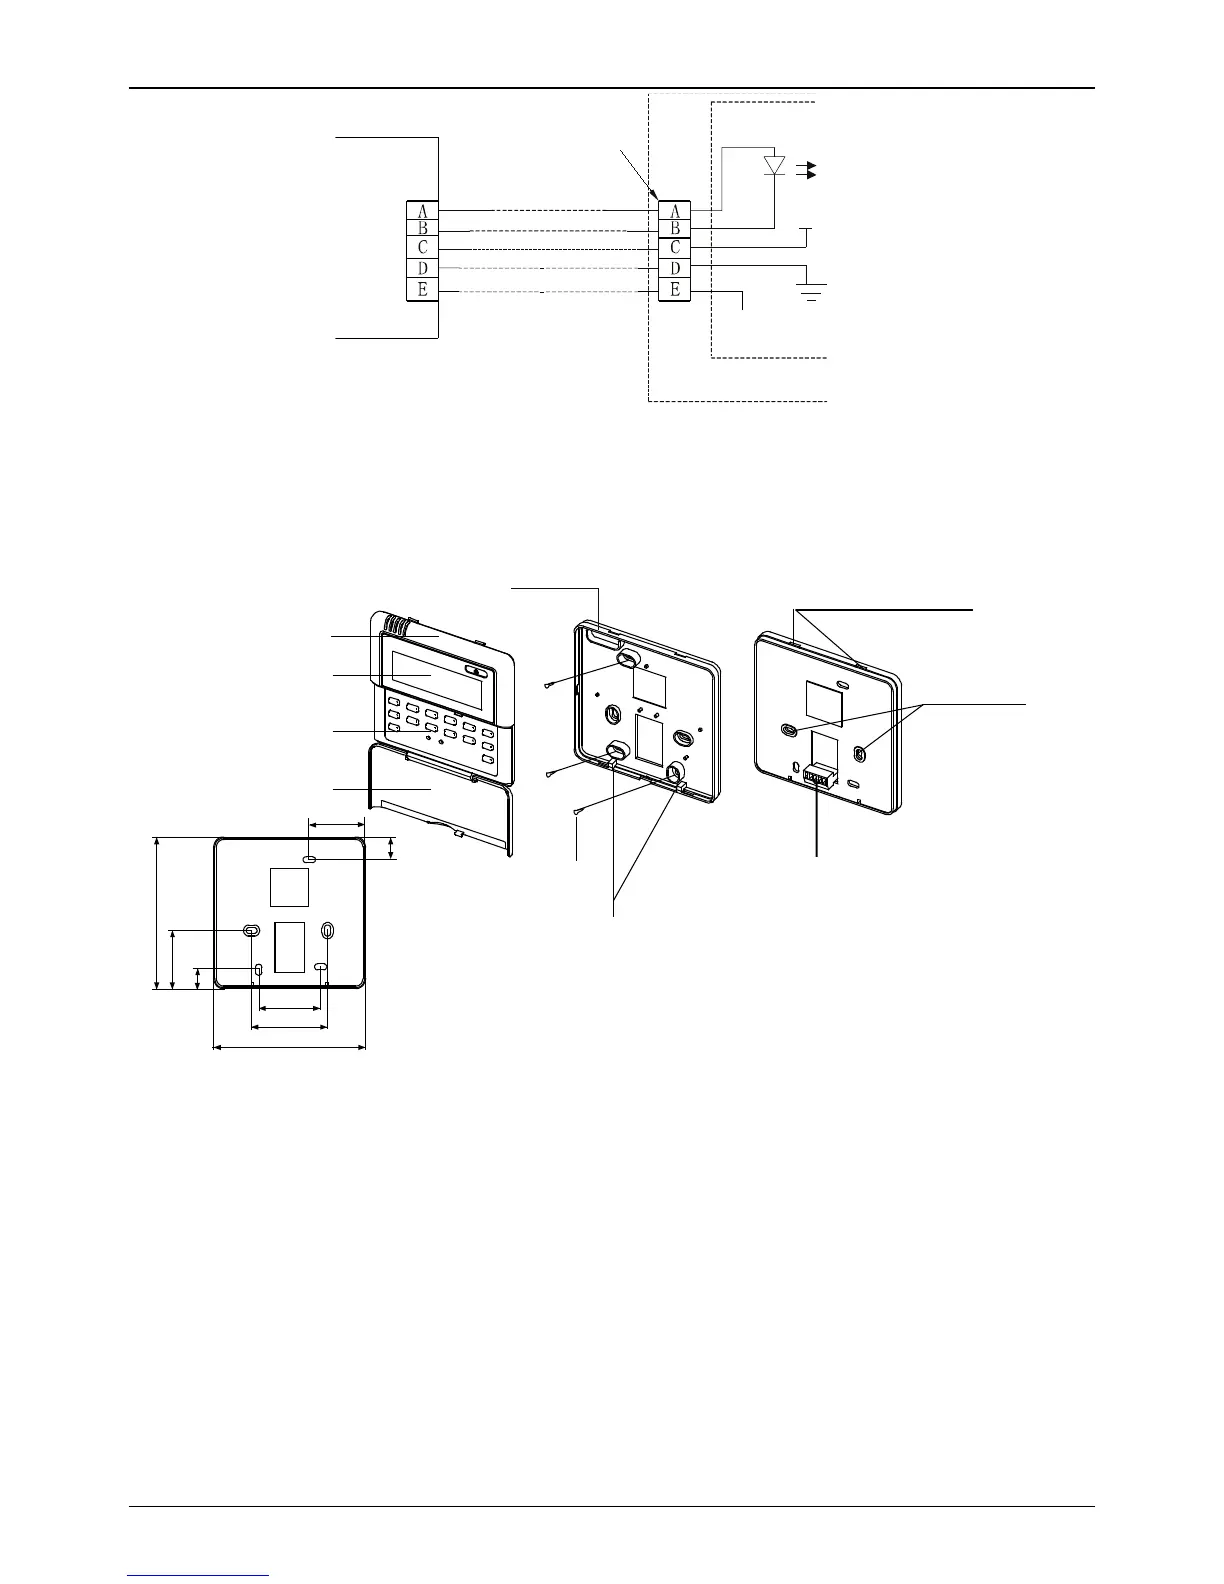
Installation description:
When the air conditioner needs the constant frequency wire Controller, be sure adding a Wire Joint with 5 terminal
named A, B, C, D, E in indoor unit, and fixing an infrared emitter whose anode and cathode connecting with A and B
near the receiver in the Indoor Unit Switch Board, then connecting the terminal +5V, GND, Run in the Switch Board
to C, D, E respectively.
Notes:
Never turn screws too tightly, or else the cover would be dented or the Liquid Crystal breaks.
Please leave enough long cable for maintenance of the Wire Controller Board.
5-Core Shield Cable, the length
is decided by installation
W
i
re
Jo
i
nt
, 5
p
I
n
fr
ae
d
Pi
p
e
Indoor Unit
RUN
GND
+5V
Indoor Unit Switch Board
W
i
re Controller
6
0
46
120
12
0
17
18
4
4
49
Holes m
atc
he w
ith t
he
8
6X
86
W
i
r
i
n
g
b
ox
W
ood
Moun
tin
g
Screw (M4X20)
When installing the Wi
re
Controller Co
ver,be sure
the
re i
s
a hol
e in
the
wall to avoid the
Wir
e
Controller Ba
ck Cover be
ing
fixe
d
directly to the wall which
is
n
ot
allo
wed
for t
he Wire Jo
int
extrudes out of the Wi
re
Controller Back Cover
When installing the Wir
e Contr
olle
r, y
ou should
adju
st t
he b
otto
m of
the W
ire
Cont
rol
ler
Boa
rd to
t
he W
ire C
ontroller Bac
k Cove
r wh
ich
sho
uld b
e
fixed first, then press the other e
nd o
f the
Wire
Controller Board.
Wire
Con
tro
ller
Bott
om C
ove
r
Wir
e
Co
ntro
lle
r
B
o
ard
Wir
e Co
nt
rol
ler
LCD
Wire
Con
tro
ller
To
p C
ov
e
r
W
ir
e
Co
nt
r
oller
Back Cover
T
ur
n a
s
cr
ew
d
ri
ve
r
at
t
he
co
n
ca
ve
o
n b
ot
t
om
pane
l
of the Wire Controller to remove the Bac
k C
ov
e
r