21
Operating
Instructions
This feature can be activated from the remote control
ONLY. To activate SLEEP feature, the set temperature
will increase(cooling) or decrease(heating) by 1°C/2°F
(or 1°F) in 30 minutes. The set temperature will then
increase(cooling) or decrease(heating) by another 1°C
NOTE: This feature is unavailabe under FAN or
DRY mode.
NOTE: This feature is unavailabe under FAN or
DRY mode.
AIR FLOW DIRECTION ADJUSTMENT
Adjust the air flow direction manually:
•
•
•
The louver can be set to the desired position
manually.
Do not place any heavy objects or other loads on
the louver, doing so will cause damage to the unit.
Ensure the louver is fully opened under heating
operation.
Keep the louver fully opened during operation.
WATER DRAINAGE
•
•
•
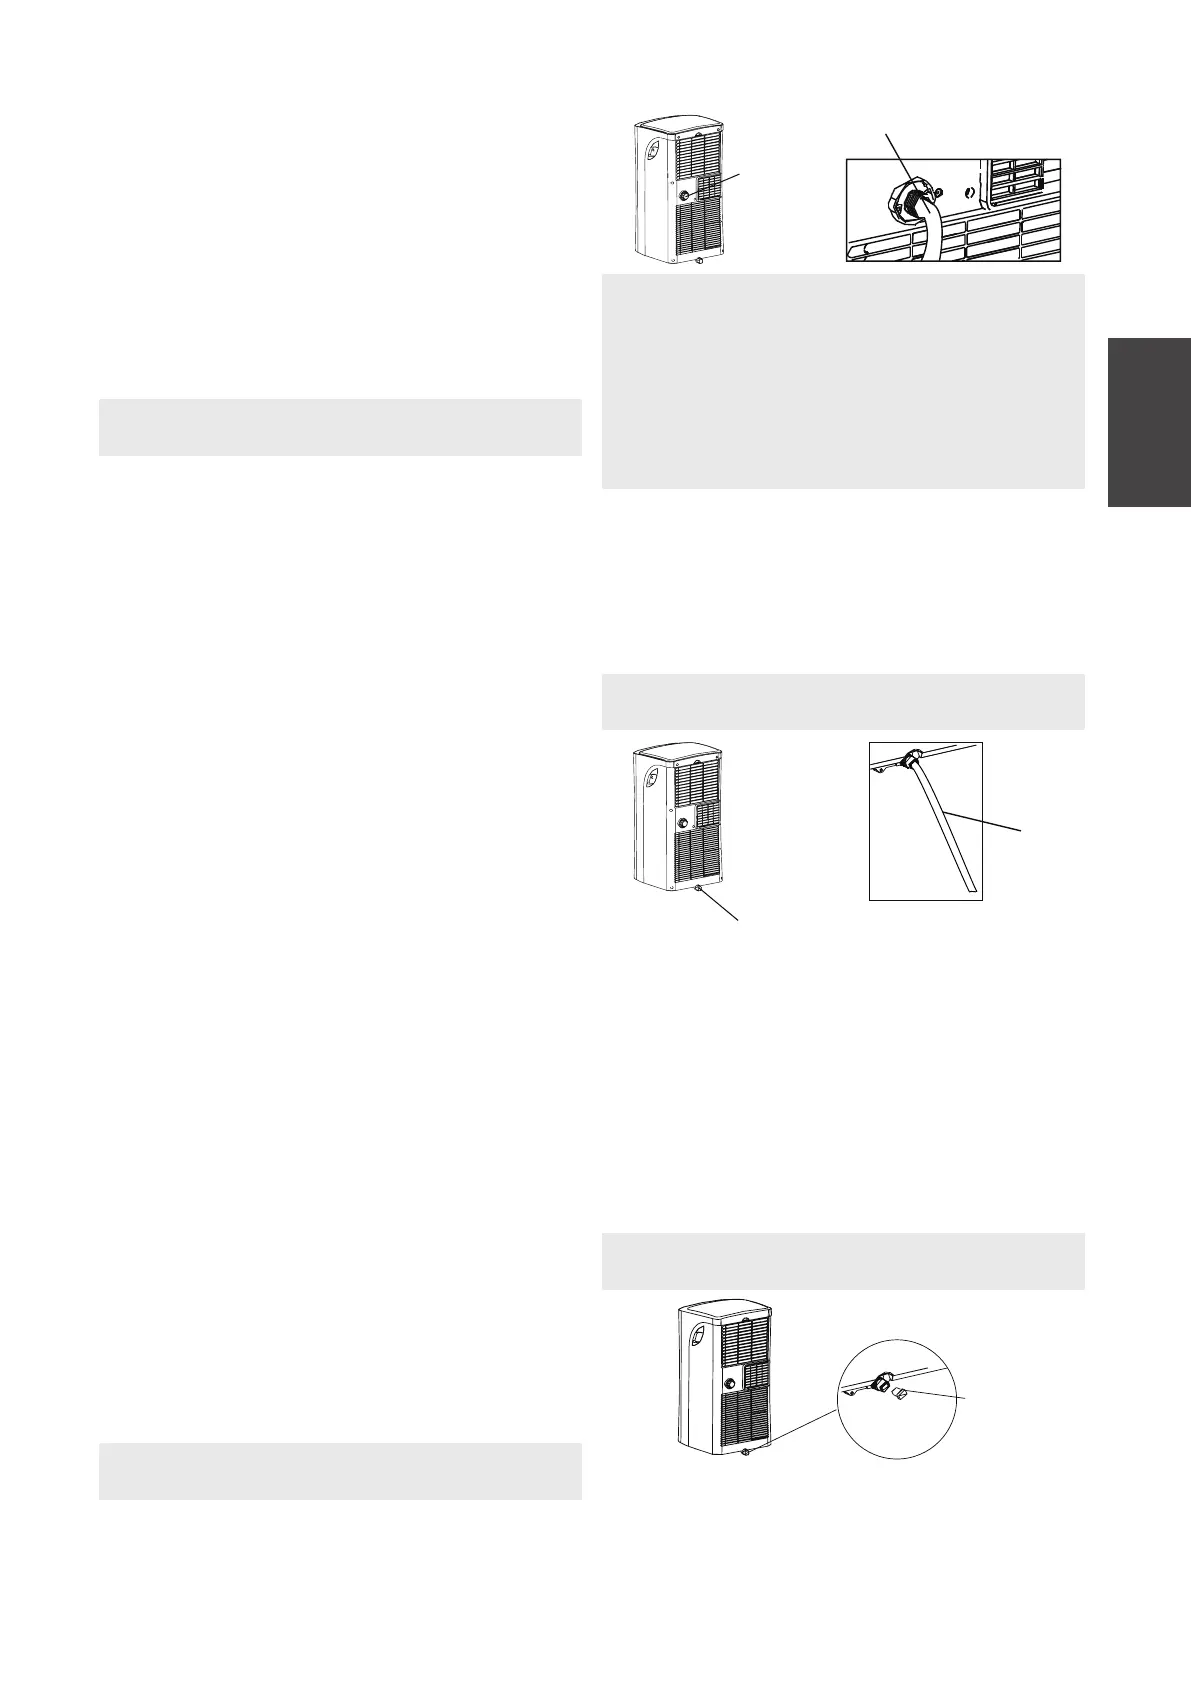
During dehumidifying modes, remove the drain
plug from the back of the unit, install the drain
connector (5/8" universal female mender) with
3/4" hose(locally purchased). For the models
without drain connector, just attach the drain
hose to the hole. Place the open returns to the
originally selected temperature. This ends the
Sleep mode and the unit will continue to operate
as originally programmed.
POWER MANAGEMENT feature(On
some models)
FOLLOW ME/TEMP SENSING feature(on
some models)
If the unit breaks off unexpectedly due to the power
cut, it will restart with the previous function setting
automatically when the power resumes.
AUTO-RESTART
Under cooling operation, when the ambient tempera-
ture is lower than the setting temperature for a period
of time, the unit will be automatically operate power
management feature. The compressor and fan motor
stop. When the ambient temperature is higher than the
setting temperature, the unit will be automatically quit
the power management feature.
The compressor and (or) fan motor run.
/2°F (or 1°F) after an additional 30 minutes. This new
temperature will be maintained for 7 hours before it
thermostat allowing for the precise temperature
control at its location. To activate the Follow Me/Temp
Sensing feature, point the remote control towards the
unit and press the Follow Me/Temp Sensing button.
The remote control will send this signal to the air
conditioner until press the Follow Me/Temp Sensing
button again. If the unit does not receive the Follow
Me/Temp Sensing signal during any 7 minutes interval,
the unit will exit the Follow Me/Temp Sensing mode.
NOTE: Make sure the drain hose is lower than the
bottom tray drain outlet.
NOTE: Make sure the hose is secure so there are
no leaks. Direct the hose toward the drain,
making sure that there are no kinks that will stop
the warter flowing. Place the end of the hose into
the drain andmake sure the end of the hose is
down to let the water flow smoothly. When the
continuous drain hose is not used, ensure that the
drain plug and knob are installed firmly to
prevent leakage.
•
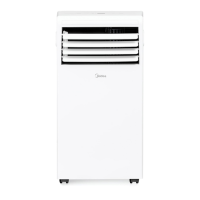
During heating pump mode, remove the lower
drain plug from the back of the unit, install the
drain connector(5/8" universal female mender)
with 3/4" hose(locally purchased). Carefully
move the unit to a drain location, and let the
water drain away.
NOTE: Be sure to reinstall the bottom drain plug
firmly to revent leakage before using the unit.
•
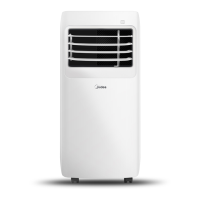
When the water level of the bottom tray reaches
a predetermined level, the unit beeps 8 times, the
digital display area shows "P1" . At this time the
air conditioning/dehumidification process will
immediately stop. However, the fan motor will
continue to operate(this is normal). Carefully
move the unit to a drain location, remove the
bottom drain plug and let the water drain away.
Reinstall the bottom drain plug and restart the
machine until the "P1" symbol disappears. If the
error repeats, call for service.
Remove the
drain plug
Continuous
drain hose
Remove the drain plug
Continuous
drain hose
Bottom drain
plug