CHIMNEY ASSEMBLY
The chimney can only be installed with exhausting hood.
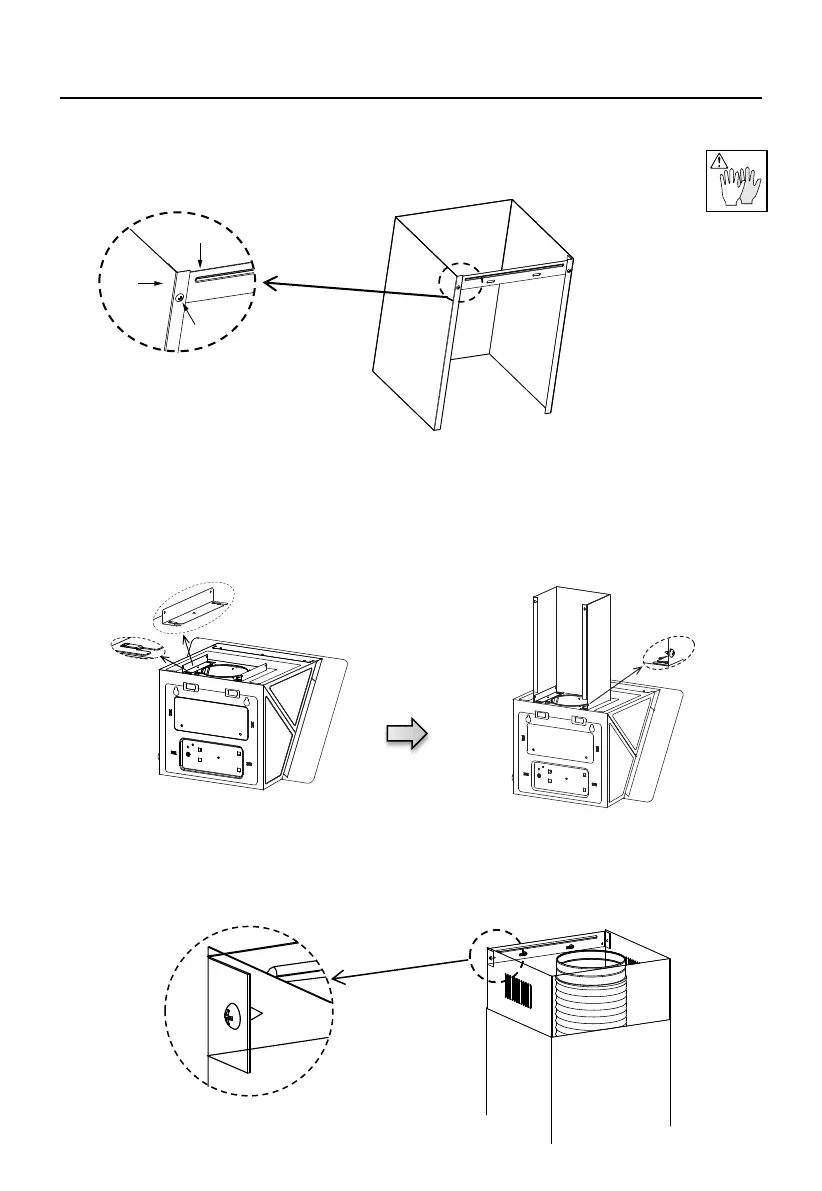
Lower Decorative Chimney
Fix a Chimney fixing bracket 21 onto the Lower Decorative Chimney with 2 screws 12
(4.2 x 9.5) supplied with the hood.
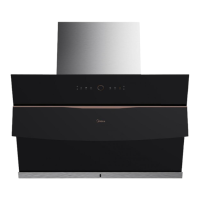
Hook the brackets 13 onto the hood body,and fix them with 2 screws 12 (4.2 x 9.5),making
sure that they are well seated.
Upper Decorative Chimney
Slightly widen the two sides of the upper chimney and hook them between the wall and the
bracket 21 which is fixed on the Lower Decorative Chimney.
Fix the upper chimney onto the bracket 21 with 2 screws 12 (4.2 x 9.5) supplied with the hood.
21
2.1
12
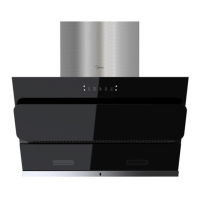
Slightly widen the two sides of the lower chimney and hook then between the brackets
13,fix the lower chimney onto the brackets 13 with 2 screws 12 (4.2 x 9.5) supplied with
the hood.