GR8-1250 WALMART
Midtronics Inc. 7000 Monroe Street Willowbrook, IL 60527
www.midtronics.com
11
Chapter 1: Before You Begin
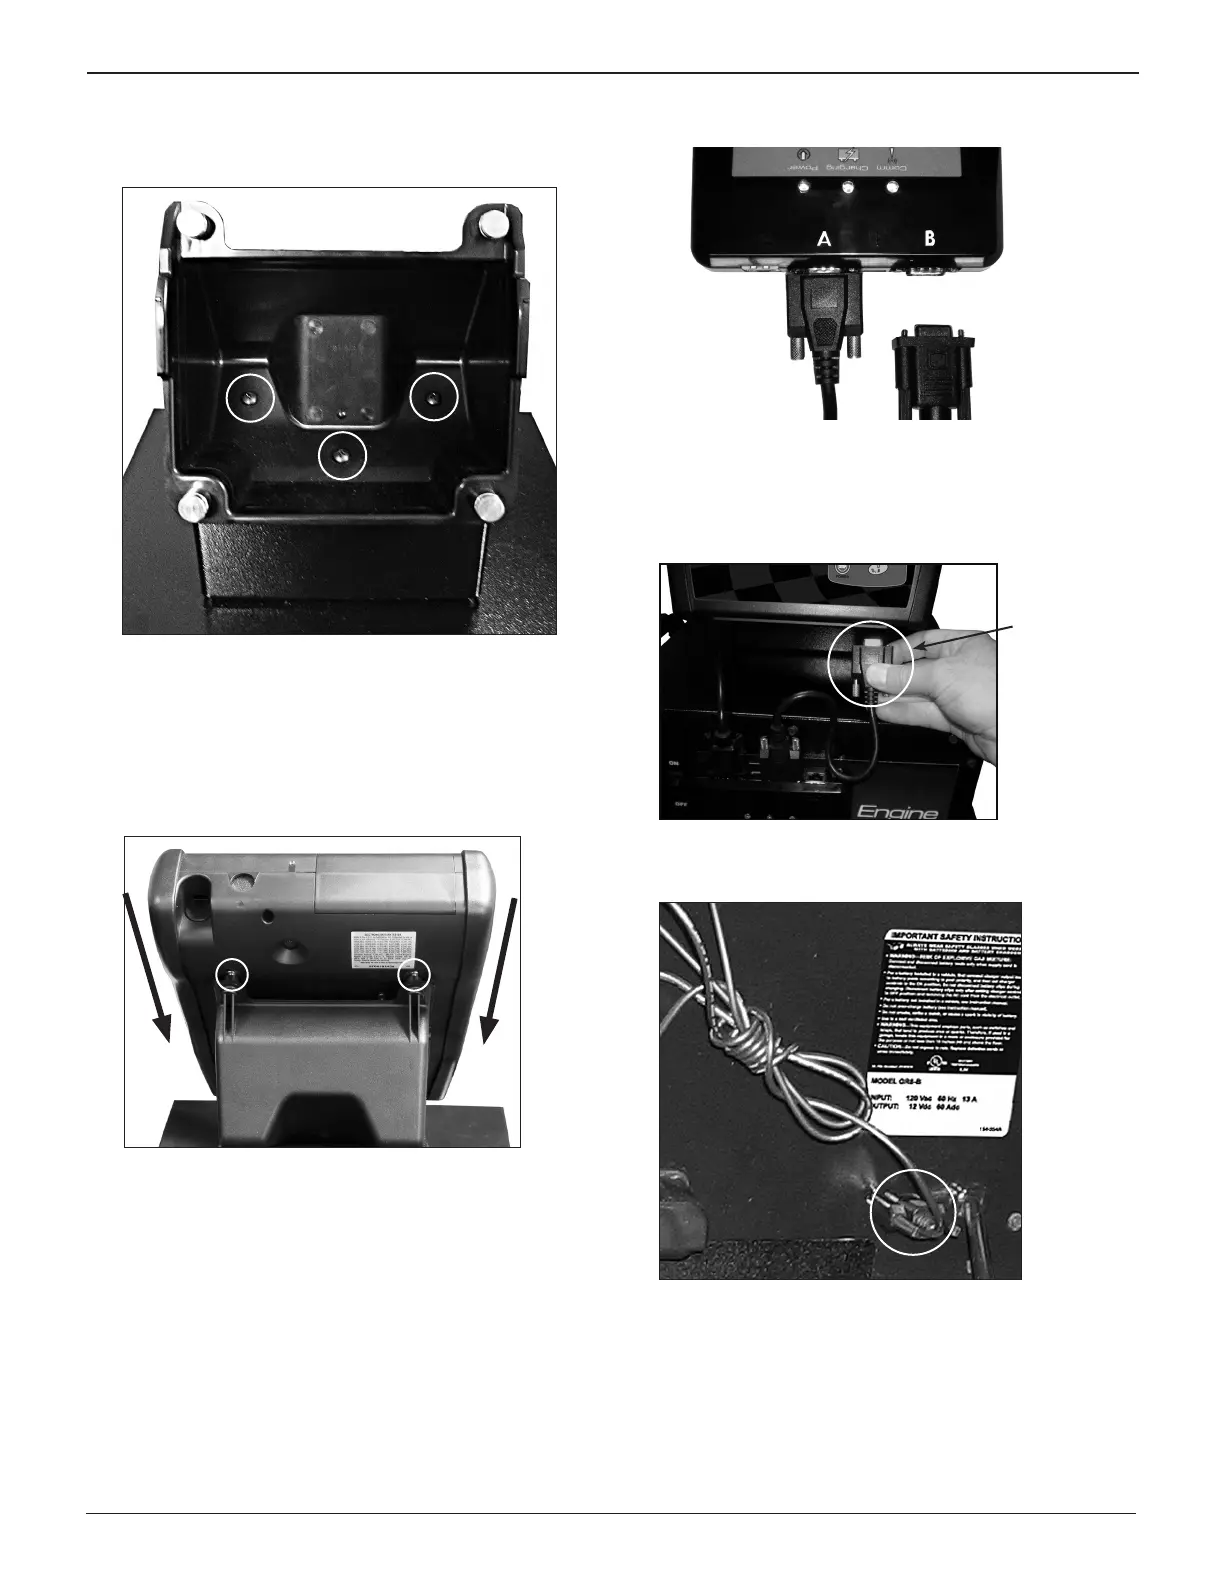
2. Attach the upper mounting bracket to the bottom bracket
with the three Phillips screws circled in the following illus-
tration.
3. The upper part of the bracket has four pre-installed bolts
at each corner for mounting the control module. Center
the holes on the bottom of the control module with the
bolts (circled), and lower the module onto the top of the
bracket. Firmly pull the module down at an angle (arrows)
until the bolts are inserted securely into the slots extend-
ing from the module’s holes.
4. Place the Charge Engine with the attached Control Mod-
ule on the cart.
5. Connect the female end of the long serical cable to port B
on the Multitask Bridge.
Tighten the screws on both connectors.
6.
Attach the Multitask Bridge to the front of the GR Charge En-
gine using the magnet on the back of the Bridge housing.
7. Connect the female end of the short serial cable to the
Control Module and tighten the screws on the connector.
Female
cable
connector
to
controller
8. Conect the male end of the long serial cable to the back of
the GR Charge Engine and tighten the screws.