GR8-1250 WALMART
Midtronics Inc. 7000 Monroe Street Willowbrook, IL 60527
www.midtronics.com
10
Chapter 1: Before You Begin
Convention
Description
The safety symbol indicates instructions for avoiding hazardous conditions and personal injury.
CAUTION
The word CAUTION indicates instructions for avoiding equipment damage.
The wrench symbol indicates procedural notes and helpful information.
UP ARROW
The text for keypad buttons are in Bold capital letters.
CAPITAL LETTERS The text for screen options are in regular capital letters.
BACK ARROW
The text for soft keys are in Bold capital letters.
Conventions Used in This Manual
To help you learn how to use your GR8, the manual uses these symbols and typographical conventions:
Table 2 - Conventions use in manual
Registering Your Battery Diagnostic Station
Before using the Battery Diagnostic Station, we recommend
that you register it online to activate your warranty.
Registration will also make it faster and easier for you to
obtain technical support and service. The serial number label
is on the back of the Control Module. For its locations, see the
illustration on page 14.
To register, log on at www.midtronics.com, click on Support,
then Warranty Registration and have your serial number ready.
If your Battery Diagnostic Station needs repair, call Midtronics
Customer Service 1-800-776-1995. Servicing the charger
yourself may void your warranty. Refer “Patents, Limited
Warranty, Service” on the back cover of this manual.
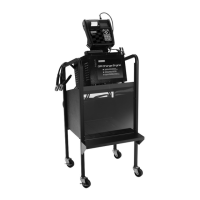
Assembling the Optional Cart
Assemble the cart following the instructions included with
your shipment.
The Battery Diagnostic Station is shipped in one box with
the control module, mounting bracket, and hardware
cables packed in a second box.
Attaching the Control Module & Multitask Bridge
1. Center the three holes in bottom mounting bracket over
the holes on the top of the cart. Insert the three /-inch
hex-head bolts into the holes and tighten the bolts se-
curely.

 Loading...