Technical Information
233
G 1xxx/G 2xxx
Step 5: Remove drip tray and place off to side.
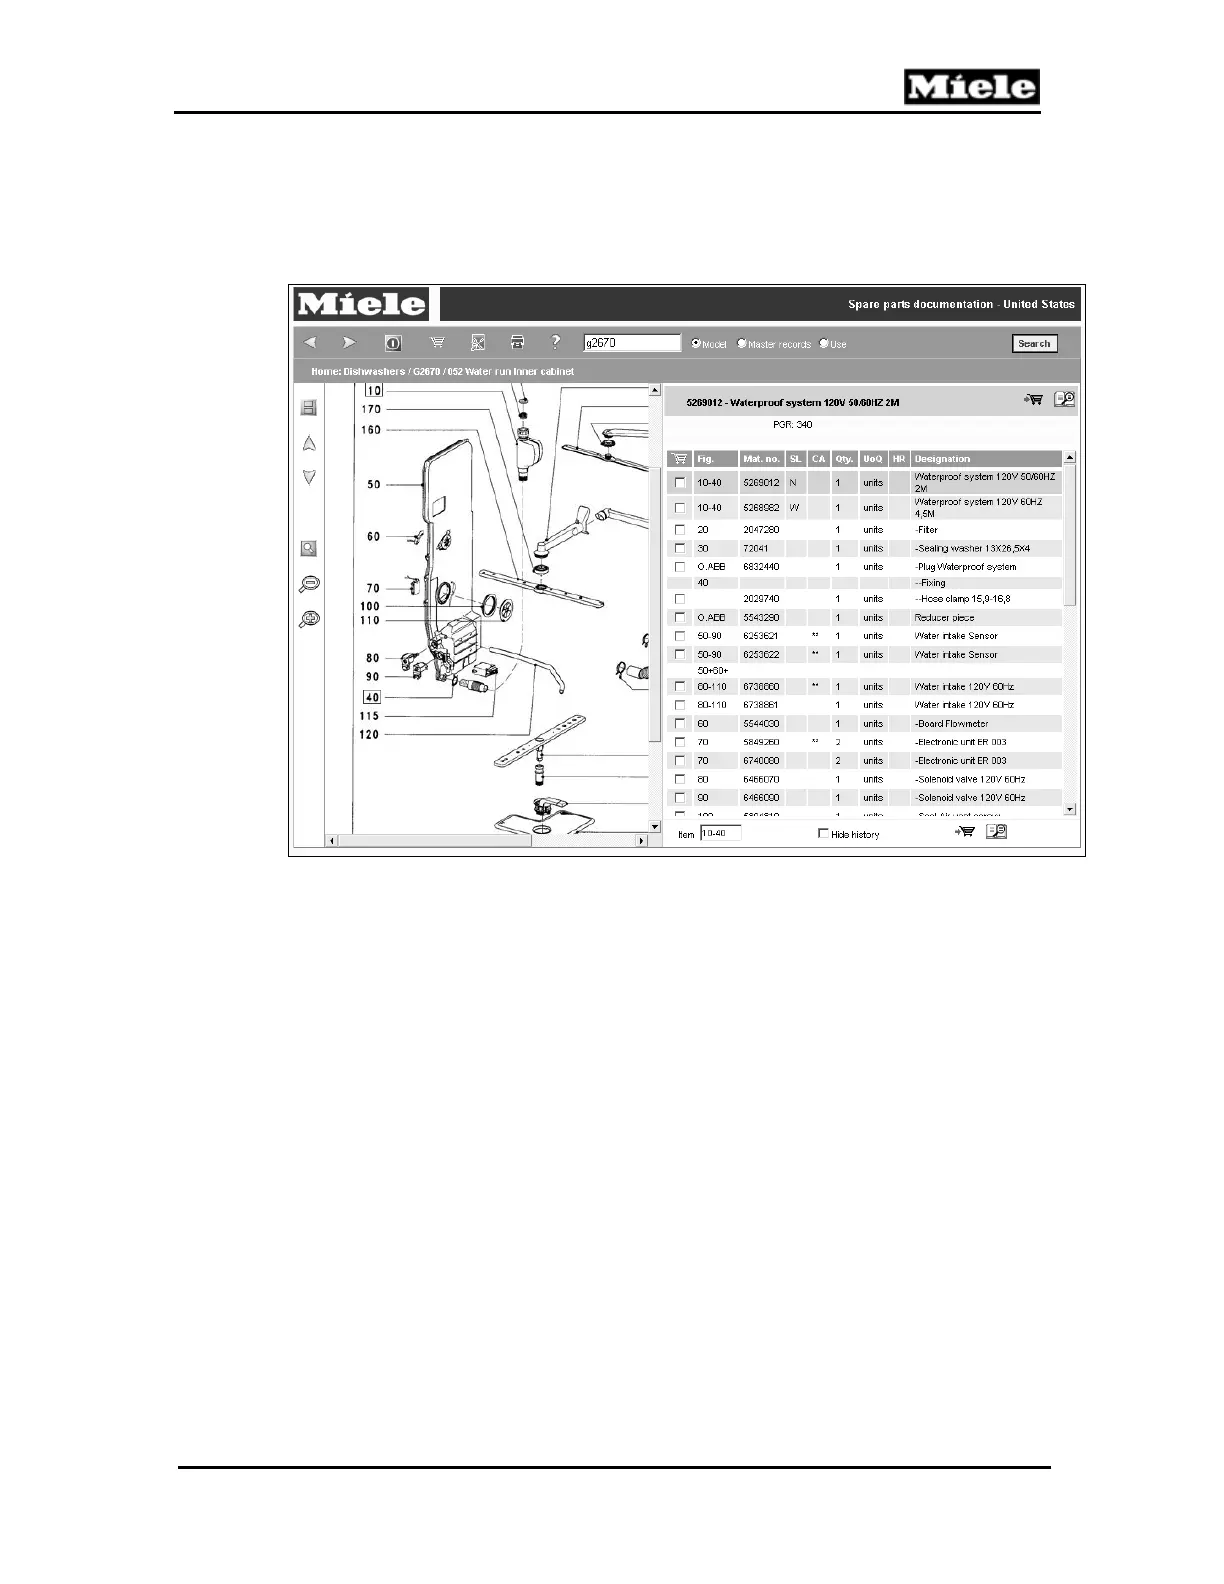
Step 6: Remove hoses from the water intake jacket/water softener resin
tank located on left side of dishwasher having a pan or such
available to catch raining water. Hoses are depicted by #40 and
#120 on exploded view of water intake included below
Step 7: Allow water to drain from blue water intake hose.
Step 8: Reconnect hoses and reinstall drip tray and screws.
Step 9: Return dishwasher to normal upright position and partially install
into cabinetry to prevent tipping during next step.
Step 10: Open dishwasher door and remove bottom basket and open water
softener salt tank reservoir cap and, using a wet/dry vacuum, suck
all water/brine solution out of salt tank.
Note: Some dishwashers have this tank located in the door and would
require opening the salt tank reservoir door to facilitate the
removal of the water/brine solution.
Step 11: Reinstall dishwasher, securing into cabinetry.
Note: When returning to unit in the spring do not open the supply valve
fully to prevent air pressure from popping hoses off the water
intake, instead only open supply valve one to two turns to allow
water to slowly fill the lines and reduce the risk of damaging the
dishwasher.
 Loading...