rev 12-14-15 Mighty Mule FM402 Installation Instructions 13
Step 4
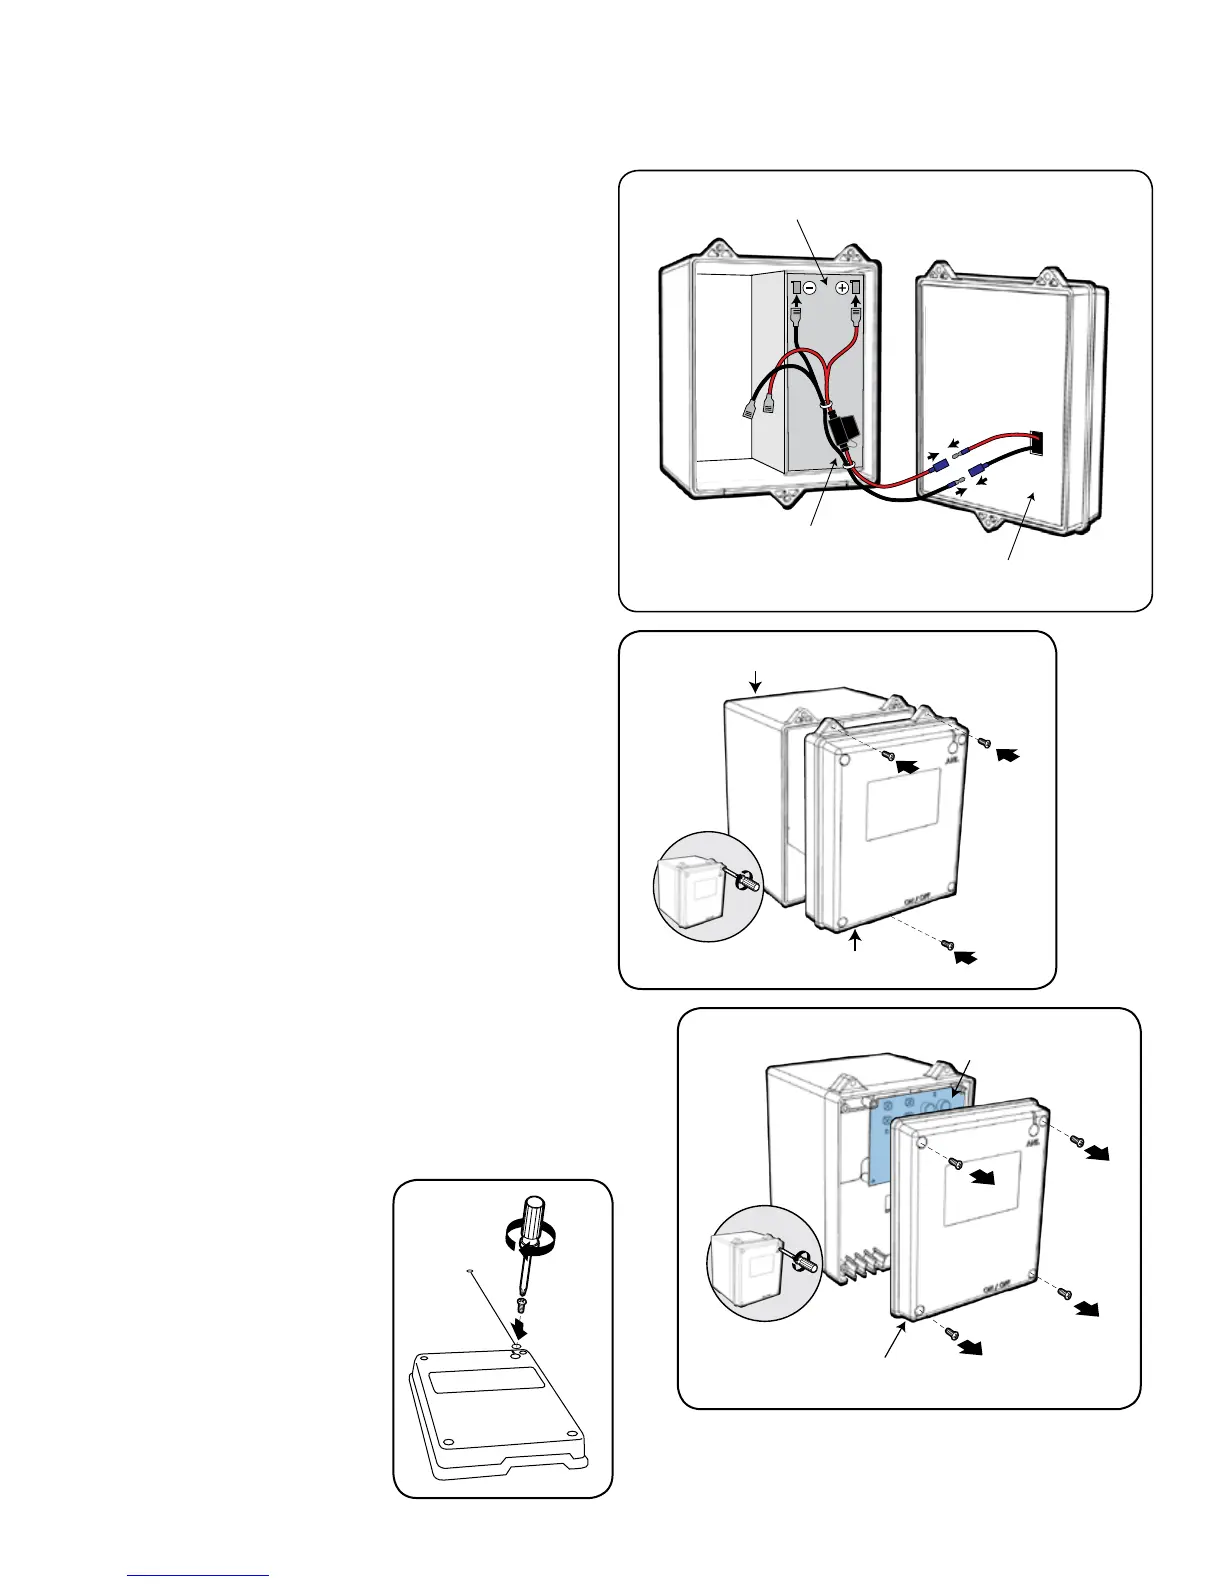
Verify that the ON/OFF switch is in the OFF position.
Connect the BATTERY WIRE HARNESS wires to the
battery --- RED wires to POSITIVE (+) battery terminal
and BLACK wires to NEGATIVE (–) battery terminal.
The BATTERY WIRES from the CONTROL BOARD
should extend through the KNOCK-OUT in the back
of the CONTROL BOX. Plug the BATTERY HARNESS
wires into the wires coming from the CONTROL BOX.
Battery
Back of
Control Box
Battery Wire Harness
with In-Line Fuse
Step 5
Tuck the excess battery leads into the battery box and
reattach the CONTROL BOX to the BATTERY BOX.
Step 6
Remove the four (4) control box cover screws and remove
the cover to access the CONTROL BOARD.
Battery Box
Control Box
Connecting the Battery
Remove the Control Box Cover
Control Box Cover
Control Board
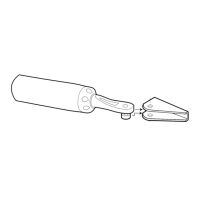
Step 7
Attach antenna to control
box cover. First, remove the
Phillips screw (labeled ANT)
from the control box cover.
Place one end of the antenna
coil over the antenna plug
(antenna wire will fit into
groove). Tighten the Phillips
screw to secure antenna.