13
Intercom Base Unit Installation
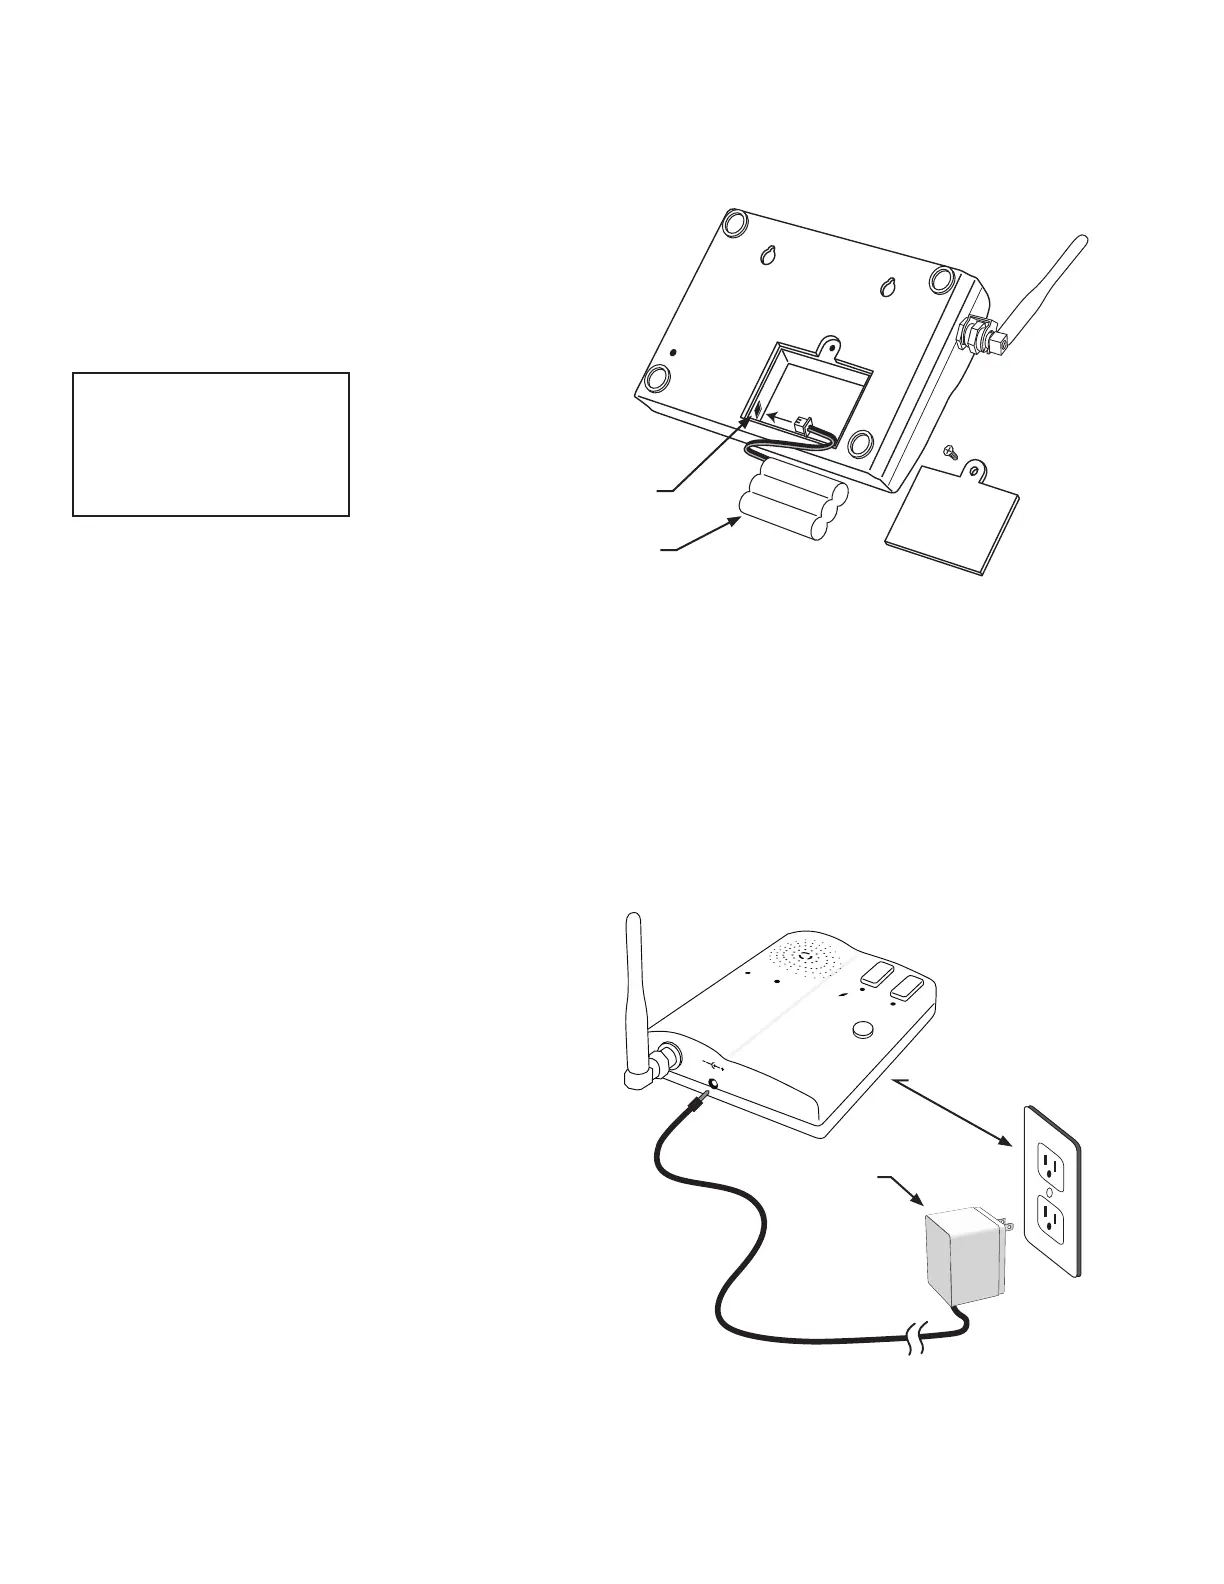
Find a convenient location near an approved outlet to mount
or place the intercom. Plug the transformer into the AC outlet
and connect it to the intercom’s power jack marked DC 9V.
If you are mounting the intercom on the wall, use the
template on the last page of this manual to place screws.
The intercom can be disconnected from the transformer
and used as a battery powered unit. It can be moved to any
convenient location, i.e. bedroom, patio, or garden area.
IMPORTANT: When the Intercom unit is ON it is in the
receive mode. When plugged into the transformer it is
constantly charging the battery. The battery will last
approximately four (4) hours when unplugged from the
transformer. You can turn the unit OFF to conserve battery
power but it will not receive a signal when OFF.
Remove the battery access cover using a small
phillips head screwdriver. Plug the rechargeable
Ni-MH battery into the receptacle inside the battery
compartment. See diagram to the right. When this is
done, replace the battery access cover.
Connecting the Battery
Connecting the Transformer
ID SET
Battery Plug
Battery
POWER
Keypad
Batt Low
Grant Permission
Push To Answer/Talk
End Call
DV 9V
Transformer
Approved 110 Vac outlet
IMPORTANT: Once connected, allow the intercom base
unit’s battery to charge for 12 hours before using the system
for the rst time.
IMPORTANT: Allow the
intercom base unit’s battery
to charge for 12 hours before
using the system for the rst
time. See page 7 for details.