EasyManua.ls Logo

Miller Maxstar 150 STL - User Manual

Miller Maxstar 150 STL
106 pages
Print Icon
To Next Page IconTo Next Page
Loading...
Visit our website at
www.MillerWelds.com
Processes
Description
TIG (GTAW) Welding
Stick (SMAW) Welding
OM-2242 208 580AA
201105
Arc Welding Power Source
Maxstar 150 S, STL, And STH
With Auto-Linet
ESPAÑOL FRANÇAIS ENGLISH
File: TIG (GTAW)
CE And Non-CE Models

Table of Contents

Questions and Answers

  • X
    Xavier LeachAug 15, 2025
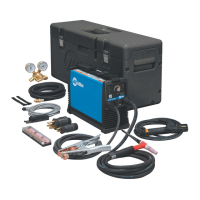
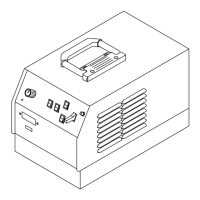
    Why is my Miller Welding System overheating?
    • T
      Troy StoutAug 16, 2025
      If the high temperature light is on, it indicates the unit has overheated, causing a thermal shutdown. Allow the unit to cool with the fan on. You may also need to reduce the duty cycle or amperage. Check for and correct any blocked or poor airflow to the unit.
  • A
    Arthur KingAug 19, 2025
    What to do if my Miller Maxstar 150 STL Welding System has stick welding problems like hard starts or unusual spattering?
    • J
      Joshua RiveraAug 19, 2025
      Ensure you are using the proper type and size of electrode. Check and reverse the electrode polarity, and correct any poor connections. Also, make sure a remote control is not connected.
  • N
    Natalie MartinAug 21, 2025
    What to do if my Miller Maxstar 150 STL has erratic welding arc or output?
    • F
      fordrachelAug 22, 2025
      Use the proper size and type of weld cable. Clean and tighten all weld connections. Check and reverse the polarity, and make sure the connections to the workpiece are correct and secure.
  • E
    Erica JohnsonAug 25, 2025
    How to troubleshoot TIG welding problems with my Miller Welding System?
    • C
      Carol CarterAug 26, 2025
      To address wandering arc, hard starts, poor welding characteristics, or spattering, use the proper type and size of tungsten and ensure it is properly prepared. Check and reverse the electrode polarity. Shield the weld zone from drafts, verify the correct type of shielding gas, and check and tighten all gas fittings.
  • P
    prestonscottAug 27, 2025
    What to do if Miller Maxstar 150 STL Welding System high temperature light is flashing?
    • P
      Patricia DavisAug 27, 2025
      Turn the power off and back on again.
  • S
    sharpdanielleAug 30, 2025
    What to do if Miller Welding System has no weld output and the ready light is on?
    • Z
      ztorresAug 30, 2025
      First, check and secure any loose weld cables into the receptacles. Also, check and correct any poor connection of the work clamp to the workpiece.
  • A
    Angela AlexanderSep 3, 2025
    What to do if my Miller Maxstar 150 STL Welding System fan is not operating?
    • C
      Calvin GarciaSep 3, 2025
      The unit may not be warmed up enough to require fan cooling. Check for and remove anything blocking the fan movement.
  • T
    thompsonalyssaSep 6, 2025
    What does it mean if blue light flashes continuously and yellow LED is off on Miller Welding System?
    • D
      Donna RodriguezSep 6, 2025
      This indicates that the line voltage is too high or too low. The line voltage must be within ±10%. The unit may also need to be reset. Cycle the power off and back on.
  • T
    thomascrystalSep 8, 2025
    What to do if Miller Maxstar 150 STL has no weld output, unit is inoperative, and ready light is off?
    • G
      grodriguezSep 8, 2025
      Ensure the line disconnect switch is in the On position. Check and replace the line fuse(s) if necessary, or reset the circuit breaker. Also, ensure the power cord is plugged in and the receptacle is receiving input power.
  • J
    Joseph LeeSep 12, 2025
    What does it mean if blue LED flashes 3 times repeatedly and yellow LED is off on Miller Maxstar 150 STL Welding System?
    • K
      Kimberly GregorySep 12, 2025
      This indicates that the remote trigger is left on. Turn off the remote trigger, wait 5 seconds, and restart operation.

Summary

SECTION 1 - SAFETY PRECAUTIONS - READ BEFORE USING

1-2. Arc Welding Hazards

Details hazards associated with arc welding processes like electric shock and fumes.

SECTION 2 - DEFINITIONS

SECTION 3 - SPECIFICATIONS AND INSTALLATION

3-3. Specifications

Lists technical specifications including input power, output, amperage, and dimensions.

3-4. Duty Cycle And Overheating

Explains duty cycle limits and precautions to prevent overheating and damage.

3-7. Electrical Service Guide For 230 VAC

Provides guidelines for electrical service, fuses, and conductors for 230 VAC input.

3-9. Selecting A Location, And Connecting Input Power

Covers requirements for unit placement and connecting input power safely.

3-10. Connecting 1-Phase Input Power For 230 VAC

Provides step-by-step instructions for connecting 230 VAC single-phase input power.

SECTION 4 - OPERATION

4-1. Front Panel Controls And Gas Connection

Explains the function of front panel controls, indicators, and gas connection fittings.

4-5. Set-Up Procedure For The TIG Process And Restoring Factory Default Settings (STH Model Only)

Guides on setting up TIG process features and restoring factory defaults on STH models.

SECTION 5 - MAINTENANCE AND TROUBLESHOOTING

5-3. Troubleshooting

Provides a guide to diagnose and resolve common operational issues and malfunctions.

SECTION 6 - ELECTRICAL DIAGRAM

WARRANTY

For Service Information

Miller Maxstar 150 STL Specifications

General IconGeneral
Amperage Range5 - 150 A
Input Voltage120/240 V
Input Hz50/60 Hz
Frequency50/60 Hz
Input Power120/240 V
ProcessesTIG, Stick

Related product manuals