
E
Ethan LangAug 4, 2025
What to do if the coolant level is low in my Miller Maxstar 280?
- SstephenvelasquezAug 5, 2025
If the coolant level is low, check it and top it off with distilled or deionized water.
What to do if the coolant level is low in my Miller Maxstar 280?
If the coolant level is low, check it and top it off with distilled or deionized water.
How to clean heat exchanger fins on a Miller Maxstar 280?
Blow out the heat exchanger fins.
Identifies products and lists conformity directives/standards.
Lists product info, regulations, standards, and compliance status.
Details exposure indices and distances for non-thermal effects.
Explains symbols used for hazard identification.
Details general hazards associated with arc welding.
Explains symbols related to installation and operation.
Provides warnings about chemicals in the product.
Lists key safety standards and references for welding.
Discusses electromagnetic fields and potential health effects.
Explains additional safety symbols and their meanings.
Defines various symbols used in the manual.
Describes the location of serial and rating information.
Provides detailed technical specifications for Dynasty models.
Provides detailed technical specifications for Maxstar models.
Explains the output characteristics of the welding power source.
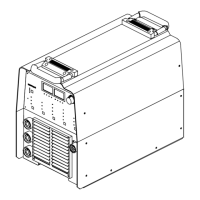
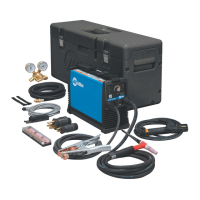
Details physical dimensions, weight, and mounting.
Covers IP rating, EMC, and temperature specs.
Explains duty cycle and overheating protection.
Information on hazardous substances in Chinese regulations.
Guidelines for choosing a suitable installation location.
Guide for choosing appropriate weld cable sizes based on current and distance.
Identifies weld output connection terminals on front panels.
Details various connection points on the front and rear panels.
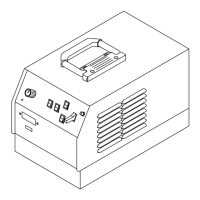
Explains how to connect the optional cooler unit.
Service requirements for three-phase power input.
Service requirements for three-phase power input.
Instructions for connecting three-phase power supply.
Instructions for connecting single-phase power supply.
Details the function of each socket on the Remote 14 receptacle.
Illustrates a basic automation circuit connection.
Information on downloading and installing software updates.
Identifies and describes front panel controls for Dynasty 280.
Guide for navigating AC TIG settings via the control panel.
Guide for navigating DC TIG settings via the control panel.
Guide for AC/DC Stick settings via the control panel.
Steps to access and adjust user setup parameters for AC/DC TIG.
Steps to access and adjust user setup parameters for AC/DC Stick.
Identifies and describes front panel controls for Dynasty 280 DX.
Guide for navigating control panel settings for various processes.
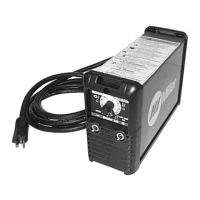
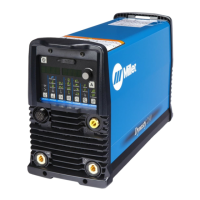
Identifies and describes front panel controls for Maxstar 280.
Guide for DC TIG HF/Lift Arc settings via control panel.
Guide for DC Stick settings via control panel.
Steps to access and adjust user setup for DC TIG HF/Lift-Arc.
Steps to access and adjust user setup for DC Stick.
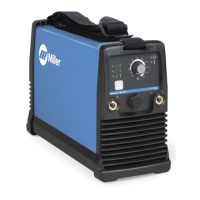
Identifies and describes front panel controls for Maxstar 280 DX.
Guide for navigating control panel settings.
Guide for accessing and adjusting user setup parameters.
Steps to access the technical menu for advanced settings.
Steps to access the technical menu for advanced settings.
Explains the sequencer and weld timer functions for DX models.
Details various output control and trigger functions for DX models.
Explains how to use lockout features to limit parameter adjustments.
Scheduled maintenance tasks for the power source and cooler.
Explains various messages displayed on the unit's meters.
Lists common problems and their solutions.
Identifies welding processes that use high frequency.
Provides guidance for proper installation to minimize HF interference.
Guide to choosing the correct tungsten electrode based on diameter and type.
Instructions for properly grinding tungsten electrodes for optimal welding.
Explains how to start the arc using Lift-Arc and HF methods.
Details how to use the pulser function for heat control and bead quality.
Settings for programmable TIG start parameters for DX models.
Chart for selecting stick electrodes and recommended amperage ranges.
Outlines Miller's limited warranty terms and conditions.
Lists conditions under which the warranty does not apply.
Provides contact information for service and distributors.
| Output Amperage Range | 5-280 A |
|---|---|
| Efficiency | 85% |
| Input Voltage | 208 V / 240 V / 460 V / 575 V |
| Rated Output | 280 A at 32 V |
| Duty Cycle | 60 % |
| Process | TIG (GTAW), Stick (SMAW) |
| Input Phase | Single Phase |