OM-283935 Page 65
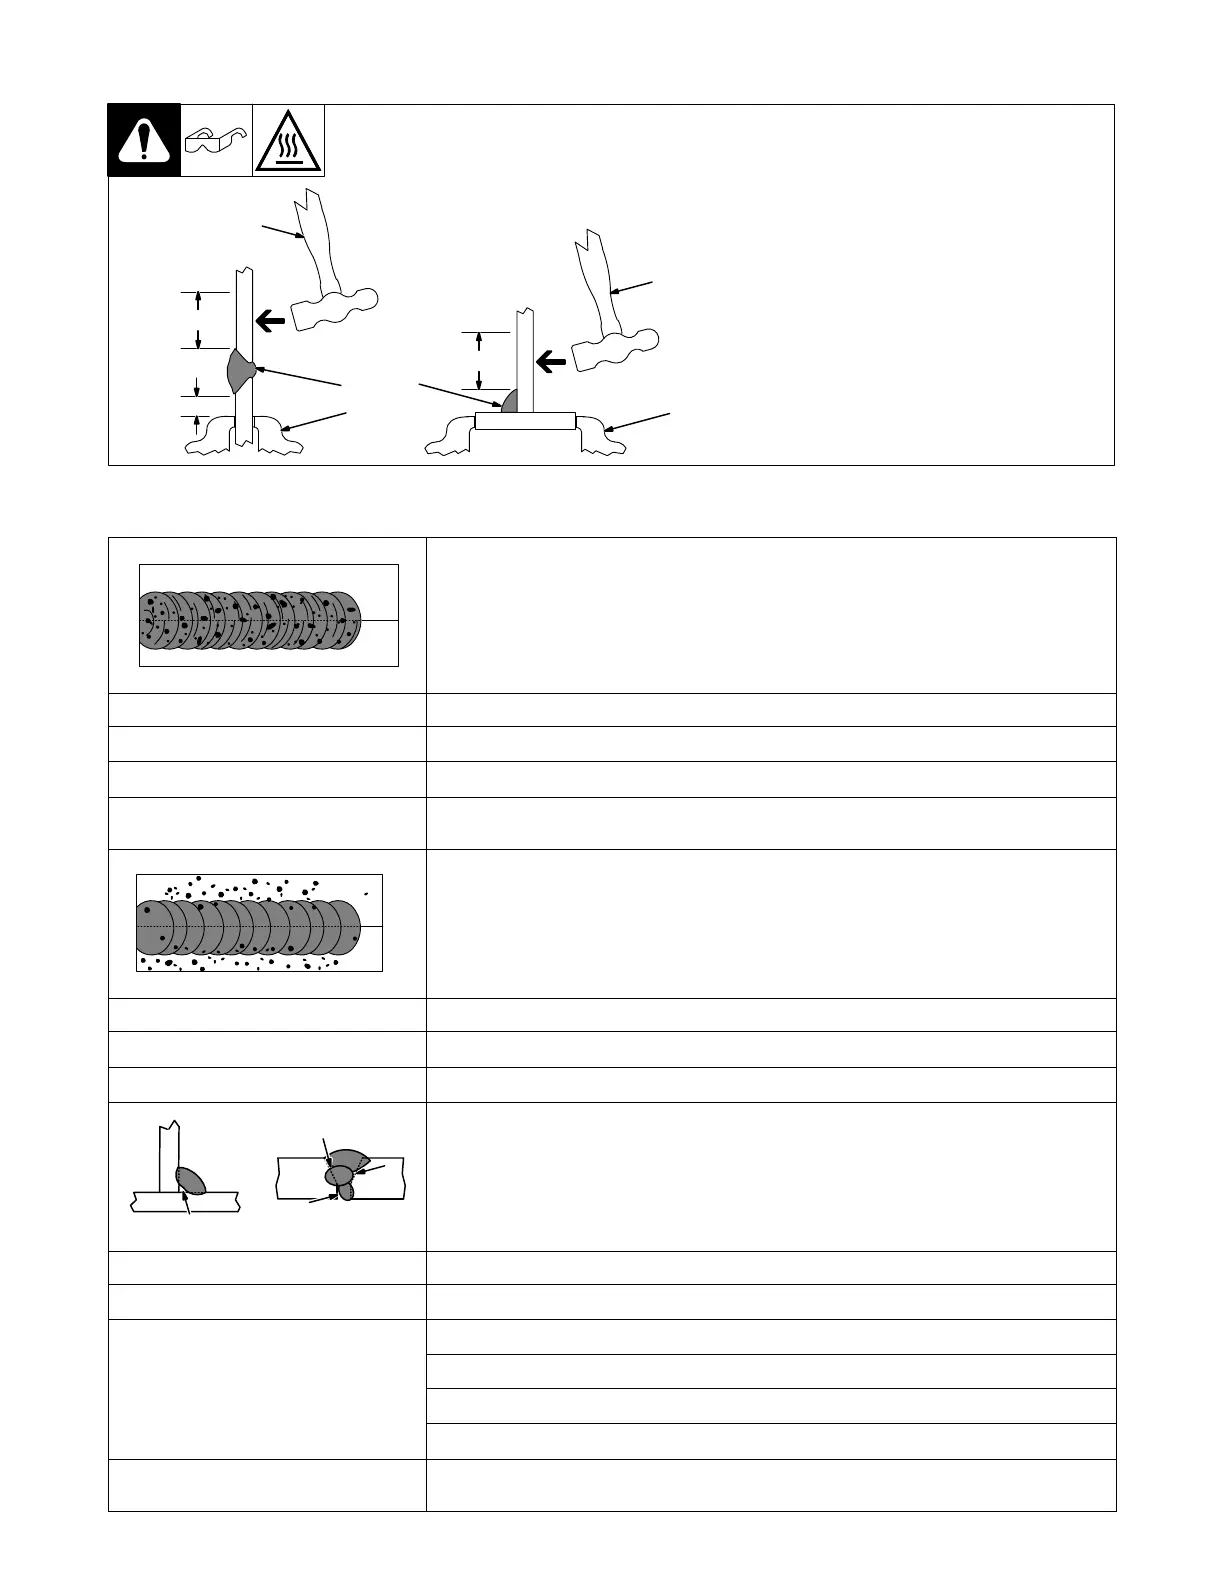
11-12. Weld Test
S-0057-B
1 Vise
2 Weld Joint
3 Hammer
Strike the weld joint in the direction shown. A good weld
bends over but does not break.
If the weld breaks, examine it to determine the cause.
If the weld is porous (many holes), the arc length was
probably too long.
If the weld contains bits of slag, the arc may have been
too long or the electrode was moved incorrectly which
allowed molten slag to be trapped in the weld. This may
happen on a V-groove joint made in several layers and
calls for additional cleaning between layers.
If the original beveled surface is visible the material was
not fully melted which is often caused by insufficient
heat or too fast a travel speed.
2 To 3 in.
1/4 in.
3
2
1
2 To 3 in.
3
2
1
(51-76 mm)
(6.4 mm)
(51-76 mm)
11-13. Troubleshooting
Porosity − small cavities or holes resulting from gas pockets in weld metal.
Possible Causes Corrective Actions
Arc length too long. Reduce arc length.
Damp electrode. Use dry electrode.
Workpiece dirty. Remove all grease, oil, moisture, rust, paint, coatings, slag, and dirt from work surface before
welding.
Excessive Spatter − scattering of molten metal particles that cool to solid form near weld bead.
Possible Causes Corrective Actions
Amperage too high for electrode. Decrease amperage or select larger electrode.
Arc length too long or voltage too high. Reduce arc length or voltage.
Incomplete Fusion − failure of weld metal to fuse completely with base metal or a preceeding
weld bead.
Possible Causes Corrective Actions
Insufficient heat input. Increase amperage. Select larger electrode and increase amperage.
Improper welding technique.
Place stringer bead in proper location(s) at joint during welding.
Adjust work angle or widen groove to access bottom during welding.
Momentarily hold arc on groove side walls when using weaving technique.
Keep arc on leading edge of weld puddle.
Workpiece dirty. Remove all grease, oil, moisture, rust, paint, coatings, slag, and dirt from work surface before
welding.
 Loading...