EasyManua.ls Logo

Miller Millermatic 211 - User Manual

Miller Millermatic 211
52 pages
Print Icon
To Next Page IconTo Next Page
Loading...
Millermatic 211
Processes
OM265809B 201601
Arc Welding Power Source And
Wire Feeder
Description
MIG (GMAW) Welding
Flux Cored (FCAW) Welding
File: MIG (GMAW)
Visit our website at
www.MillerWelds.com
R

Table of Contents

Questions and Answers

  • C
    cynthia22Aug 16, 2025
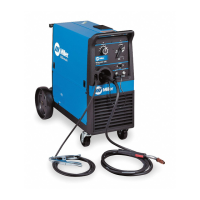
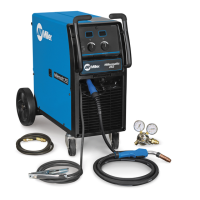
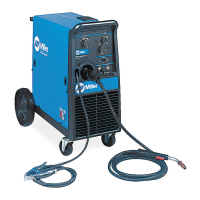
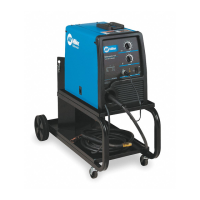
    How to fix low weld output on my Miller Millermatic 211?
    • S
      Stephen HensonAug 16, 2025
      To address a low weld output on your Miller Welding System: * Connect the unit to the correct input voltage or check for low line voltage. * Ensure the Power switch is in the On position.
  • S
    Sheena PetersonAug 22, 2025
    What to do if my Miller Millermatic 211 has no weld output, wire doesn't feed, but the fan motor runs?
    • S
      Stacey DavisAug 22, 2025
      If your Miller Welding System has no weld output, the wire isn't feeding, and the fan motor continues to run, consider these steps: * If the thermostat TP1 is open due to overheating, allow the fan to run with the gun trigger switch off. The thermostat will close once the unit cools down. * Ensure the gun trigger plug is securely connected. * Release the gun trigger and cycle the unit power off and then back on.
  • J
    Jessica MartinAug 25, 2025
    What to do if my Miller Millermatic 211 Welding System has no weld output, but the wire feeds?
    • M
      Ms. Nicole MoyerAug 26, 2025
      If your Miller Welding System has no weld output, the wire feeds, you can try the following: * Connect the work clamp to ensure good metal-to-metal contact. * Check for any loose connections. * Replace the gun contact tip. * Verify that the polarity connections are correct. * Check and tighten the thumbscrew securing the gun end to the feed head adapter.
  • E
    Edward SpearsAug 27, 2025
    Why is the Over Temperature light on steady on my Miller Welding System?
    • N
      nancyhendersonAug 27, 2025
      If the Over Temperature light on your Miller Welding System is on steady, it indicates that thermostat TP1 is open due to overheating. To resolve this, allow the fan to run with the gun trigger off. The thermostat will close once the unit has cooled.
  • C
    Christopher WilliamsAug 31, 2025
    What does it mean if the Over Temperature light is blinking one time on my Miller Millermatic 211 Welding System?
    • E
      Elizabeth HuangAug 31, 2025
      If the Over Temperature light on your Miller Welding System is blinking one time, it indicates a trigger error. Release the trigger and check the MIG gun for a shorted trigger connection. Contact your nearest Factory Authorized Service Agent.
  • E
    Erica MoodySep 3, 2025
    What does it mean if the Over Temperature light is blinking three times on my Miller Millermatic 211 Welding System?
    • P
      Pamela RussellSep 3, 2025
      If the Over Temperature light on your Miller Welding System is blinking three times, it indicates a motor error. Check for birds nesting at the wire spool and drive assembly. Verify proper drive roll alignment and tension, and ensure that the wire drive pressure assembly is closed. Contact your nearest Factory Authorized Service Agent.
  • P
    pjohnstonSep 6, 2025
    What does it mean if the Over Temperature light is blinking two times on my Miller Millermatic 211?
    • V
      Victor McclainSep 6, 2025
      If the Over Temperature light on your Miller Welding System is blinking two times, it means the unit has detected a shorted output, indicating the welding gun has shorted to the workpiece and turned off the output. Release the trigger and ensure the gun isn't touching the workpiece. Contact your nearest Factory Authorized Service Agent.
  • J
    Joanna SandersSep 8, 2025
    How to troubleshoot a Miller Welding System with no weld output, wire feed, fan, or power light?
    • T
      tmyersSep 9, 2025
      To address a Miller Welding System with no weld output, no wire feed, a non-running fan, and no power light, take these steps: * Ensure the power cord is securely plugged into the receptacle. * Replace the building line fuse or reset the circuit breaker if it's open. * Make sure the Power switch is in the On position. * Reset the welding power source supplementary protector if it's open.
  • J
    John MillerSep 12, 2025
    What does it mean if the Over Temperature light is blinking six times on my Miller Millermatic 211?
    • M
      Mr. Ricky Underwood DVMSep 12, 2025
      If the Over Temperature light on your Miller Welding System is blinking six times, it indicates a thermistor error. Contact your nearest Factory Authorized Service Agent.
  • E
    Eric AndersonNov 18, 2025
    What to do if electrode wire feeding stops during welding with my Miller Millermatic 211 Welding System?
    • K
      Karen CooleyNov 18, 2025
      If the electrode wire feed stops during welding with your Miller Welding System, there are several possible solutions: * Ensure the gun cable is straight and replace any damaged parts. * Adjust the drive roll pressure. * Change to the correct drive roll groove. * Readjust the hub tension. * Make sure the wire is properly positioned in the drive roll groove. * Replace a blocked contact tip. For some wires, an oversized tip may be needed. * Clean or replace a dirty or plugged wire inlet guide or liner. * Replace worn or slipping drive rolls or pressure bearings. * Secure the gun trigger plug. * Check and clear any restrictions at the drive assembly and liner. * Release the gun trigger and allow the gun and motor protection circuitry to reset. * Have a Factory Authori...

Summary

Safety Precautions

Arc Welding Hazards

Details risks associated with arc welding processes like shock and burns.

Installation, Operation, Maintenance Hazards

Covers hazards related to installation, operation, and maintenance, including fire, falling equipment, and static.

EMF Information

Provides information on Electromagnetic Fields and their effects on medical implants.

Specifications

Duty Cycle And Overheating

Explains duty cycle percentages and overheating protection mechanisms.

Installation

Electrical Service Guide

Provides recommendations for electrical service, including voltage and amperage requirements.

Spool Gun Calibration Procedure

Explains the steps for calibrating the spool gun for optimal performance.

Operation

Using Auto-Set

Explains how to use the Auto-Set feature for simplified welding parameter selection.

Weld Parameter Chart

Provides a comprehensive chart of recommended weld parameters for different materials and sizes.

Weld Parameters

Lists detailed weld parameters for various materials, wire types, and shielding gases.

Maintenance & Troubleshooting

Drive Motor & Tip Saver Protection

Describes protection circuits for the drive motor and tip saver function.

Troubleshooting Table

A comprehensive table listing common problems and their solutions.

Electrical Diagram

GMAW Welding (MIG) Guidelines

Troubleshooting - Excessive Spatter

Addresses troubleshooting for excessive spatter, listing causes and corrective actions.

Troubleshooting - Porosity

Details troubleshooting steps for porosity in weld metal.

Troubleshooting - Excessive Penetration

Explains how to troubleshoot and correct excessive weld penetration.

Troubleshooting - Lack Of Penetration

Provides solutions for lack of weld penetration.

Troubleshooting - Incomplete Fusion

Offers troubleshooting steps for incomplete fusion in welds.

Troubleshooting - Burn-Through

Guides on how to troubleshoot and prevent burn-through issues.

Troubleshooting Guide For Semiautomatic Welding Equipment

A guide for troubleshooting common issues with semiautomatic welding equipment.

Miller Millermatic 211 Specifications

General IconGeneral
Input Voltage120/240 V
Input Hz60 Hz
Output Amperage Range30 - 230 A
Welding ProcessMIG (GMAW), Flux-Cored (FCAW)
Weight38 lbs
Input PhaseSingle Phase
Wire Feed Speed50 - 700 IPM
Wire Size Range0.023-0.035 in (0.6-0.9 mm) solid, 0.030-0.045 in (0.8-1.2 mm) flux-cored

Related product manuals