OM-251981 Page 10
SECTION 5 − MAINTENANCE & TROUBLESHOOTING
5-1. Routine Maintenance
! Disconnect torch before maintaining.
40 Hours
Replace
unreadable
labels.
Repair or
replace
cracked
weld cable.
Clean and
tighten weld
terminals.
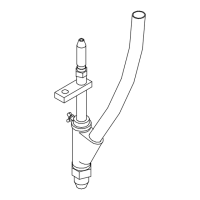
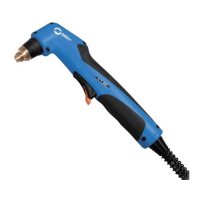
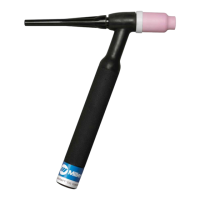
Replace cracked parts
Torch Body
Torch Cable
5-2. Troubleshooting
. Before using troubleshooting table, check selection and preparation of tungsten electrode according to Section 7.
Trouble Remedy
Arc will not start. High frequency present
and visible at the torch.
Check cable and work connections. Be sure weld circuit is complete (see Section 4-7).
Check and be sure shielding gas is present.
Lack of high frequency; difficulty in es-
tablishing arc.
Select proper size and type tungsten. Properly prepare tungsten according to Section 7.
Check cables and torch for cracks or bad connections. Be sure that torch cables are not close to any
grounded metal. Repair or replace necessary parts.
Check torch consumables. Be sure collet and collet body are correctly installed and tightened (see Sec-
tion 4-2).
Check welding power source High Frequency control, and if necessary, check and adjust spark gaps.
Torch gas valve not working properly (if
applicable).
Have Factory Authorized Service Station/Service Distributor check valve.
No shielding gas flow from torch. Be sure valves on gas supply are open.
Check cable for kinks or blockage.
Check and tighten all gas supply fittings.
Check cables and torch for cracked insulation or bad connections. Repair or replace (see Section 5-1).
Tungsten electrode oxidizing and not re-
maining bright after conclusion of weld.
Shield weld zone from drafts.
Increase postflow time.
Increase gas flow rate. Check manufacture’s recommendations.
Check and tighten all gas fittings.
Check gas valve and flow meter/regulator.
Select proper size and type tungsten. Properly prepare tungsten (see Section 7).
Excessive tungsten electrode con-
sumption.
Select proper size and type tungsten. Properly prepare tungsten according to Section 7.
Check polarity setting on welding power source (see welding power source Owner’s manual).
Check for proper gas flow rate. Check manufacture’s recommendations.
If torch is water cooled, check torch and cables for water leaks. Repair or replace if necessary (see Sec-
tion 5-1).
Wandering arc Shield weld zone from drafts.
Reduce gas flow rate.
Select proper size and type tungsten. Properly prepare tungsten according to Section 7.
When using AC, check welding power source High Frequency control setting, and increase setting if
necessary.
Yellow powder or smoke on cup. Use proper type shielding gas.
Check for proper gas flow rate. Check manufacture’s recommendations.
Increase postflow time.
Check torch cup size. Match cup size to joint being welded.
 Loading...