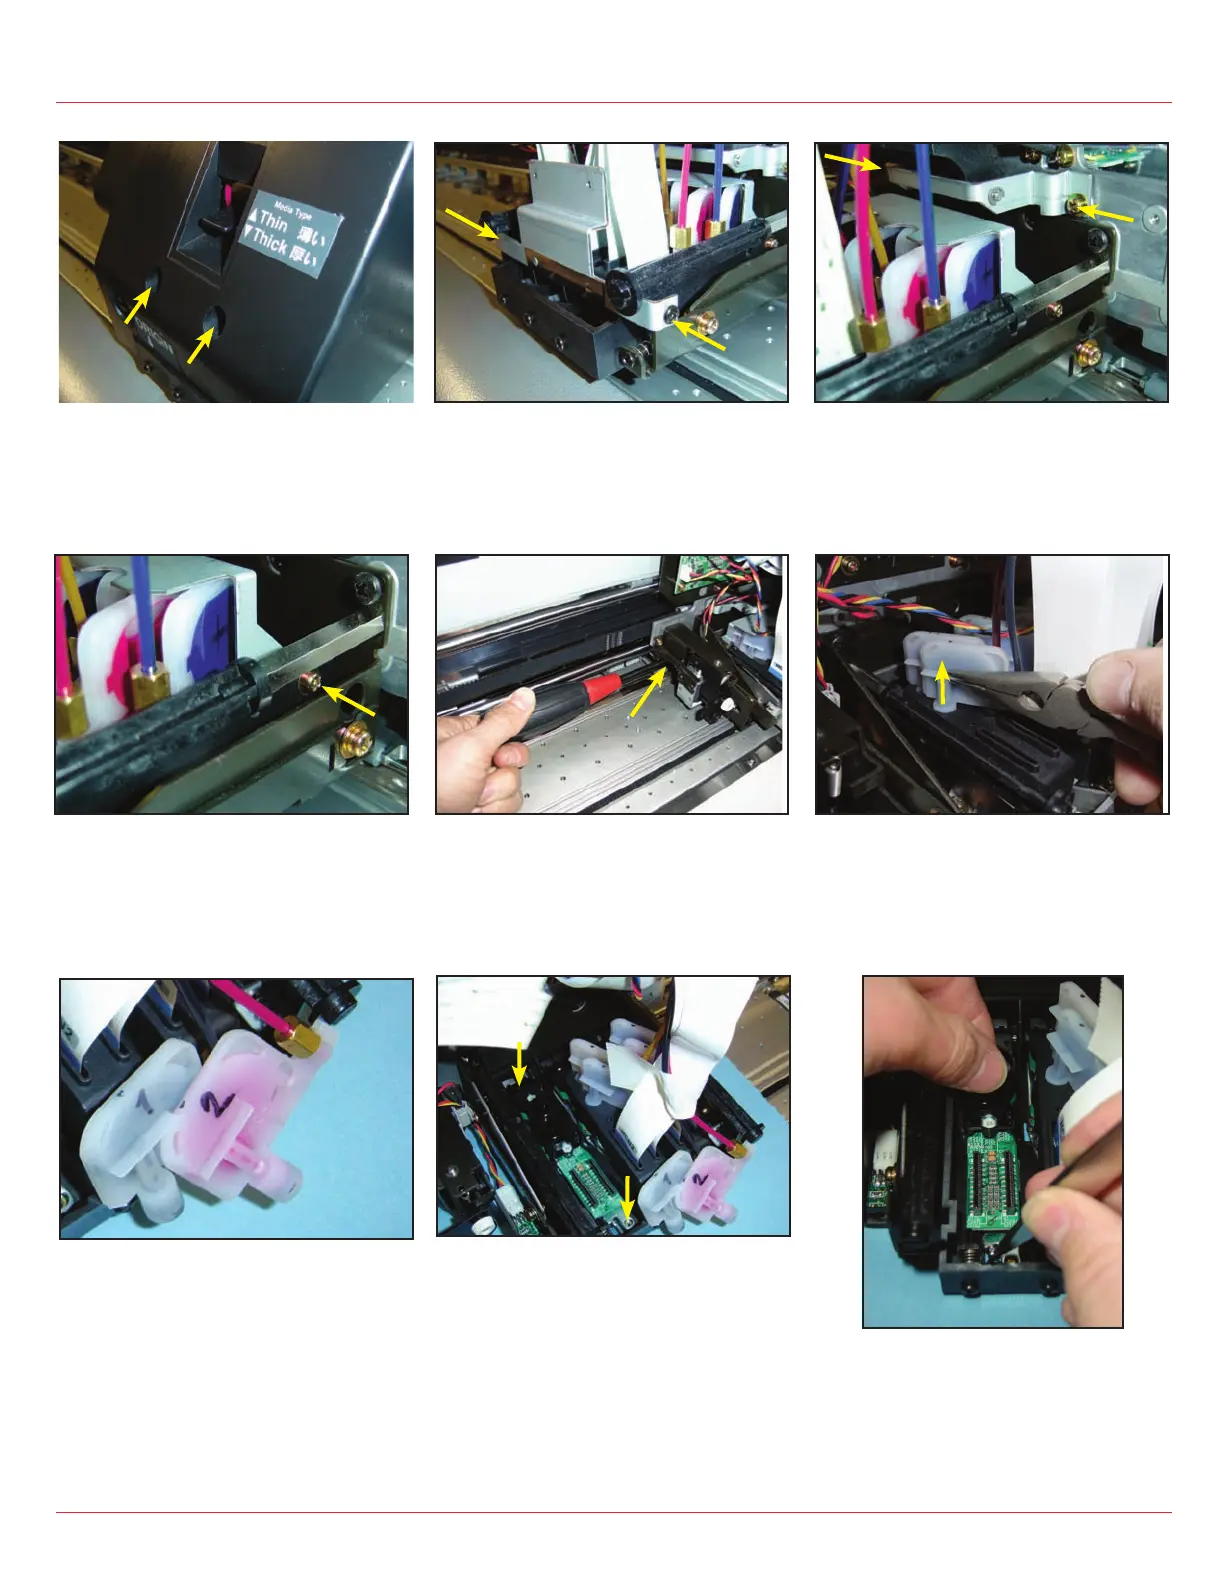
1-2. Remove the two indicated screws and
remove the Head Cover Bracket.
1-4a. Loosen the two screws that secure the
Damper Holder Bracket, tilt up and remove.
1-5. Unplug the pair of FPC Cables from the
head you wish to replace and tuck cables
up out of the way. Using long-nose pliers as
shown, remove each of the two Dampers.
Be especially careful not to drip ink onto
FPC Cables or contacts on Head!
1-6.If replacing multiple Heads it is a good
idea to label the position of each Damper.
Newer models may already have a small
ID tag on each ink line. Take care not to
touch or damage the clear membrane on
back of Damper!
1-7. Tape ink lines and Dampers out of the
way. Lift off the plastic Damper Holder that
covers the head. Remove the hex screw
from front and rear of Head Adjusting Plate.
1-8. Wipe any ink from the damper projec-
tions. Grasp damper projection nearest to
you. Using tweezers or needle-nose pliers
to compress the spring, tip head forward
and lift to remove.
1-3. Use a coin to ensure that Head-Lock
Screws are tight then remove screws on
left and right ends of Head Lever Bracket.
Remove entire Head lever taking care not to
damage Head FPC Cables.
1. Removal of Damaged Print Head:
© 2005 Mimaki USA Pg. 2/7
1-1. Ensure both power switches are off.
Move Carriage out over Platen by hand.
Remove indicated screws and remove Head
Cover.
1-4b. Left screw is accessed through this
opening in Head Bracket and Cutter Brack-
et.
Lift straight up
 Loading...


