This document outlines the step-by-step procedure for replacing print heads in the Mimaki JV3 series of solvent printers, intended for authorized dealer technicians. It emphasizes the importance of understanding all related documents and having the necessary parts and tools on hand before beginning the procedure.
Function Description
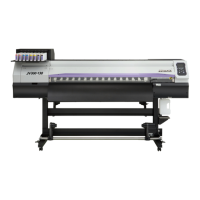
The Mimaki JV3 series printer is a solvent-based printing device. The core function described here is the replacement of its print heads, which are critical components for ink deposition and image creation. The procedure ensures that the new print heads are correctly installed, calibrated, and ready for operation, maintaining the printer's ability to produce high-quality prints. The process involves careful removal of damaged heads, preparation of new heads, and precise re-installation and calibration to ensure optimal print performance.
Usage Features
The head replacement procedure is a detailed process with several key usage features designed to ensure accuracy and prevent damage:
- Pre-Procedure Checks: Before starting, technicians must ensure both front and rear power switches are off. The carriage is manually moved over the platen to provide access.
- Component Disassembly: The process begins with removing the head cover and head cover bracket by unscrewing indicated fasteners. A coin is used to ensure head-lock screws are tight before removing the head lever bracket. This careful disassembly prevents damage to sensitive components like the Head FPC Cables.
- FPC Cable Handling: Special attention is given to the Flexible Printed Circuit (FPC) cables. They are unplugged from the head and tucked away to prevent ink drips or damage. During re-installation, technicians are instructed to thread them back through the damper holder, ensuring correct cable routing (HCN2 through the left slot, HCN1 through the right, with the blue side facing left). Correct seating of the FPC cables is crucial, as an angled connection can short out and damage both the cable and the head.
- Damper Management: Dampers, which hold ink, are carefully removed using long-nose pliers, with a strict warning against dripping ink onto FPC cables or head contacts. If multiple heads are being replaced, labeling the position of each damper is recommended. Newer models may have ID tags on ink lines. Technicians are cautioned not to touch or damage the clear membrane on the back of the damper. After removal, ink lines and dampers are taped out of the way.
- Head Removal: The print head is removed by lifting off the plastic damper holder and then removing hex screws from the front and rear of the head adjusting plate. Any ink from the damper projections is wiped clean. The head is grasped by the damper projection nearest to the technician, and tweezers or needle-nose pliers are used to compress a spring, allowing the head to be tipped forward and lifted out.
- New Head Preparation: New heads are unpackaged, and their Head ID is recorded. A critical step involves flushing the new head with S-Head Replacement Solution (M005026) using a syringe. This is essential because water-based transportation liquid (S-46) in new heads reacts with solvent ink, potentially causing clogging. The solution is injected slowly (3-4 cc into each damper insertion projection over 30 seconds) to prevent damage.
- New Head Installation: Before installing the new head, the area where it will sit is inspected for debris and cleaned with solvent (SPC-0336) if necessary. The head is then placed into position, grasping the damper projection, and hex screws are inserted but not tightened.
- Spring Installation: A spring is installed using needle-nose pliers, ensuring one end is inserted first, then compressed to complete installation. The front and rear hex screws are then lightly tightened.
- Component Reassembly: Dampers are re-installed in their original positions, ensuring proper seating. The damper holder bracket, head cover bracket, and height adjustment lever are then re-installed.
- Service Mode and Head ID Entry: After restoring power, the printer is put into Service Mode by holding the FUNCTION and REMOTE keys during boot-up. The new Head ID is entered using the arrow keys under the #ADJUST -> HEAD ID menu. Correct entry of all ID values is vital to prevent error codes.
- Ink Fill Up and Test Draw: An Ink Fill Up is performed in Service Mode (MAINTENANCE -> FILL UP INK) to fill the new heads with ink. Technicians can choose to pump only Pump 1 or Pump 2 if desired. Finally, a TEST DRAW is performed to confirm that all nozzles are firing correctly. Additional Ink Fill Ups or Cleanings can be performed if needed.
- Adjustment Flow (Print Adjust 2): This is a crucial calibration step.
- Head Height and Speed Selection: Technicians select the head height and speed (LS, LH, HS, HH) based on priority. LH (Thin & High speed) is generally recommended for best quality. This selection sets a standard for PRINT ADJUST 2.
- Y Base Adjustment: This is the first adjustment, ensuring colors overlap straight on Head No. 1 (Black). All colors (excluding black) are adjusted. Input values range from -50 to 50 (0.1 dot unit). Technicians print an adjustment pattern, confirm overlap, and adjust again if necessary.
- Y Single, Y Repeat, Y Bi-Directional Adjustment: These fine adjustments are performed for each head's "a" line (left nozzle line) for Y single and Y bi-directional, and for both "a" and "b" lines for Y repeat (new adjust). Input values are matched to plotted drawing sections.
- X Direction Adjustment: This adjustment is performed for the "a" line (left nozzle line) to ensure correct print alignment. If the adjustment value exceeds 5 dots, media adjust and head unit adjust may be required.
- "Maintenance" - "PRINT adjust": This function resets the print adjust value of maintenance to zero. It is used for bi-directional printing adjustments.
Maintenance Features
The document implicitly highlights several maintenance features and best practices:
- Preventative Measures: The emphasis on careful handling of FPC cables, preventing ink drips, and not touching damper membranes serves as a preventative maintenance measure to extend component lifespan.
- Cleaning: Instructions to wipe ink from damper projections and clean the head seating area with solvent (SPC-0336) before installing a new head are direct maintenance actions.
- Warranty Considerations: The document mentions that if a head is covered by warranty, it should be flushed, drained, capped, and packaged for return to Mimaki USA, indicating a clear process for handling defective parts.
- Troubleshooting Support: The detailed adjustment flow for PRINT ADJUST 2, including Y base, Y single, Y repeat, Y bi-directional, and X direction, provides a structured approach to troubleshooting and correcting print quality issues after head replacement. The warning about incorrect Head ID entry leading to error codes also aids in troubleshooting.
- Safety Protocols: The prominent warning about wearing proper eye protection and gloves when handling cleaning or S-Head replacement solution underscores a critical maintenance safety feature, protecting technicians from chemical exposure.
- Documentation: The document itself serves as a maintenance feature by providing clear, step-by-step instructions, ensuring consistency and accuracy in head replacement procedures across technicians. It also references "JV3 Series - Procedure for Print Adjust 2" as a related document, indicating a comprehensive suite of maintenance guides.