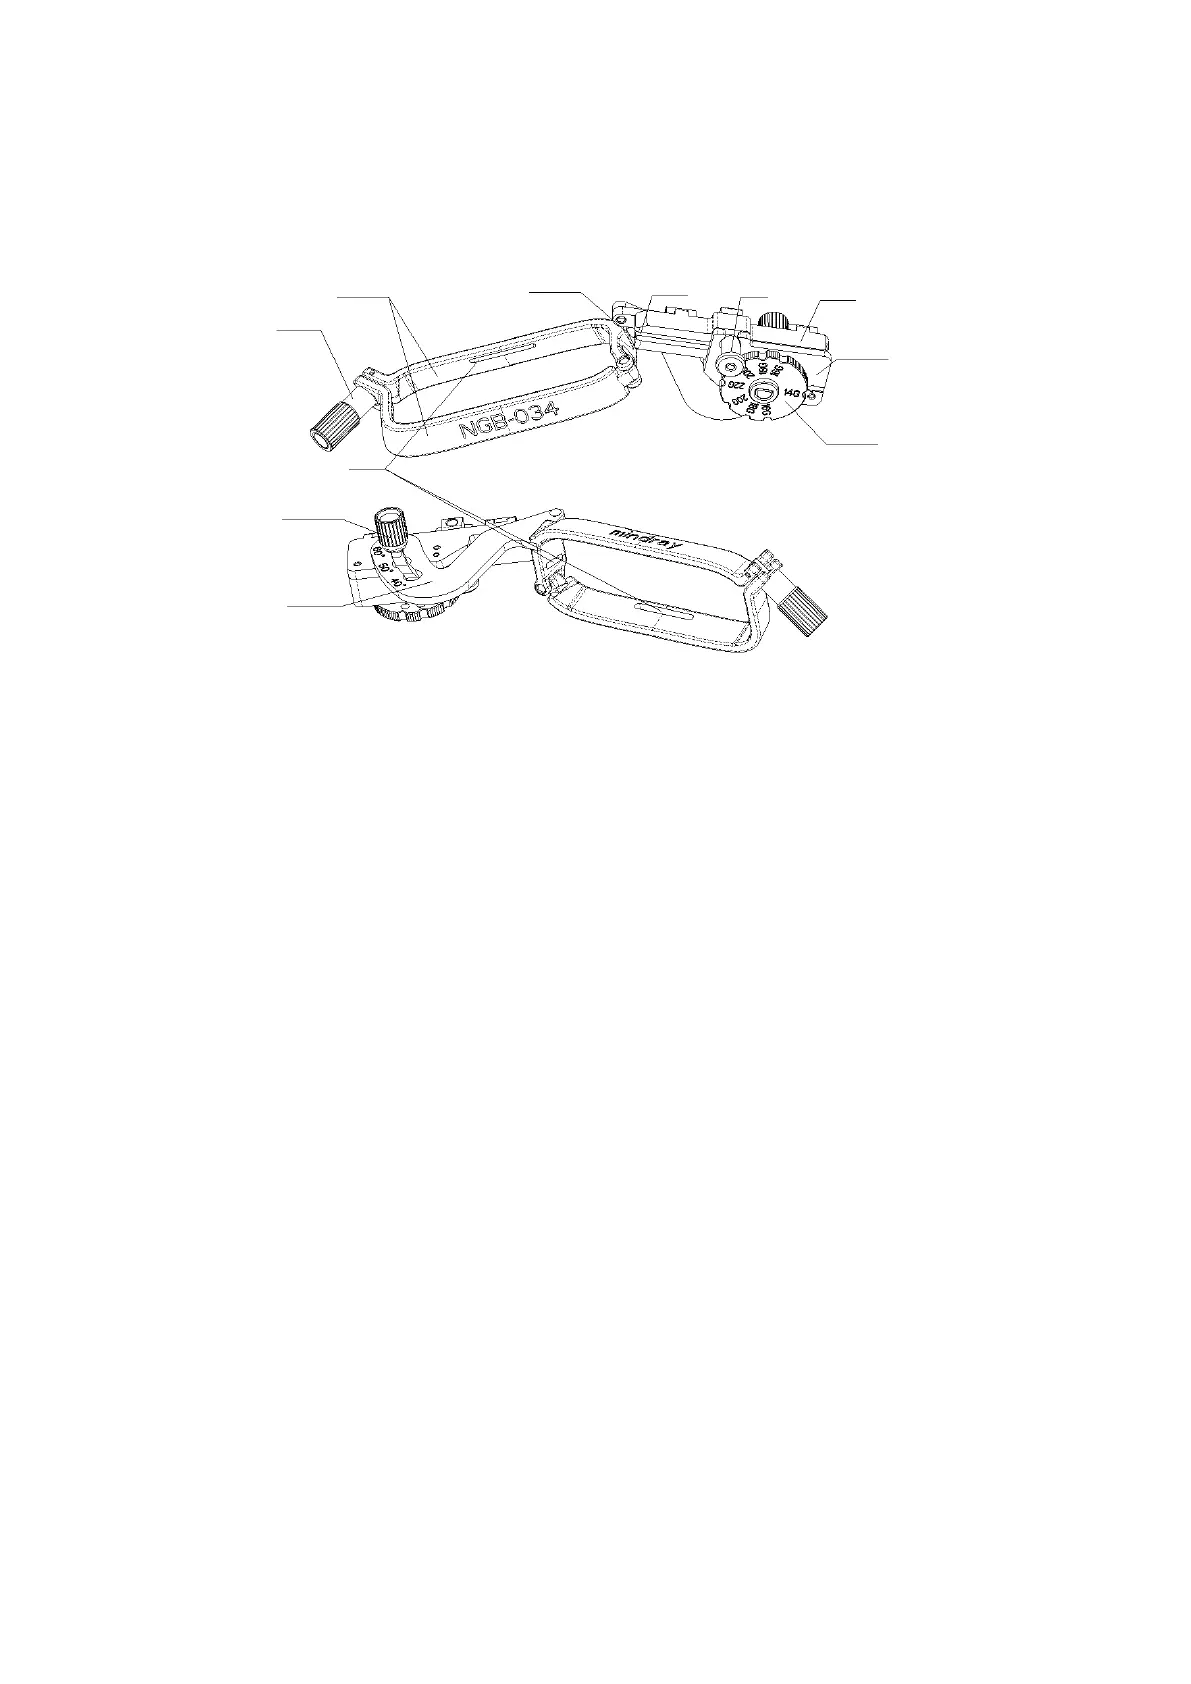
13-22 Probes and Biopsy
NGB-034
13.2.2 Basic Procedures for Biopsy Guiding
1. Select the right needle-guided bracket and needle, install them properly. For details, please
refer to ―13.2.3 Needle-guided Bracket Inspection and Installation‖.
2. Verify the biopsy guide line.
3. Press <F11 Biopsy> to enter the biopsy. Before biopsy guiding, you can preset bracket model,
biopsy display and guide line dot type. .
Tips:
If the current probe has no matched bracket; or, the image is frozen and the guide line is
hidden before image frozen, then you can’t enter Biopsy menu.
Before entering Biopsy menu, the system will prompt you ―Please verify guidelines before
biopsy‖.
4. Select the bracket and guide line according to actual situation.
5. On the Biopsy menu, click [Verify] to enter the Verify menu to verify the guide line. After the
verification, click [Save] on the menu to save the parameter setting. And then click [Exit] to
return to Biopsy menu.
Tips:
If you switched the probe or needle-guided bracket during the biopsy, please verify the
guide line again.
When exiting the Verify menu without saving the setting, system will confirm with you
―Data have changes. Do you want to save the changes?‖. Click [Yes] to save the setting
and return to Biopsy menu.
6. Scan to locate the target. Center the target in the electronic guidezone path.
7. Direct the needle into the area of interest for specimen.
8. After extraction of the biopsy sample is completed, gently remove the probe from the body.
To exit Biopsy menu: press the <Esc> key; or press <Biopsy>.
9. Disassemble the items and properly dispose of these items as required.