N
nkramerSep 8, 2025
How to fix too light images on Minolta Copier?
- GgarciarobertSep 8, 2025
If the image is too light on your Minolta Copier, it means that the image density is set at 'Lighter.' Adjust the image density to the darker side.

How to fix too light images on Minolta Copier?
If the image is too light on your Minolta Copier, it means that the image density is set at 'Lighter.' Adjust the image density to the darker side.
How to fix lines on Minolta Copier copies?
If your Minolta Copier copies have lines, it could be due to several reasons. The Original Glass surface might be dirty, so wipe it clean with a soft dry cloth. Alternatively, the Original Pad could be dirty; in that case, wipe it clean with a soft cloth dampened with neutral detergent. If the original is highly transparent, place a blank sheet of paper over it. If the original is 2-sided, adjust the image density to the lighter side.
Why my Minolta Copier can't be turned on?
If your Minolta Copier cannot be turned on, check if the power cord is unplugged from the power outlet and plug it in. Also, check if the room’s circuit breaker is tripped and close it.
What to do if the original is not placed firmly against the Original Glass of my Minolta Di152 All in One Printer?
Place the original in position so that it is placed firmly against the Original Glass.
What to do if no copies are produced even when the [Start] key is pressed on my Minolta Di152 All in One Printer?
If no copies are produced even when the [Start] key is pressed on your Minolta All in One Printer, an icon on the control panel might be lit. Take necessary action to correct the problem indicated by the lit icon. Also, the copier may still be warming up, it takes about 30 seconds to complete warming up after it has been turned ON.
Why is the copy blurry from my Minolta Di152?
The copy from your Minolta All in One Printer may be blurry if the paper is damp. Change the paper.
What to do if the [Start] key does not light green on my Minolta All in One Printer?
If the [Start] key does not light green on your Minolta All in One Printer, an account number may not have been entered. Enter the account number according to the procedure given in “To enter an account number.”
Why is the image on the copy not aligned properly when using my Minolta Di152?
If the image on the copy is not aligned properly when using your Minolta All in One Printer, ensure the original is placed correctly on the Original Glass against the Original Width Scale, or load it correctly in the Automatic Document Feeder along the Document Guide Plates. The original may also not be suitable for use in the Automatic Document Feeder, so place the original on the Original Glass correctly against the Original Width Scale.
Why is the image too light when using my Minolta Di152?
If the image is too light when using your Minolta All in One Printer, it might be because the image density is set at “Lighter.” Adjust the image density to the darker side.
Why is the image too dark when using my Minolta All in One Printer?
If the image is too dark when using your Minolta All in One Printer, it could be because the image density is set to “Darker.” Adjust the image density to the lighter side.
| Printing Technology | Laser |
|---|---|
| Print Speed (A4) | 15 ppm |
| Print Resolution | 600 x 600 dpi |
| Copy Speed | 15 cpm |
| Copy Resolution | 600 x 600 dpi |
| Scan Resolution | 600 x 600 dpi |
| Scanner Type | Flatbed |
| Fax Capability | Optional |
| Connectivity | Parallel, Optional Network |
| Copy Zoom Range | 50-200% |
| Zoom | 50-200% |
| Memory (Standard) | 16 MB |
| Type | Digital Copier |
| Paper Capacity (Standard) | 250 sheets |
Details instructions on operation and maintenance for optimum utility and safety.
Information about the manual's structure, conventions, and how to use it effectively.
Explains fundamental concepts and symbols used within the manual for clarity.
Lists requirements for the copier's installation location, e.g., ventilation, temperature, humidity.
Lists essential precautions for proper operation to ensure optimum performance.
Outlines legal restrictions on copying certain documents and currencies.
Lists main copy settings like 1-sided, 2in1, 4in1, and book separation copies.
Explains the function of optional components like ADF, Paper Feed Cabinet, Shifting Unit, and Job Tray.
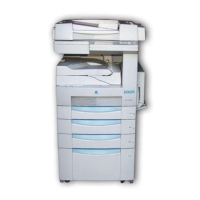
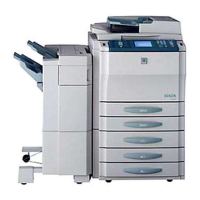
Illustrates and describes the copier's main parts, internal components, and optional units.
Details the control panel layout, keys, and icons for operation.
Provides instructions for powering the copier ON and OFF, and understanding initial states.
Explains functions like Panel Resetting, Energy Saver, Auto Shut OFF, and Account Number.
Details paper types, sizes, and capacities for each tray and bypass.
Explains loading originals via the Automatic Document Feeder or Original Glass.
Lists unsuitable original types for ADF to prevent misfeeds, recommending Original Glass use.
Provides precautions for positioning nonstandard originals and transparent documents.
Describes the basic procedure for placing an original and making a copy.
Explains automatic and manual paper selection for copying.
Details paper types, sizes, and procedures for using the Bypass Tray.
Details Auto Size, Fixed ratios, variable ratios using keys, Full Size, and X/Y Zoom.
Explains Text mode (Auto/Manual) and Photo mode for image density adjustment.
Explains how to stop and resume a multi-copy cycle using the Interrupt key.
Explains copy types: 1-sided, 2in1, 4in1, and book separation.
Describes Non-Sort, Sort, and Group finishing types for organizing copies.
Explains Left, Upper, Frame, and Center Erase functions for removing parts of the original image.
Explains how to reverse background and text colors on the copy.
Describes shifting the image to the right to create a filing margin on the copy.
Allows modification of default settings for various functions like Margin Setting, Erase Setting, and Auto Panel Reset.
Dries the PC Drum surface to prevent blotchy copies caused by condensation.
Restores normal image density by replenishing toner when it is low.
Sets custom paper sizes for the 1st Tray when nonstandard sizes are loaded.
Allows administrators to set 'Copy Track' for tracking copies per account.
Shows total copies, printed pages, and count by paper size.
Stores frequently used job settings for quick setup, up to two jobs.
Lists error displays, their possible causes, and recommended actions.
Provides instructions for loading paper into the 1st Tray and other trays.
Step-by-step guide for replacing the toner bottle.
Explains how to identify misfeed locations and refers to clearing procedures.
Troubleshoots copy quality issues like light, dark, or blurry images.
Troubleshoots common operational issues like no display, keys not responding, or power problems.
Provides detailed technical specifications for the Copier Di152/Di183.
Provides instructions for cleaning the housing cover, original glass, and control panel.
Details which function combinations are possible or restricted.
Lists standard paper names with their metric and inch dimensions.