Do you have a question about the Minolta Maxxum Dynax 7 and is the answer not in the manual?
Critical safety warnings regarding battery use, potential hazards, and proper handling.
Important safety notes concerning potential risks like swallowing objects or eye damage.
Instructions on installing and checking battery status for camera operation.
Steps for correctly loading film into the camera to prevent fogging or errors.
Explanation of how to achieve sharp focus on subjects using various autofocus modes.
Procedures for automatically or manually rewinding exposed film back into the cartridge.
Overview of the camera's dot-matrix LCD for displaying photographic information.
Selecting between autofocus modes (A, C, S) and manual focus (MF) for precise focusing.
Understanding and controlling the camera's exposure settings for optimal image brightness.
Understanding the different light metering methods available on the camera.
Selecting drive modes like single-frame, continuous, self-timer, and bracketing.
Guide to using the camera's built-in and accessory flash units for illumination.
Exploring extra functionalities like date/time imprinting and eye-start.
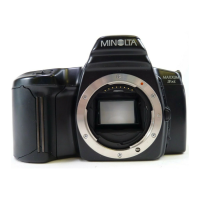
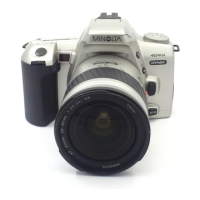
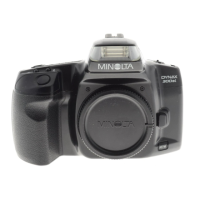
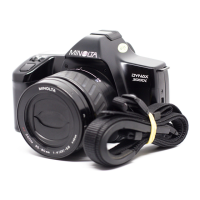
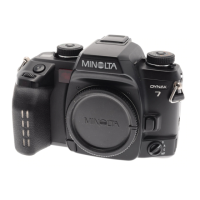
Identification and description of the main components of the camera's body.
Overview of the buttons and displays located on the camera's control panel.
Description of the information displayed on the camera's top data panel.
Explanation of the components and indicators visible within the camera's viewfinder.
Step-by-step instruction for powering the camera using the correct batteries.
Guidance on properly mounting a lens onto the camera body.
Basic steps to load film into the camera, ensuring correct alignment.
Configuring the camera to P mode for automatic exposure and operation.
The final step of fully pressing the shutter-release button to capture the image.
Detailed steps for inserting the camera's power source, including polarity.
A visual guide to aligning and mounting lenses onto the camera body correctly.
Understanding the icons that display the camera's remaining battery power.
A visual guide to aligning and mounting lenses onto the camera body correctly.
Steps for safely detaching a lens from the camera body and replacing caps.
Placing the film cartridge into the designated chamber for loading.
Securing the back cover to automatically advance the film to the first frame.
Techniques for gripping the camera body and supporting the lens for stability.
How to operate the shutter button for autofocus activation and picture capture.
Configuring the camera for automatic operation by setting the mode dial to P.
The final step of fully pressing the shutter-release button to capture the image.
Overview of the default settings automatically applied when the camera is in P full-auto mode.
Understanding the viewfinder indicators that show focus status and confirmation.
Techniques for locking focus on a subject and maintaining it while recomposing.
Advice for focusing in challenging conditions like low contrast or overlapping subjects.
Interpreting the viewfinder signals related to flash charging status and exposure confirmation.
Table showing the effective flash distance based on aperture and film speed.
The process by which the camera automatically rewinds film after the last frame.
How to rewind film before the roll is finished using the manual rewind button.
How to change the camera's display mode via the display-selection button.
Viewing all camera settings simultaneously on the navigation display.
A simplified display showing only essential information in large icons.
Displaying exposure compensation and bracketing values relative to the meter index.
Reviewing the exposure data for recent frames taken with the camera.
Shows selected compensation/bracketing values against the ambient exposure.
Displays exposure data for the current and previous 5 frames.
Automatic orientation change of the display based on camera position.
Temporary display of new settings when a dial or function is operated.
Normal display when the exposure mode dial is set to P.
Upper display part turns black in full-auto mode for clarity.
Upper display part turns black when using memory settings.
Enabling the backlight for the navigation display for improved readability.
Adjusting the contrast level of the camera's display screen for clarity.
Camera automatically adjusts focus, especially for subjects that stop suddenly.
Maintaining focus on moving subjects by continuously tracking them.
Locking focus on a stationary subject or one that stops momentarily.
Manually adjusting focus using the lens ring, with viewfinder assistance.
Switching from autofocus to manual focus by pressing the AF/MF button.
Switching from manual focus to autofocus by pressing the AF/MF button.
Explanation of the advanced focus control system and manual focus operation.
The standard focus mode covering the entire center area for easier subject acquisition.
Selecting specific focus points for greater flexibility when composing shots.
How to select the wide focus area and lock focus using the spot-AF button.
Selecting one of nine local focus areas and locking focus.
Steps to lock focus within a specific local area or the center spot area.
Functionality and limitations of the AF illuminator in low-light conditions.
Using Programmed AE mode for balanced shutter and aperture settings.
How the built-in flash operates automatically in P mode.
Using creative program modes to adjust shutter or aperture while maintaining auto-exposure.
Adjusting the aperture to control depth-of-field and light entering the lens.
Explanation of how aperture size affects depth-of-field and image brightness.
Adjusting shutter speed to control motion blur or freezing action.
Understanding how shutter speed impacts the appearance of motion in photographs.
Adjusting shutter/aperture combinations without altering the overall exposure value.
Using the built-in or accessory flash in manual exposure mode.
Interpreting the meter index to compare settings against the camera's metered exposure.
Shifting exposure values using equivalent aperture/shutter speed combinations.
The camera's standard metering mode, using autofocus data for pattern selection.
Measuring exposure using only the center honeycomb segment for precise targeting.
Basing exposure on an average of readings, emphasizing the center of the image.
Switching the compensation increment from 1/2 EV to 1/3 EV for finer adjustments.
Displaying the set exposure compensation value and its relation to the meter index.
How exposure and flash compensation differ in their effect on shutter speed, aperture, and flash burst.
Comparing locked exposure to spot-metered area exposure to predict results.
How AE-lock functions with different metering patterns to lock exposure.
Locking exposure specifically for the spot-metered area.
Visualizing exposure differences across the image segments after locking exposure.
Enabling the backlight for the navigation display for improved readability.
Adjusting the contrast level of the camera's display screen for clarity.
Selecting autofocus modes like Automatic, Continuous, Single-shot, and Manual.
Camera automatically adjusts focus, especially for subjects that stop suddenly.
Maintaining focus on moving subjects by continuously tracking them.
Locking focus on a stationary subject or one that stops momentarily.
Minimizing camera shake by delaying mirror movement before shutter release.
How the meter index displays bracketing information and exposure compensation shifts.
Selecting flash modes like Normal, Red-eye Reduction, Rear Sync, and Wireless/Remote.
Taking multiple shots with varied flash exposures by controlling flash output.
Information on attaching and using external accessory flash units.
Adjusting the order of year, month, and day for date imprinting.
| Continuous Shooting | Up to 4 fps |
|---|---|
| Flash Sync Speed | 1/200 sec |
| Sensor Type | 35mm film |
| Effective Pixels | N/A (Film Camera) |
| Camera type | SLR |
| Lens Mount | Minolta A-mount |
| Shutter Speed | 30 - 1/8000 sec + Bulb |
| Metering Modes | Center-weighted, Spot |
| Storage | Film |
| Battery | 2x CR123A |
| ISO Range | ISO 6 to 6400 |
| ISO Sensitivity | ISO 6 to 6400 |