EasyManua.ls Logo

Mitsubishi Electric PUMY-P200YKM2 User Manual

Mitsubishi Electric PUMY-P200YKM2
134 pages
To Next Page IconTo Next Page
Page #1 background imageLoading...
Page #1 background image
TECHNICAL & SERVICE MANUAL
OUTDOOR UNIT
HFC
utilized
R410A
Model name
indication
PARTS CATALOG (OCB675)
CONTENTS
1. SAFETY PRECAUTION
.....................................
2
2. OVERVIEW OF UNITS
.......................................
5
3. SPECIFICATIONS
..............................................
9
4. DATA
.................................................................
10
5. OUTLINES AND DIMENSIONS
.......................
18
6. WIRING DIAGRAM
...........................................
19
7.
NECESSARY CONDITIONS FOR SYSTEM CONSTRUCTION
.......
20
8. TROUBLESHOOTING
......................................
38
9. ELECTRICAL WIRING
...................................
115
10. REFRIGERANT PIPING TASKS
....................
121
11. DISASSEMBLY PROCEDURE
.......................
128
Note:
This service manual
describes technical data of
the outdoor units only.
No. OCH675
REVISED EDITION-D
SPLIT-TYPE, HEAT PUMP AIR CONDITIONERS
June 2019
OCH675 REVISED EDITION-C
is void.
Revision:
PUMY-P200YKM2R1 and
PUMY-P200YKM2R1-BS
have neen added.
Some descriptions have
been modified in REVISED
EDITION-D.
<Outdoor unit>
[Model Name]
PUMY-P200YKM2
PUMY-P200YKM2
PUMY-P200YKM2R1
PUMY-P200YKM2-BS
PUMY-P200YKM2R1-BS
[Service Ref.]
Salt proof model
PUMY-P200YKM2-BS

Other manuals for Mitsubishi Electric PUMY-P200YKM2

Question and Answer IconNeed help?

Do you have a question about the Mitsubishi Electric PUMY-P200YKM2 and is the answer not in the manual?
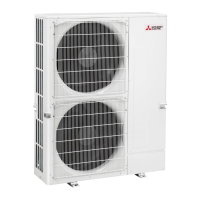
Mitsubishi Electric PUMY-P200YKM2 Specifications

General IconGeneral
SeriesPUMY
Cooling Capacity (kW)22.4
Heating Capacity (kW)25.0
RefrigerantR410A
COP (Heating)3.40
Power Supply380-415V, 3Ph, 50Hz

Summary

SAFETY PRECAUTION

1-1. CAUTIONS RELATED TO NEW REFRIGERANT

Cautions for units utilizing refrigerant R410A.

1-2. PRECAUTIONS FOR SALT PROOF TYPE "-BS" MODEL

Precautions for salt proof type "-BS" models.

OVERVIEW OF UNITS

2-1. SYSTEM CONSTRUCTION

Details the construction of various system configurations.

SPECIFICATIONS

DATA

4-1. SELECTION OF COOLING/HEATING UNITS

Guide for selecting units based on cooling/heating data.

OUTLINES AND DIMENSIONS

WIRING DIAGRAM

NECESSARY CONDITIONS FOR SYSTEM CONSTRUCTION

7-1. TRANSMISSION SYSTEM SETUP

Details the setup requirements for the transmission system.

7-2. Special Function Operation and Settings (for M-NET Remote Controller)

Explains special functions and settings for M-NET remote controllers.

7-3. REFRIGERANT SYSTEM DIAGRAM

Illustrates the refrigerant system diagram for various configurations.

7-3-2. Connection with Branch box

Explains connections when using a branch box.

7-3-3. Mixed system (CITY MULTI indoor units and M, S, P series indoor units (Via Branch box)

Describes mixed systems using branch boxes with different indoor unit series.

7-4. SYSTEM CONTROL

Covers system control methods including wiring and address settings.

TROUBLESHOOTING

8-1. CHECKPOINTS FOR TEST RUN

Procedures and checks to perform before initiating a test run.

8-1-2. Countermeasures for Error During Test Run

Details error codes and their corresponding corrective actions.

8-1-3. SELF-DIAGNOSIS ACTION BY FLOWCHART

Provides a flowchart for self-diagnosis actions.

REMOTE CONTROLLER DIAGNOSIS

Guide for diagnosing M-NET and MA remote controller issues.

REMOTE CONTROLLER TROUBLE

Troubleshooting symptoms and causes for M-NET and MA remote controllers.

THE FOLLOWING SYMPTOM DO NOT REPRESENT TROUBLE (EMERGENCY)

Lists symptoms that are normal operation and not actual faults.

INTERNAL SWITCH FUNCTION TABLE

Details the function of internal switches on the outdoor unit.

OUTDOOR UNIT INPUT/OUTPUT CONNECTOR

Describes the function and connections of outdoor unit input/output terminals.

HOW TO CHECK THE PARTS

Provides methods for checking the resistance and condition of various parts.

HOW TO CHECK THE COMPONENTS

Details how to check specific components like thermistors and sensors.

TEST POINT DIAGRAM

Illustrates test points on the outdoor multi controller circuit board.

OUTDOOR UNIT FUNCTIONS

Lists outdoor unit functions and their corresponding SW1 settings and display data.

ELECTRICAL WIRING

9-1. OVERVIEW OF POWER WIRING

Provides an overview of power wiring for the system.

9-2. WIRING OF MAIN POWER SUPPLY AND EQUIPMENT CAPACITY

Details wiring for main power supply and equipment capacity.

9-2-1. Cross section area of Wire for Main Power and ON/OFF capacities

Specifies wire cross-section areas and breaker capacities for power wiring.

9-3. DESIGN FOR CONTROL WIRING

Guides the design of control wiring based on remote controllers and system linking.

9-4. WIRING TRANSMISSION CABLES

Covers types of control cables used for transmission.

9-5. SYSTEM SWITCH SETTING

Explains how to set system switches for identification and addressing.

9-6. EXAMPLE EXTERNAL WIRING DIAGRAM FOR A BASIC SYSTEM

Shows example external wiring diagrams for basic system configurations.

9-7. METHOD FOR OBTAINING ELECTRICAL CHARACTERISTICS WHEN A CAPACITY AGREEMENT IS TO BE SIGNED WITH AN ELECTRIC POWER COMPANY

Details obtaining electrical characteristics for capacity agreements with power companies.

REFRIGERANT PIPING TASKS

10-1. REFRIGERANT PIPING SYSTEM

Explains refrigerant piping systems and connection methods.

■ Additional refrigerant charge

Instructions for calculating and adding refrigerant for extended piping.

10-2. PRECAUTIONS AGAINST REFRIGERANT LEAKAGE

Safety precautions and procedures related to refrigerant leakage.

DISASSEMBLY PROCEDURE

1. Removing the service panel and top panel

Instructions for removing the service panel and top panel.

4. Removing the thermistor <Suction pipe> (TH6)

Steps for removing the suction pipe thermistor.

6. Removing the thermistors

Instructions for removing HIC, compressor, and outdoor pipe thermistors.

9. Removing bypass valve coil (SV1) and bypass valve

Steps for removing the bypass valve coil and valve.

14. Removing the compressor (MC)

Detailed steps for removing the compressor unit.

Related product manuals