Chapter 12 Chassis electrical system
12-3
4.1 A typical fusible link
4
Fusible links-general information
Refer to illustration 4.1
Some circuits are protected by fusible links. The links are used in cir-
cuits which are not ordinarily fused, such as the ignition circuit (see
illus-
tration).
Although the fusible links appear to be a heavier gauge than the wire
they are protecting, the appearance is due to the thick insulation. All fus-
ible links are four wire gauges smaller than the wire they are designed to
protect.
Fusible links cannot be repaired, but a new link of the same size wire
can be put in its place. The procedure is as follows:
a) Disconnect the negative cable from the battery.
b) Disconnect the fusible link from the wiring harness.
c) Cut the damaged fusible link out of the wiring just behind the con-
nector.
d) Strip the insulation back approximately l/2-inch.
e) Position the connector on the new fusible link and crimp it into
place.
f) Use rosin core solder at each end of the new link to obtain a good
solder joint.
Q)
Use plenty of electrical tape around the soldered joint. No wires
.
should be exposed.
h) Connect the battery ground cable. Test the circuit for proper opera-
tion.
5 Circuit breakers -general information
Circuit breakers protect components such as power windows, power
door locks and headlights. Some circuit breakers are located in the fuse
box.
On some models the circuit breaker resets itself automatically, so an
electrical overload in a circuit breaker protected system will cause the cir-
cuit to fail momentarily, then come back on. If the circuit does not come
back on, check it immediately. Once the condition is corrected, the circuit
breakerwill resume its normal function. Some circuit breakers must be re-
set manually.
6 Relays - general infofmation
Refer to illustration 6.2
1 Several electrical accessories in the vehicle use relays to transmit the
electrical signal to the component. If the relay is defective, that component
will not operate properly.
2
The various relays are
grouped together in several locations
(see illustration).
6.2 This group of relays Is located under the driver’s
side of the instrument panel
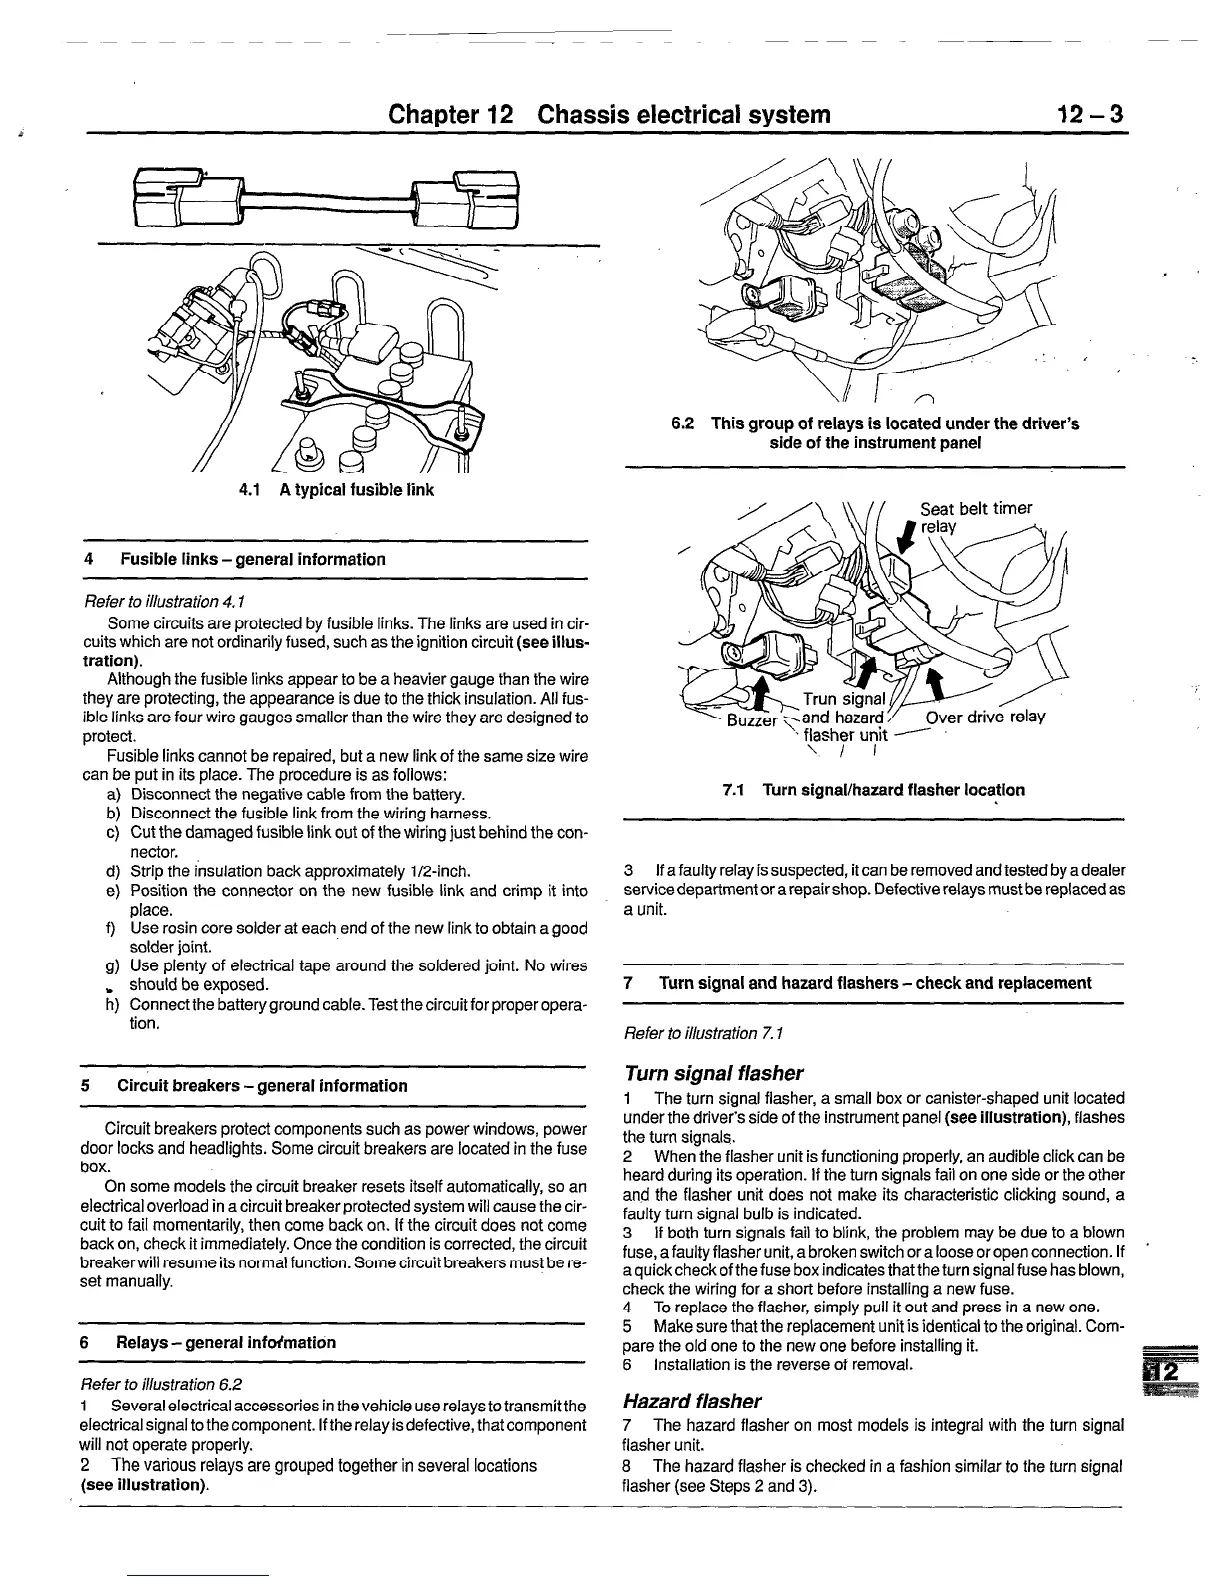
7.1 Turn signal/hazard flasher location
3 If a faulty relay is suspected, it can be removed and tested by a dealer
service department or a repair shop. Defective relays must be replaced as
a unit.
7 Turn signal and hazard flashers - check and replacement
Refer to illustration 7.1
Turn signal flasher
1 The turn signal flasher, a small box or canister-shaped unit located
under the driver’s side of the instrument panel
(see illustration),
flashes
the turn signals.
2 When the flasher unit is functioning properly, an audible click can be
heard during its operation. If the turn signals fail on one side or the other
and the flasher unit does not make its characteristic clicking sound, a
faulty turn signal bulb is indicated.
3 If both turn signals fail to blink, the problem may be due to a blown
fuse, a faulty flasher unit, a broken switch or a loose or open connection. If ’
a quick check of the fuse box indicates that the turn signal fuse has blown,
check the wiring for a short before installing a new fuse.
4 To replace the flasher, simply pull it out and press in a new one.
5 Make sure that the replacement unit is identical to the original. Com-
pare the old one to the new one before installing it.
6 Installation is the reverse of removal.
Hazard flasher
7 The hazard flasher on most models is integral with the turn signal
flasher unit.
8 The hazard flasher is checked in a fashion similar to the turn signal
flasher (see Steps 2 and 3).
 Loading...


