Chapter 11 Body
.
11-3
sandpaper. Repeat this spray-and-repair procedure until you are satisfied
that the surface of the filler and the feathered edge of the paint are perfect.
Rinse the area with clean water and allow it to dry completely.
19 The repair area is now ready for painting. Spray painting must be car-
ried out in
a
warm, dry, windless and dust free atmosphere. These condi-
tions can be created if you have access to a large indoor work area, but if
you are forced to work in the open, you will have to pick the day very care-
-fully. If you are working indoors, dousing the floor in the work area with wa-
ter will help settle the dust which would otherwise be in the air. If the repair
area is confined to one body panel, mask off the surrounding panels. This
will help minimize the effects of a slight mismatch in paint color. Trim
pieces such as chrome strips, door handles, etc., will also need to be
masked off or removed. Use masking tape and several thicknesses of
newspaper for the masking operations.
20 Before spraying, shake the paint can thoroughly, then spray a test
area until the spray painting technique is mastered. Coverthe repair area
with a thick coat of primer. The thickness should be built up using several
thin layers of primer rather than one thick one. Using 600-grit wet-or-dry
sandpaper, rubdownthesurfaceoftheprimeruntil itisverysmooth. While
doing this, the work area should be thoroughly rinsed with water and the
wet-or-dry sandpaper periodically rinsed as well. Allow the primer to dry
before spraying additional coats.
21 Spray on the top coat, again building up the thickness by using sever-
al thin layers of paint. Begin spraying in the center of the repair‘area and
then, using a circular motion, work out until the whole repair area and
about two inches of the surrounding original paint is covered. Remove all
masking material 10 to 15 minutes after spraying on the final coat of paint.
Allow the new paint at leasttwo weeks to harden, then use avery fine rub-
bing compound to blend the edges of the new paint into the existing paint.
Finally, apply a coat of wax.
6
Body repair-major damage
1 Major damage must be repaired by an auto body shop specifically
equipped to perform unibody repairs. These shops have the specialized
equipment required to do the job properly.
2 If the damage is extensive, the body must be checked for proper
alignment or the vehicle’s handling characteristics may be adversely af-
fected and other components may wear at an accelerated rate.
3 Due to the fact that all of the major body components (hood, fenders,
etc.) are separate and replaceable units, any seriously damaged compo-
nents should be replaced rather than repaired. Sometimes the compo-
nents can be found in a wrecking yard that specializes in used vehicle
components, often at considerable savings over the cost of new parts.
7 Hinges and locks-maintenance
Once every 3000 miles, or every three months, the hinges and latch
assemblies on the doors, hood and cargo door should be given a few
drops of light oil or lock lubricant. The door latch strikers should also be
lubricated with a thin coat of grease to reduce wear and ensure free move-
ment. Lubricatethedoorandcargodoorlockswithspray-ongraphitelubri-
cant.
8 Windshield and fixed glass -replacement
Replacement of the windshield and fixed glass requires the use of spe-
da\ fast-setting adhesive/caulk materials and some specialized tools and
techniques. These operations should be left to a dealer service depart-
ment or a shop specializing in glass work.
9.2 Use a scribe or marking pen to mark the hinge locations
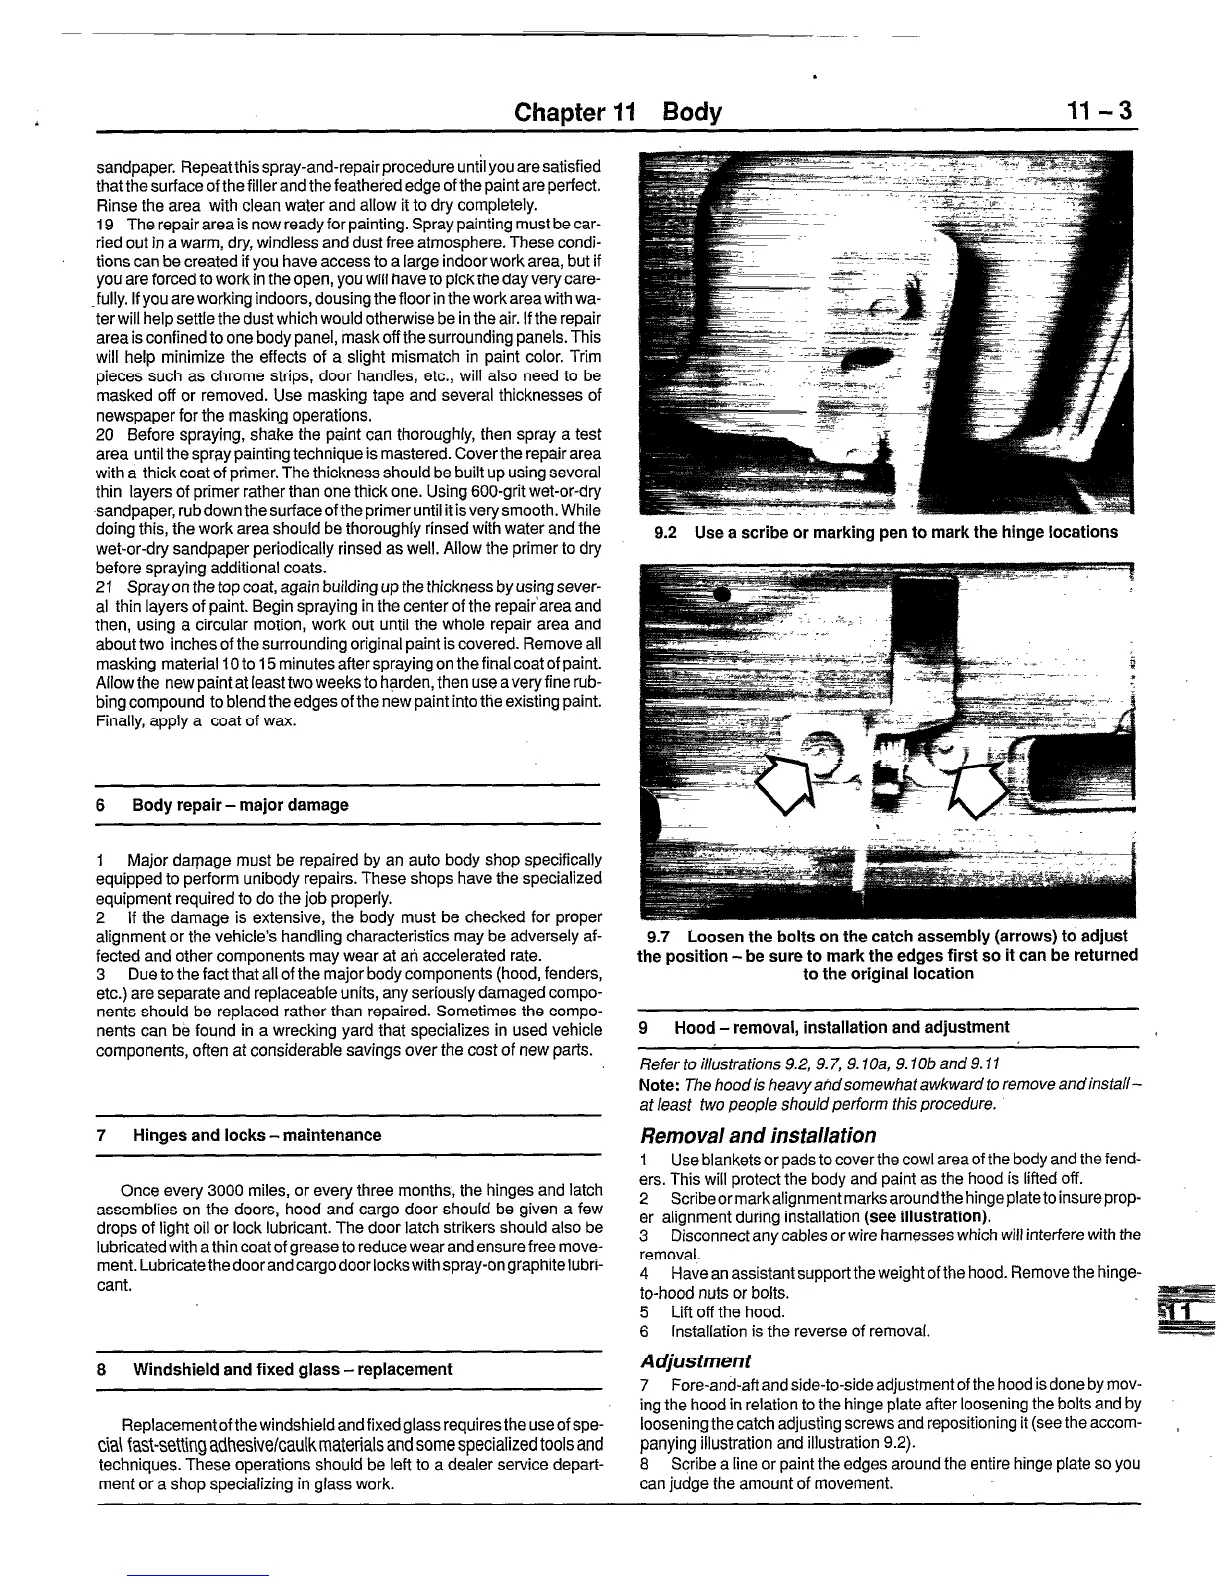
9.7 Loosen the bolts on the catch assembly (arrows) to adjust
the position-be sure to mark the edges first so it can be returned
to the original location
9
Hood-removal, installation and adjustment
Refer to illustrations 9.2, 9.7, 9. IOa, 9. f Ob and 9. I I
Note:
The hoodis heavyahdsomewhatawkwardtoremoveandinstall-
at least two people should perform this procedure.
Removal and installation
1 Use blankets or pads to cover the cowl area of the body and the fend-
ers. This will protect the body and paint as the hood is lifted off.
2 Scribeormarkalignmentmarksaroundthehingeplatetoinsureprop-
er alignment during installation
(see illustration).
3 Disconnect any cables or wire harnesses which will interfere with the
removal.
4 Have an assistant supportthe weight of the hood. Remove the hinge-
to-hood nuts or bolts.
5
Lift off the hood.
6 Installation is the reverse of removal.
Adjustment
7 Fore-and-aft and side-to-side adjustment of the hood is done by mov-
ing the hood in relation to the hinge plate after loosening the bolts and by
loosening the catch adjusting screws and repositioning it (see the accom-
panying illustration and illustration 9.2).
8 Scribe a line or paint the edges around the entire hinge plate so you
can judge the amount of movement.
,
 Loading...


