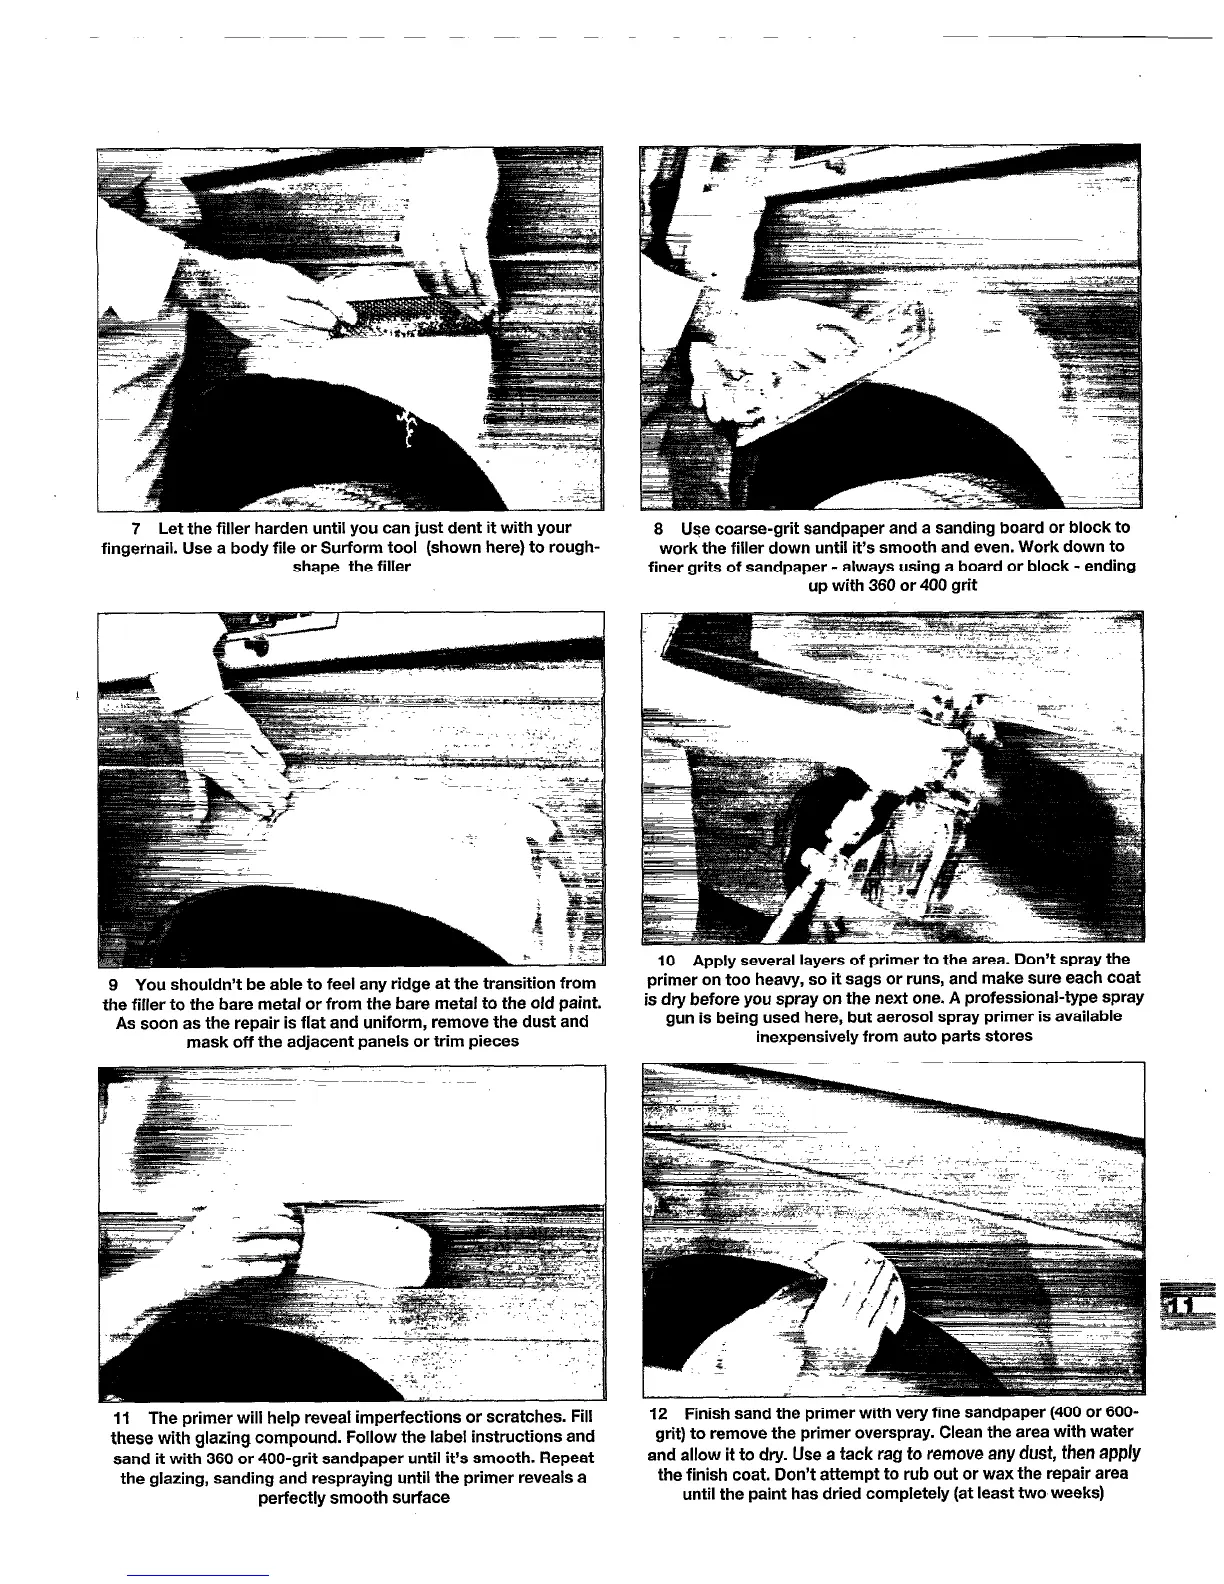
7 Let the filler harden until you can just dent it with your
Fingernail. Use a body file or Sutform tool (shown here) to rough-
shape the filler
9 You shouldn’t be able to feel any ridge at the transition from
the filler to the bare metal or from the bare metal to the old paint.
As soon as the repair is flat and uniform, remove the dust and
mask off the adjacent panels or trim pieces
11 The primer will help reveal imperfections or scratches. Fill
these with glazing compound. Follow the label instructions and
sand it with 360 or 400-grit sandpaper until it’s smooth. Repeat
the glazing, sanding and respraying until the primer reveals a
perfectly smooth surface
8 Use coarse-grit sandpaper and a sanding board or block to
work the filler down until it’s smooth and even. Work down to
finer grits of sandpaper - always using a board or block - ending
up with 360 or 400 grit
10 Apply several layers of primer to the area. Don’t spray the
primer on too heavy, so it sags or runs, and make sure each coat
is dry before you spray on the next one. A professional-type spray
gun is being used here, but aerosol spray primer is available
inexpensively from auto parts stores
12 Finish sand the primer with very fine sandpaper (400 or 600-
grit) to remove the primer overspray. Clean the area with water
and allow it to dry. Use a tack rag to remove any dust, then apply
the finish coat. Don’t attempt to rub out or wax the repair area
until the paint has dried completely (at least two weeks)
 Loading...


