11
New Installation - No Factory Pre Wires Present (continued)
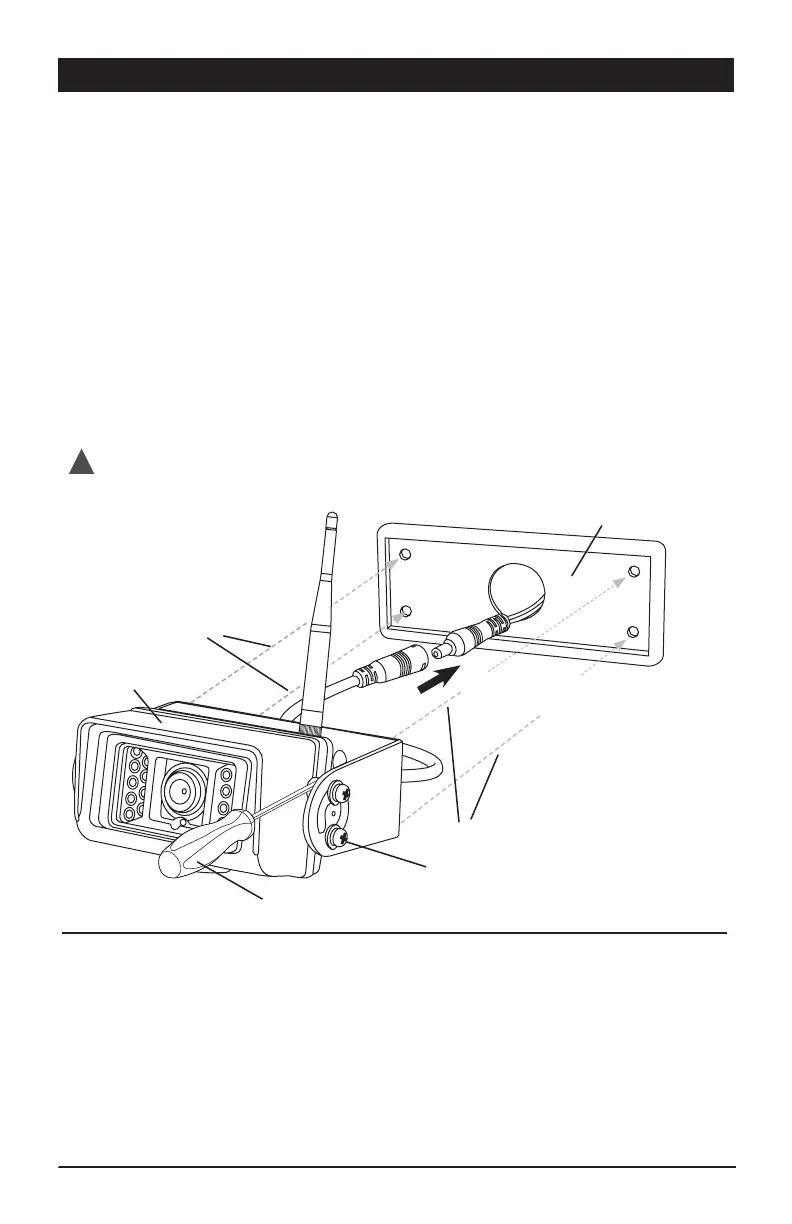
4) Mounting Camera:
• Make sure vehicles power lead passes through the gasket’s large center hole.
Use precaution to prevent lead from falling into vehicle.
• Connect the camera and vehicle power leads. Make sure the connectors are
securely twist-locked together.
• Push the connected power leads back through the 3/4” hole in the middle
of the gasket and into vehicle.
• Without removing camera adjustment screws from bracket, align the camera and
bracket with the gasket and pre-drilled holes in the vehicle. Using the supplied
4 screws, attach and secure the camera, bracket and gasket into position using a screw
driver inserted between the camera and the bracket wall. Make sure antenna mounting
screw is facing up. (Figure A)
• Adjust viewing angle of camera by loosening camera adjustment screws and then tighten.
• Mount the antenna on camera.
Connect the camera power lead to the
routed vehicle power harness.
System Operation:
• Power up vehicle.
• Turn on monitor.
• Check for camera operation.
- Camera and monitor are paired.
- If camera is not paired, proceed to section
on camera pairing in this manual.
Test System Operation before adding any additional sealant to permanently mount camera.
!
Figure A
Screw Driver
Camera Adjustment Screws
(loosen only, do not remove)
Camera &
Bracket Assembly
Gasket
Screws from Bracket
Screws from Bracket