Zeus200 Installation manual
V 1.0.7 - 12/10/2020 Page 13 of 28
to a maximum of 3m. In order to optimize the noiselessness of the drain, it is advisable not to
use pipes less than 1m long.
4. Fix the exhaust silencer in a stable way using the bracket (3) with screw (6), washer (7) and
nut (8), taking care that no part can interfere or be damaged due to the heat produced by the
drain.
5. Mount the exhaust terminal (4) to the through-hull taking care to perform a siphon in order to
avoid the sea water from coming into contact with the combustion chamber.
6. Secure the drain pipes with the 4 26x28x22mm steel clamps (5).
7. Finally, cover everything with the supplied thermal bandage or other thermally insulating
materials in order to avoid possible heat transfers inside the locker. Lock the thermal bandage
with the 4 clamps (9) provided.
Note: consider that the drain hose reaches temperatures above 200°C so make sure that it cannot
come into contact with anything. The thermal bandage must be handled with gloves and must be
immersed in water before use in order to simplify its installation.
2.4 Fuel supply line
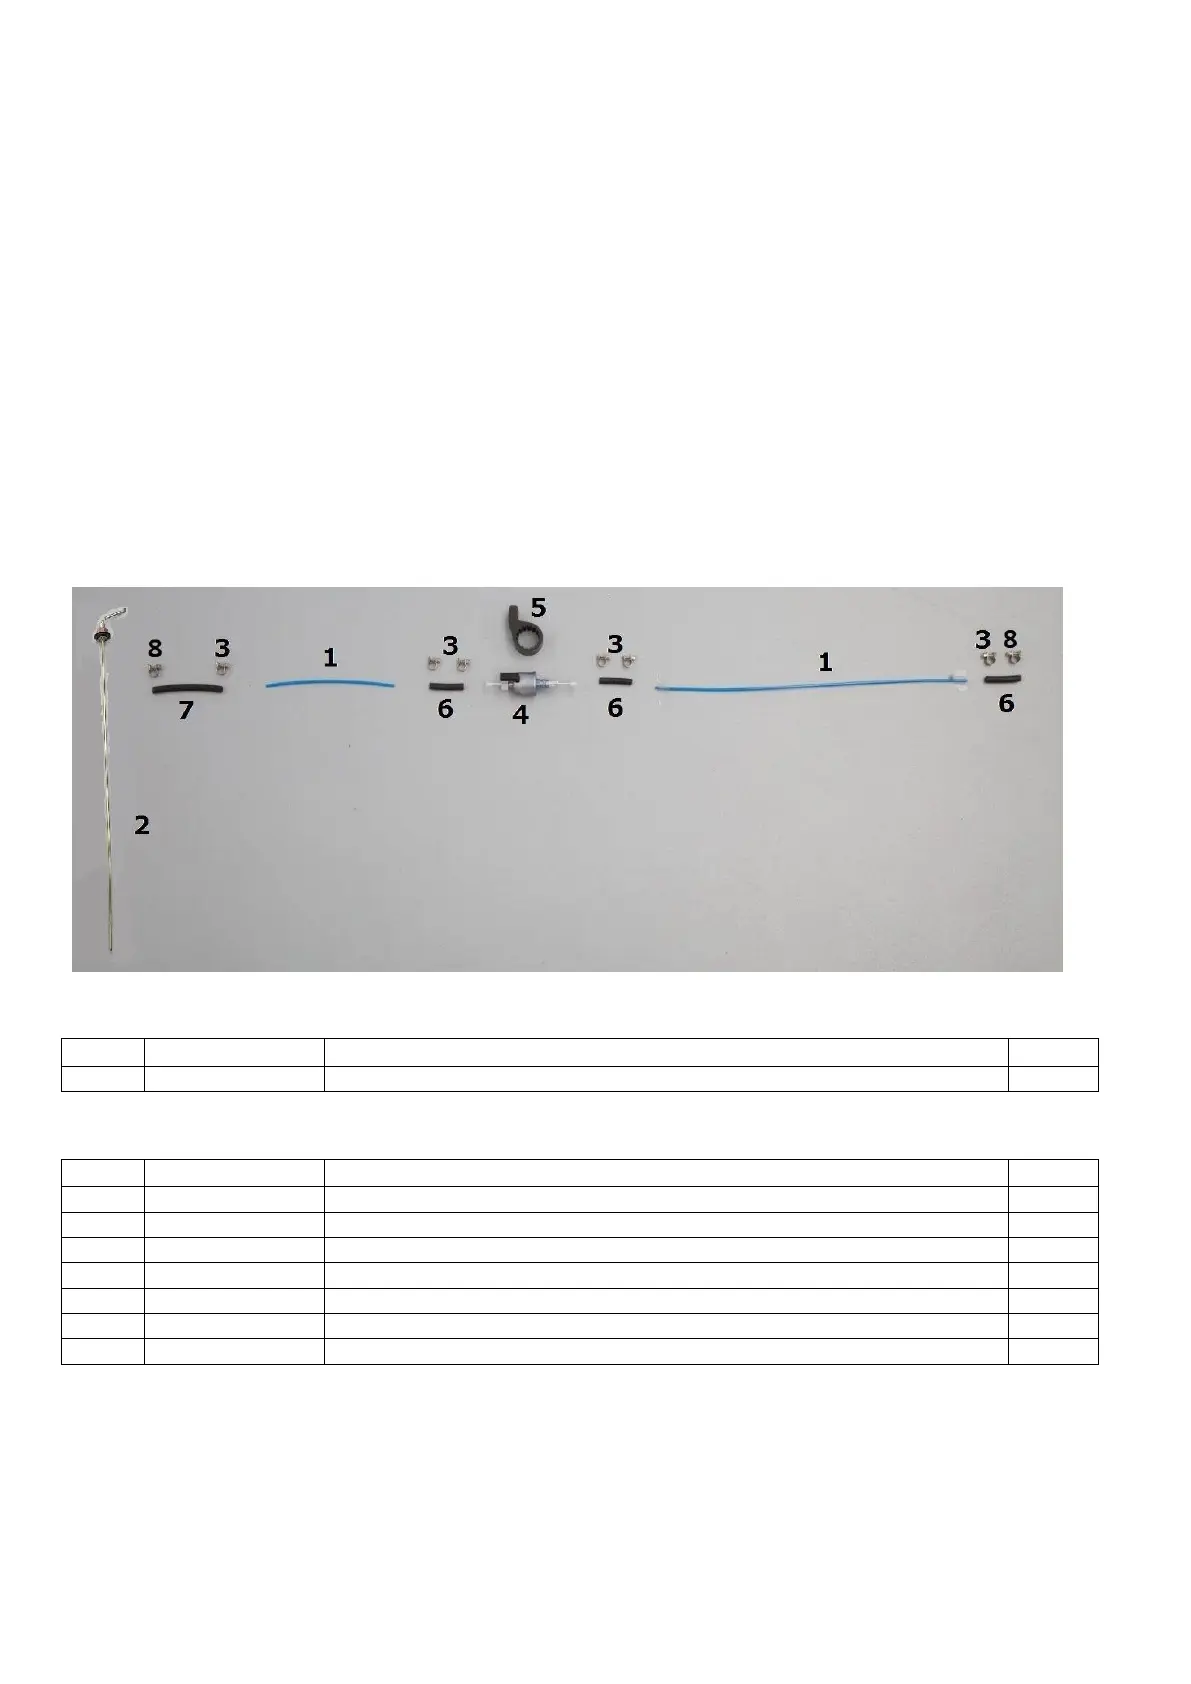
2.4.1 Components list
2.4.2 Mounting instruction
1. Mount the 600mm dip tube provided (1) on the upper part of the tank or any predisposition of
the float / fuel pump. Drill with 18mm bit paying attention that the plastic shavings do not fall
inside the tank. Check that the height of the dip tube is correct. For no reason should it go
beyond 5cm from the bottom of the tank in order to leave in any case a sufficient quantity of