EasyManua.ls Logo

Mocka Aspen Cot User Manual

Mocka Aspen Cot
5 pages
To Next Page IconTo Next Page
Page #1 background imageLoading...
Page #1 background image
Flathead screwdriver required
Hardware Supplied
WARNING: TO PREVENT FALLS, THE MATTRESS BASE OF THIS COT SHOULD
BE ADJUSTED TO THE LOWEST POSITION BEFORE THE CHILD CAN SIT UP.
A
8x
bolt
B
16x
bolt
C
8x
bolt
D
8x
nut
E
8x
dowel
F
1x
allen key
Ensure the cot is placed at a reasonable distance from curtains, blinds, heaters and power points.
Keep all medications, string, elastic, small toys or small items, such as money, out of reach from
any position in the cot.
Assembly
Care must be taken when attaching sides. Do not over-tighten screws as this can cause damage
to the cot.
Care and Maintenance
Regularly check all screws for tightness or damage that could render the cot unsafe.
To clean - use a damp cloth, avoiding the use of detergents or abrasives.
Recommended mattress size
This cot has been manufactured for use with a mattress which measures 1300mm long x 690mm
wide x 100mm in thickness. The width and length are specified because it is important that gaps
between the mattress and the sides and ends of the cot will not exceed 40mm. This is to minimize
the risk of a child’s limb becoming caught in the gap. The thickness of the mattress has been
specified to ensure that the depth of the cot is greater than 500mm with the mattress base in the
lower positio
n to minimize the risk of a child climbing or falling out of the cot.
1
mocka.co.nz | mocka.com.au | PO BOX 6171, Maroochydore, QLD, 4558
Aspen Cot
Assembly Instructions
Thank you for your purchase.
Please follow the manufacturers assembly instructions in detail
to ensure the safety features of the cot are not compromised.
Question and Answer IconNeed help?

Do you have a question about the Mocka Aspen Cot and is the answer not in the manual?

Mocka Aspen Cot Specifications

General IconGeneral
TypeCot
Mattress IncludedNo
Assembly RequiredYes
Mattress Size130cm x 70cm
External Width75cm
External Length135cm
Height85cm
ColorWhite

Summary

Aspen Cot Assembly and Safety Information

Hardware Supplied

Lists the components provided for assembling the cot, including bolts, nuts, dowels, and an allen key.

Safety and Placement Guidelines

Advises on safe placement of the cot away from hazards and keeping small items out of reach.

Assembly Precautions

Cautionary note regarding careful attachment of sides and avoiding over-tightening screws.

Care and Maintenance

Instructions for regular checks of screws and cleaning methods using a damp cloth.

Recommended Mattress Size

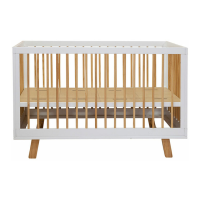
Specifies the required mattress dimensions for safety, gap minimization, and cot depth.

Critical Safety Warning: Mattress Base Position

Urgent warning to prevent falls by keeping the mattress base at the lowest position.

Cot Assembly Steps

Step 1: Initial Panel Assembly

Assembling base panels using dowels and bolts, attaching side panels to a central panel.

Step 2: Attaching Side Panels

Securing side panels to a frame panel using nuts and bolts, requiring a screwdriver for alignment.

Step 3: Attaching First Side Rail

Connecting a side rail panel to the main frame using bolts, ensuring proper tightening.

Step 4: Attaching Second Side Rail

Attaching another side rail panel to the frame using bolts, ensuring all connections are secure.

Step 5: Installing Mattress Base

Fitting the mattress base panels into the cot structure using bolts.

Step 6: Securing Mattress Base

Final attachment of the mattress base panels to the cot frame using bolts.

Step 7: Final Assembly Check

Confirmation that all screws are tightened and the cot is ready for mattress placement.

Step 8: Optional Mattress Base Adjustment

Instructions for adjusting the mattress base height by repositioning panels.

Related product manuals