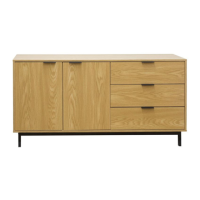
The provided manual details the assembly and adjustment of the Sadie Buffet, a piece of furniture designed for storage and display.
Function Description
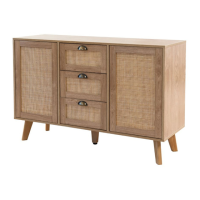
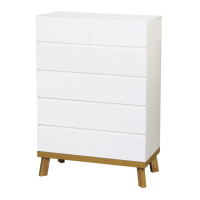
The Sadie Buffet serves as a versatile storage unit, likely intended for living rooms, dining areas, or hallways. It features a combination of enclosed storage with doors and drawers, as well as open shelf space, offering flexible options for organizing various items. The design suggests a modern aesthetic, suitable for contemporary home interiors. Its primary function is to provide organized storage, help declutter spaces, and offer a surface for decorative items. The inclusion of a wall strap indicates a focus on safety, preventing the furniture from tipping over, especially in households with children or in earthquake-prone areas.
Important Technical Specifications
Based on the panel layout and hardware list, the Sadie Buffet is constructed from various panels and utilizes a range of fasteners and fittings.
Panel Components:
- Top Panel (1): 1 unit
- Bottom Panel (2): 1 unit
- Shelf Panel (3): 1 unit
- Left Side Panel (4): 1 unit
- Right Side Panel (5): 1 unit
- Dividers (6, 7, 8): 1 unit each, totaling 3 dividers
- Back Panel (10): 1 unit
- Shelf Panel (11): 1 unit
- Door (12): 1 unit
- Drawer Fronts (13, 14): 1 unit each, totaling 2 drawer fronts
- Rails (9, 15, 20, 21, 22): Multiple units for structural support and drawer/door mechanisms. Specifically, 2 units of Rail (9), 1 unit of Rail (15), 2 units of Rail (20), 2 units of Rail (21), and 2 units of Rail (22).
- Left Drawer Side (16): 2 units
- Right Drawer Side (17): 2 units
- Drawer Back (18): 2 units
- Drawer Base (19): 2 units
Hardware Components:
The assembly requires a comprehensive set of hardware, categorized for clarity:
-
Fasteners:
- Bolt (A): 48 units. Used extensively throughout the assembly for connecting panels.
- Locking Nut (B): 48 units. Paired with bolts (A) for secure panel connections.
- Dowel (C): 20 units. Wooden dowels for alignment and additional structural integrity.
- Small Screw (D): 24 units. Used for various smaller attachments, particularly for drawer slides.
- Screw (E): 8 units. General purpose screws.
- Long Screw (F): 10 units. Longer screws for specific panel connections.
- Hinge Screw (H): 12 units. Specifically for attaching hinges.
-
Drawer/Door Mechanisms:
- Slide Rail (CL): 2 units. For the left side of a drawer.
- Slide Rail (CR): 2 units. For the right side of a drawer.
- Slide Rail (DL): 2 units. For the left side of a drawer.
- Slide Rail (DR): 2 units. For the right side of a drawer.
- Hinge (G): 2 units. For the door.
-
Support/Stabilization:
- Wedge (K): 10 units. Likely used for leveling or securing panels.
- Screw (L): 10 units. General purpose screws.
- Shelf Plug (M): 4 units. For supporting shelves.
- Plastic Glide (N): 8 units. For the base of the buffet, allowing for easier movement and protecting floors.
-
Wall Strap (Safety):
- Safety Strap (V): 2 units. For anchoring the buffet to a wall.
- Screw (W): 2 units. For attaching the safety strap.
- Wall Anchor (X): 2 units. For securing the safety strap to the wall.
- Wall Screw (Y): 2 units. For securing the safety strap to the wall.
- Washer (Z): 4 units. For use with screws, likely for the safety strap.
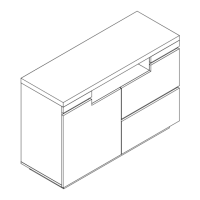
The buffet appears to have one door and two drawers, along with internal shelving, based on the part list. The dimensions are not explicitly stated but can be inferred from the number and type of panels. The use of locking nuts and bolts suggests a sturdy construction method.
Usage Features
The Sadie Buffet is designed for practical use in a home environment.
- Storage Versatility: It offers a mix of storage options:
- Enclosed Cabinet: One door (12) provides a concealed space, ideal for items that need to be kept out of sight or protected from dust.
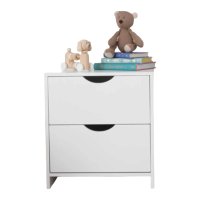
- Drawers: Two drawers (with fronts 13 and 14, sides 16 and 17, back 18, and base 19) offer organized storage for smaller items, linens, or cutlery. The slide rails (CL, CR, DL, DR) ensure smooth operation of the drawers.
- Shelving: Internal shelf panels (3, 11) provide adjustable or fixed open storage, suitable for books, decorative objects, or media devices. The shelf plugs (M) allow for easy installation of shelves.
- Mobility: Plastic glides (N) on the base facilitate easier movement of the buffet, preventing scratches on floors and simplifying repositioning.
- Safety: The inclusion of a wall strap (V) is a crucial safety feature. It is designed to prevent the furniture from tipping over, which is particularly important in homes with children or in regions prone to earthquakes. The manual explicitly warns about the tipping hazard and strongly recommends using the provided wall anchor.
- Aesthetics: While not explicitly detailed, the "Sadie Buffet" name and typical buffet designs suggest a piece of furniture that contributes to the aesthetic appeal of a room, often serving as a focal point or a complementary element to existing decor.
Maintenance Features
The manual primarily focuses on assembly and initial setup, but some aspects relate to maintenance and longevity:
- Adjustable Hinges: The manual provides detailed instructions for adjusting the hinges to align the doors. This is a key maintenance feature, as doors can become misaligned over time due to settling, frequent use, or minor impacts. The three adjustment steps cover:
- Upward/Downward Adjustment: Loosening and tightening screws in oval and round holes to adjust the door's vertical position.
- Flush Adjustment: Adjusting a screw to ensure the door panel is flush with the side panel, preventing gaps or protrusions.
- Gap Adjustment: Adjusting a screw to control the gap between the door panel and the side panel, ensuring even spacing.
These adjustments help maintain the buffet's appearance and functionality, ensuring doors close properly and look aesthetically pleasing.
- Durability of Construction: The use of bolts, locking nuts, and dowels indicates a design intended for a reasonably sturdy and durable structure. Proper assembly, as guided by the instructions, is crucial for maximizing the furniture's lifespan.
- Wall Anchoring: While a safety feature, the wall strap also contributes to the furniture's long-term stability by preventing accidental tipping, which could otherwise damage the buffet itself or surrounding items. The recommendation to seek advice from a qualified tradesperson for attaching the safety strap to specific wall types highlights the importance of correct installation for effective maintenance of stability.
- Cleaning: Although not explicitly mentioned, typical furniture maintenance would involve regular cleaning with appropriate products to preserve the finish and appearance of the buffet.
- Assembly Tools: The manual recommends Phillips and Flathead screwdrivers, a hammer, and optionally a power drill on a low-speed setting for quicker assembly. Having the right tools for assembly and adjustments is essential for proper maintenance and repair if needed.
In summary, the Sadie Buffet is a functional and aesthetically pleasing storage solution with a strong emphasis on safety through its wall-anchoring mechanism. Its design incorporates adjustable features for long-term usability and appearance, making it a practical addition to various home settings.