EasyManua.ls Logo

Mocka Savannah Buffet - User Manual

Mocka Savannah Buffet
12 pages
Print Icon
To Next Page IconTo Next Page
Loading...
Savannah Buffet
Assembly Instructions
Thank you for your purchase.
Please follow the instructions below for correct assembly.
mocka.co.nz | mocka.com.au | PO BOX 6171, Maroochydore, QLD, 4558
1
use of a power drill on a low-speed setting.
A B
Ha rdware Supplied
x8 x20
C
Phillips screwdriver
D E
x20 x20x58
F
x22 x5
G
dowel
brace
foot support beam hinge guide
rail rail handle
small
screw screw
allen
key
screw
locking
nut
bolt
small
screw
medium
screw
plate
x12
K
O
x
3
T
x
S
x
M
x
N
x
U
x
P
x
6
Maximum Weight 10kgs
WARNING: Any furniture that is not anchored to a wall
has the potential to tip over in certain circumstances, ie. if a
child attempts to climb on the furniture or in the event
of an earthquake. Accordingly, we recommend that all
furniture is anchored to a wall. We supply a free safety wall
anchor with all furniture sold and we recommend these are
used to prevent your product tipping. The fixing device
provided should fit most wall types, but please note that
different wall materials may require different fixing devices
from those supplied.
H
x4
I
J
x2
x14
L
Wall
attachment
washer
strap
wall anchor
x2
wall screw
x1
Q
x10
R
Y
W
x4
x
8
Question and Answer IconNeed help?

Do you have a question about the Mocka Savannah Buffet and is the answer not in the manual?

Summary

Savannah Buffet Assembly Overview

Hardware Identification and Tools

Lists all components and quantities required for assembly and identifies necessary tools.

Safety Precautions and Anchoring

Crucial safety advice on anchoring the furniture to prevent tipping hazards.

Main Cabinet Assembly

Step 1: Attach Base Panel

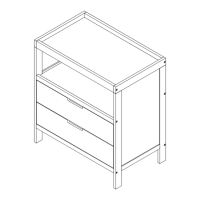
Secure the base panel [1] using 8 x bolts (D).

Step 2: Install Supports and Beams

Attach supports (T) to panels [9] and [10], and secure with screws (E) and beams (U).

Step 3 & 4: Attach Drawer Rails

Mount drawer rails (M) to panels [9] and [10] using screws (E).

Step 5: Assemble Cabinet Body

Connect panels [2], [9], [10], [3] to panel [1] using locking nuts (C).

Step 6: Insert Back Panels

Slide panels [4] into the assembled cabinet frame.

Step 7: Attach Side and Base Fittings

Insert dowels (A) and attach panel [5] with screws (B) to side panels.

Step 8: Mount Legs and Feet

Assemble legs [6] and [7] with plates (G), screws (Q), and attach foot (S).

Step 9: Secure Legs to Cabinet Base

Fasten legs [6] and [7] to panel [5] using 20 x screws (F).

Step 10: Install Rear Braces

Attach 12 x braces (K) to the back of the frame using 12 x screws (L).

Drawer and Door Assembly

Step 11: Install Drawer Guides

Insert drawer guides (W) and slide panel [8] into the frame.

Step 12: Attach Hinges to Door Panel

Attach hinges (Y) to panel [11] using 4 x screws (E).

Step 13 & 14: Mount Door Panels

Attach panel [11] to the assembled frame using 8 x screws (E) for each door.

Step 15: Construct Drawer Boxes

Assemble drawer components: rails (M,N), bolts (D), panels [12,13,14].

Step 16: Fit Drawer Hardware

Slide panel [15], attach handle (O) to [16], and secure [16] with nuts (C).

Step 17: Insert Drawers

Slide the completed drawers into their positions in the cabinet.

Final Assembly and Safety Anchoring

Step 18: Attach Anti-Tip Straps

Secure 2 x wall straps (J) to the back frame using washers (H) and screws (L).

Step 19: Secure Unit to Wall

Fasten the safety strap (J) to the wall using anchor (I), screw (B), and washer (H).

Step 20: Final Inspection

Check unit balance and stability before putting it into use.

Mocka Savannah Buffet Specifications

General IconGeneral
BrandMocka
ModelSavannah Buffet
CategoryIndoor Furnishing
LanguageEnglish

Related product manuals