EasyManua.ls Logo

Mocka Parker Buffet User Manual

Mocka Parker Buffet
7 pages
To Next Page IconTo Next Page
Page #1 background imageLoading...
Page #1 background image
WARNING: Any furniture that is not anchored to a wall has the potential to tip over in certain
circumstances, i.e. if a child attempts to climb up on the furniture or in the event of an
earthquake. Accordingly, we recommend that all furniture is anchored to a wall. We supply a
free safety wall anchor with all furniture sold and we recommend these are used to prevent
your product tipping. The fixing device provided should fit most wall types, but please note
that different wall materials may require different fixing devices from those supplied.
Phillips & Flathead screwdrivers and hammer required
*We recommend using a Flathead screwdriver to tighten all locking nuts 100% before first use.
Please clear any loose wood from the locking nut holes before inserting the nut to ensure it locks 100%.
For quicker assembly, we recommend the
use of a power drill on a low-speed setting.
A B1
B2 C1
D
E
F
G
KI
J
Hardware Supplied
50mm
screw x8
30mm
screw x12
bolt &
nut x16
14mm
screw x24
hinge
x4
wall
anchor x2
wall
strap x2
dowel
x16
shelf
plug x8
wedge
x10
C2
18mm
screw x10
H
nail
x4
25mm
screw x2
14mm
screw x2
L
Parker Buffet
1
mocka.co.nz | mocka.com.au
Assembly Instructions
Thank you for your purchase.
Please follow the instructions below for correct assembly.
Question and Answer IconNeed help?

Do you have a question about the Mocka Parker Buffet and is the answer not in the manual?

Mocka Parker Buffet Specifications

General IconGeneral
TypeBuffet
Number of Drawers2
Assembly RequiredYes
ColorWhite
Dimensions120cm x 45cm x 85cm

Summary

Parker Buffet Assembly Instructions

General Safety Warning

Highlights the risk of furniture tipping and recommends wall anchoring.

Required Tools and Assembly Tips

Lists necessary tools and provides advice for efficient assembly.

Assembly Steps

Step 1: Assemble Leg Panels

Attach leg panels together using 8x 50mm screws (B1).

Step 2: Attach Main Panels

Connect panel [2] to leg panels with 12x 30mm screws (B2) and insert 6x bolts (A).

Step 3: Attach Shelf and Side Panels

Connect panels [3] and [5] to panel [6] using dowels (F) and nuts/bolts (A).

Step 4: Attach Additional Panels

Join panels [3], [5], and [4] using dowels (F) and locking nuts (A).

Step 5: Install Back Panel

Slide panel [7] into grooves between panels [3] and [4] to form the back.

Step 6: Insert Top Panel Bolts

Insert 6x bolts (A) into panel [1].

Step 7: Secure Top Panel

Attach panel [1] to panels [3], [5], and [4] using dowels (F) and nuts (A).

Step 8: Insert Shelf Plugs

Place 8x shelf plugs (D) into panels [5] at desired shelf heights.

Step 9: Install Shelf Panels

Rest shelf panels [10] on top of the shelf plugs (D).

Step 10: Attach Doors

Attach doors [8] and [9] using hinges (H, G) and screws (C1).

Step 11: Secure Internal Structure

Secure panel [7] with nails (H) and attach wedges with screws (C) to panel [8].

Safety Straps Installation

Step 12: Attach Wall Safety Straps

Secure 2x wall straps (L) to the unit and fasten to the wall using anchors (K) and screws (I, J).
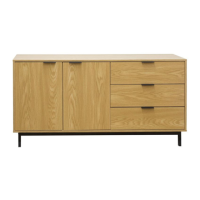
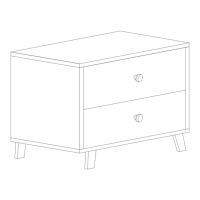
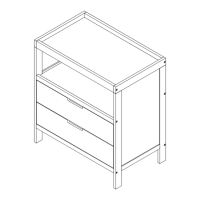
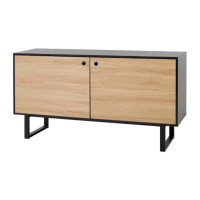
Related product manuals