EasyManua.ls Logo

Mocka Blake Series User Manual

Mocka Blake Series
6 pages
To Next Page IconTo Next Page
Page #1 background imageLoading...
Page #1 background image
Blake Console Table
Assembly Instructions
Thank you for your purchase.
Please follow the instructions below for correct assembly.
mocka.co.nz | mocka.com.au | PO BOX 6171, Maroochydore BC, QLD, 4558
1
WARNING: Any furniture that is not anchored to a wall has the potential to tip over in certain
circumstances, i.e. if a child attempts to climb up on the furniture or in the event of an earthquake.
Accordingly, we recommend that all furniture is anchored to a wall. We supply a free safety wall anchor
with all furniture sold and we recommend these are used to prevent your product tipping. The fixing device
provided should fit most wall types, but please note that different wall materials may require different fixing
devices from those supplied.
Phillips & Flathead screwdrivers required.
For quicker assembly, we recommend the
use of a power drill on a low-speed setting.
A B
C D E F G
H
I
Hardware Supplied
x4
x4
wheel
wheel
dowel
x12
bolt
x6
locking
nut x6
small
x32
screw
wedge
x4
K
J
screw
x4
L
M
bolt
x8
Wall Strap
x2
washer
Z
Y
wall
anchor
x1
X
safety
strap x1
WV
screw
x1
wall
screw
x1
N
screw
x6
felt pad
x4
spring
washer
x8
washer
x8
allen
key
x1
Question and Answer IconNeed help?

Do you have a question about the Mocka Blake Series and is the answer not in the manual?

Mocka Blake Series Specifications

General IconGeneral
CategoryIndoor Furnishing
BrandMocka
StyleModern
SeriesBlake
MaterialVarious (dependent on specific product in series, examples: MDF, Particle Board, Metal, Fabric)
ColorVarious (dependent on specific product in series)

Summary

Blake Console Table: Introduction and Safety

Hardware and Tools Overview

Lists all supplied components and necessary tools for assembly.

Important Safety Warning: Furniture Anchoring

Highlights the risk of tipping and the necessity of wall anchoring for stability.

Step 1: Base Panel Preparation

Insert Dowels (A) and Bolts (C) into Panel [1]

Attaching dowels and bolts to the main base panel as the first assembly stage.

Step 2: Attach Wheels to Side Panels

Secure Wheels (G, H) to Panels [7] and [8]

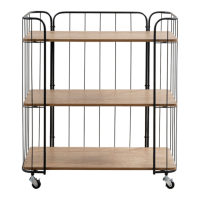
Fastening wheels to the side panels using small screws (E).

Step 3: Assemble Main Frame

Attach Side and Divider Panels to Base

Connecting side panels [2],[3] and divider panel [5] to the base panel [1] using locking nuts (D).

Step 4: Install Back Panel

Slide Back Panel [6] into Grooves

Inserting the back panel [6] into the grooves of the assembled frame to form the unit's back.

Step 5: Attach Top Panel

Insert Dowels (A) and Secure Top Panel [4]

Inserting dowels into side panels and securing the top panel [4] with screws (N).

Step 6: Attach Legs and Felt Pads

Secure Legs [9] with Hardware

Attaching legs [9] to panel [4] using washers (B), spring washers (L), and bolts (M), then applying felt pads (K).

Step 7: Install Doors

Attach Door Panels [7] and [8]

Fitting the doors [7] and [8] onto the unit, ensuring proper clip engagement for smooth operation.

Step 8: Secure Back and Attach Safety Strap

Install Wedges (I) and Safety Strap (V)

Securing the back with wedges (I) and screws (J), and attaching the safety strap (V) to the unit's back.

Step 9: Final Wall Anchoring

Fasten Safety Strap to Wall

Securing the safety strap (V) to the wall using a washer (Z), wall anchor (X), and wall screw (Y) for stability.

Related product manuals