2. Center Keel Assembly
The first step in constructing the hull is
to assemble the laser-cut center keel.
With a sharp pencil, mark the reference
line and bulkhead stations on both sides
of the center keel. Be especially critical
when locating the reference line; it is a
key to proper alignment. Measure from
several points on the plans.
Lay a sheet of waxed paper or plastic wrap
over a flat building board or table, and
place the center keel halves on top. Affix
the joints with white or woodworker’s
glue. Use a steel or aluminum straightedge
to align the reference line. If necessary, add
weights to hold down the parts. Let the
adhesive dry at least overnight, preferably
24 hours (Figure 1-1).
3. Installing the Sternpost
The keel and stem are part of the center
keel, but the sternpost is a separate
piece. Taper the sternpost per the plans
and glue in position.
Option: Cut the rabbet before installing
the sternpost
.
4. Cutting the Rabbet
Measuring from the P-O-B plans, mark
the rabbet and bearding lines on both
sides of the center keel with a pencil. At
the stern and bow, cut a 1/16” deep rab-
bet with a hobby knife. Now, using a
1/8” wide chisel, start at the bearding
line and cut toward the rabbet. The
1/16” thick hull planking must lie flush
against this cut area. Figure 1-2 shows
how the rabbet changes at midship. To
help judge the angle of the rabbet, posi-
tion a scrap piece of plank against the
keel as you cut.
5. Tapering the Stem
Taper the stem according to the plans.
6. Installing the Bulkheads
Laser
-cut bulkheads include timber
-
heads. These extend above the deck to
form bulwark stanchions. Compare the
bulkheads with the patterns on Sheet 1,
determine which is which, and label
them
A through O. Test each to make
sure it slides into the center keel slots.
If the fit is too tight, sand the slots.
Bulkheads should fit snugly with a little
tolerance for glue.
Using a pencil, mark the r
efer
ence line
on every bulkhead. It must align with
the reference line on the center keel.
This assur
es an accurate hull with each
bulkhead correctly related to the others.
Next, use a tick strip to transfer the
bevels from the plans to the bulkheads.
Mark them in pencil. Cut the bevels
with a #1
1 hobby blade (Figur
e 1-3).
Deck bevels and side bevels near amid-
ships are diminutive. Barely perceptible
ones ar
e sanded in after the bulkheads
are installed.
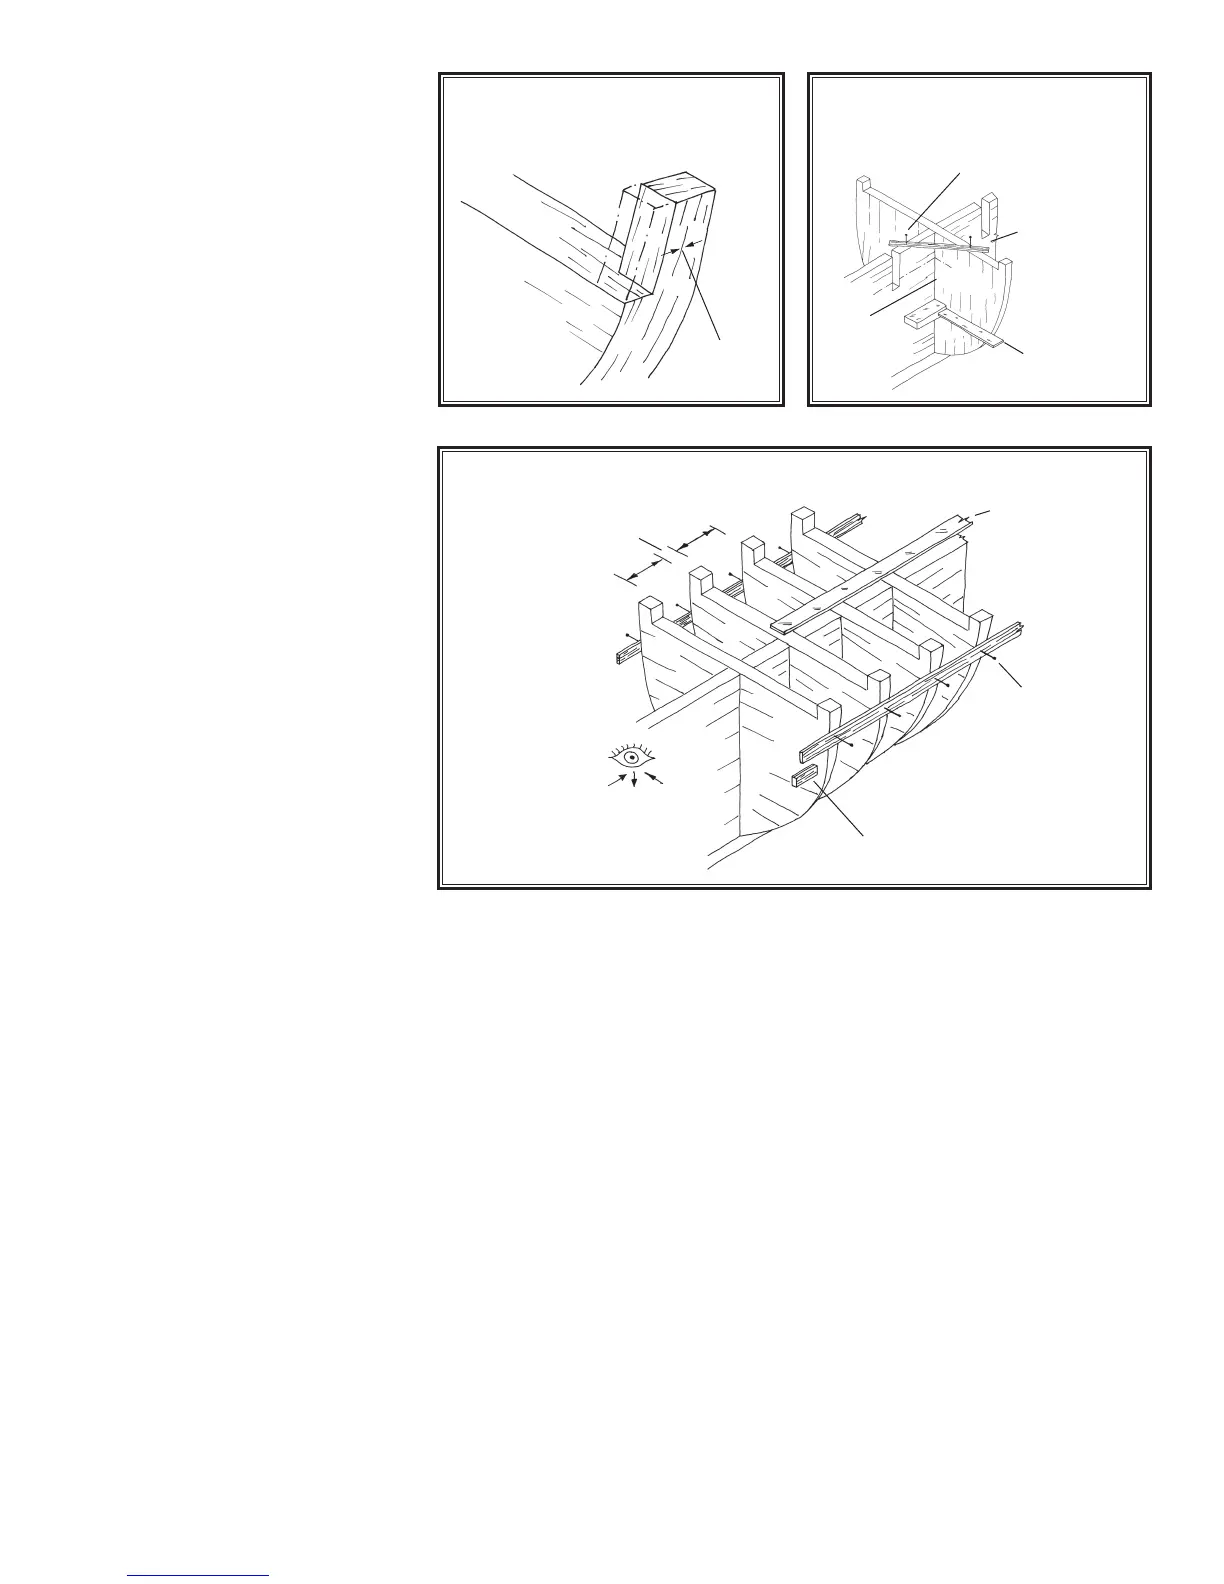
Bulwark stanchion extensions: Bulkheads
are 3/16” thick, but the stanchion exten-
sions should be 1/8”, so cut them back
(Figur
e 1-4). Stanchions between bulk
-
heads are added in Step 14.
Glue the bulkheads in place. Make sur
e
their reference lines match the one on
the center keel. Use a small machinist
square to set each bulkhead perpendicu-
lar to the center keel, then tack or tape a
temporary strip to the top of the bulk-
head to hold it in place while the glue
dries (Figure 1-5).
Model Expo sells the Fair
-A-Frame
Building Slip (Ms 105), a device that
holds the center keel steady and bulk-
heads perpendicular to it. Purchase it
separately.
Once the bulkheads ar
e installed, tack or
tape a temporary batten to the sides of
the hull just below the deck (Figure 1-6).
This is a critical step. Measur
e the spac
-
ing between each port and starboard
bulkhead and r
etack the battens until the
hull is aligned. Although the center keel
was assembled flat, it could warp and
produce a banana-shaped hull. When it
looks corr
ect, check it again.
Option: When the hull is aligned, add
permanent str
uts between bulkheads
close to the exterior, then remove the
battens. Now examine the bottom of
11
Cut to 1/8”
Fig. 1-4 Forming Bulwark
Stanchions
Fig. 1-5 Gluing Bulkheads
to Center Keel
Pin or Tape
Temporary
Wood Strip
Square
Glue
Fig. 1-6 Temporary Battens for Hull Alignment
Check Spacings
Check Keel With
Straight Edge
Tack Temporary
Strip Both Sides
Optional Permanent Strut
Between Bulkheads
Check Alignment Visually in
All Directions