4. Spiling
Edge-bending planks on real ships is
done on a limited basis. Wood is rigid, so
many planks must be cut to shape.
Spiling (Figur
e 2-3) is simply a matter of
transferring curves to a straight plank,
then sawing them out. The planking lay-
out shows the required stealers. In most
cases, the basswood strips are flexible
enough to edge-bend in place.
5. Fastening the Planks
Some fancy, commercial plank clamps
are more trouble than they are worth.
Those that screw into the edge of bulk-
heads leave a big hole to contend with
when installing subsequent planks. It’s
best to hold or pin short planks in
place. Be careful not to split the plank
with the pins. If necessary, drill a pilot
hole first. Smear a light film of white or
woodworker’s glue along the edge of
the plank with your finger, then touch
each bulkhead with thin cyano to
quickly affix the plank. Be careful not
to glue your fingers to the model.
While glue alone will secure the
planks, small brass brads or wooden
treenails provide additional holding
power and duplicate shipwright prac-
tice. If using brads, cut off and discard
the heads, then hammer in. Treenails
are commercially available, but making
your own is easy. Buy a package of
long bamboo skewers, strip off short
lengths, and pull through a drawplate
to the desired diameter. Drill holes
through the plank into the bulkhead,
dip the treenail in white or yellow
glue, and drive in place.
Another alter-
native is to whittle flat toothpicks
(round ones don’t work as well) to a
point. Place the entire toothpick in the
hole, rap sharply with a 10-inch bastard
file, and break off the remaining por-
tion. A file works better than a hammer,
because its serrated surface catches and
firmly holds the head of the toothpick,
permitting it to be driven in tightly.
Exterior stubble is dressed and sanded
smooth when treenailing is completed.
6. Planking the Outer Hull
Belt Layout: Now the fun begins! The
hull, bow to stern, is divided into even
spaces from the main rail down to the
top of the wale. Rails and wale line are
preset lines that cannot be modified.
Notice on the plans that planks are nar-
rower forward than they are amidships
and aft. Although this is how they
appear on the real ship, wider planks
could be used forward on the model.
13
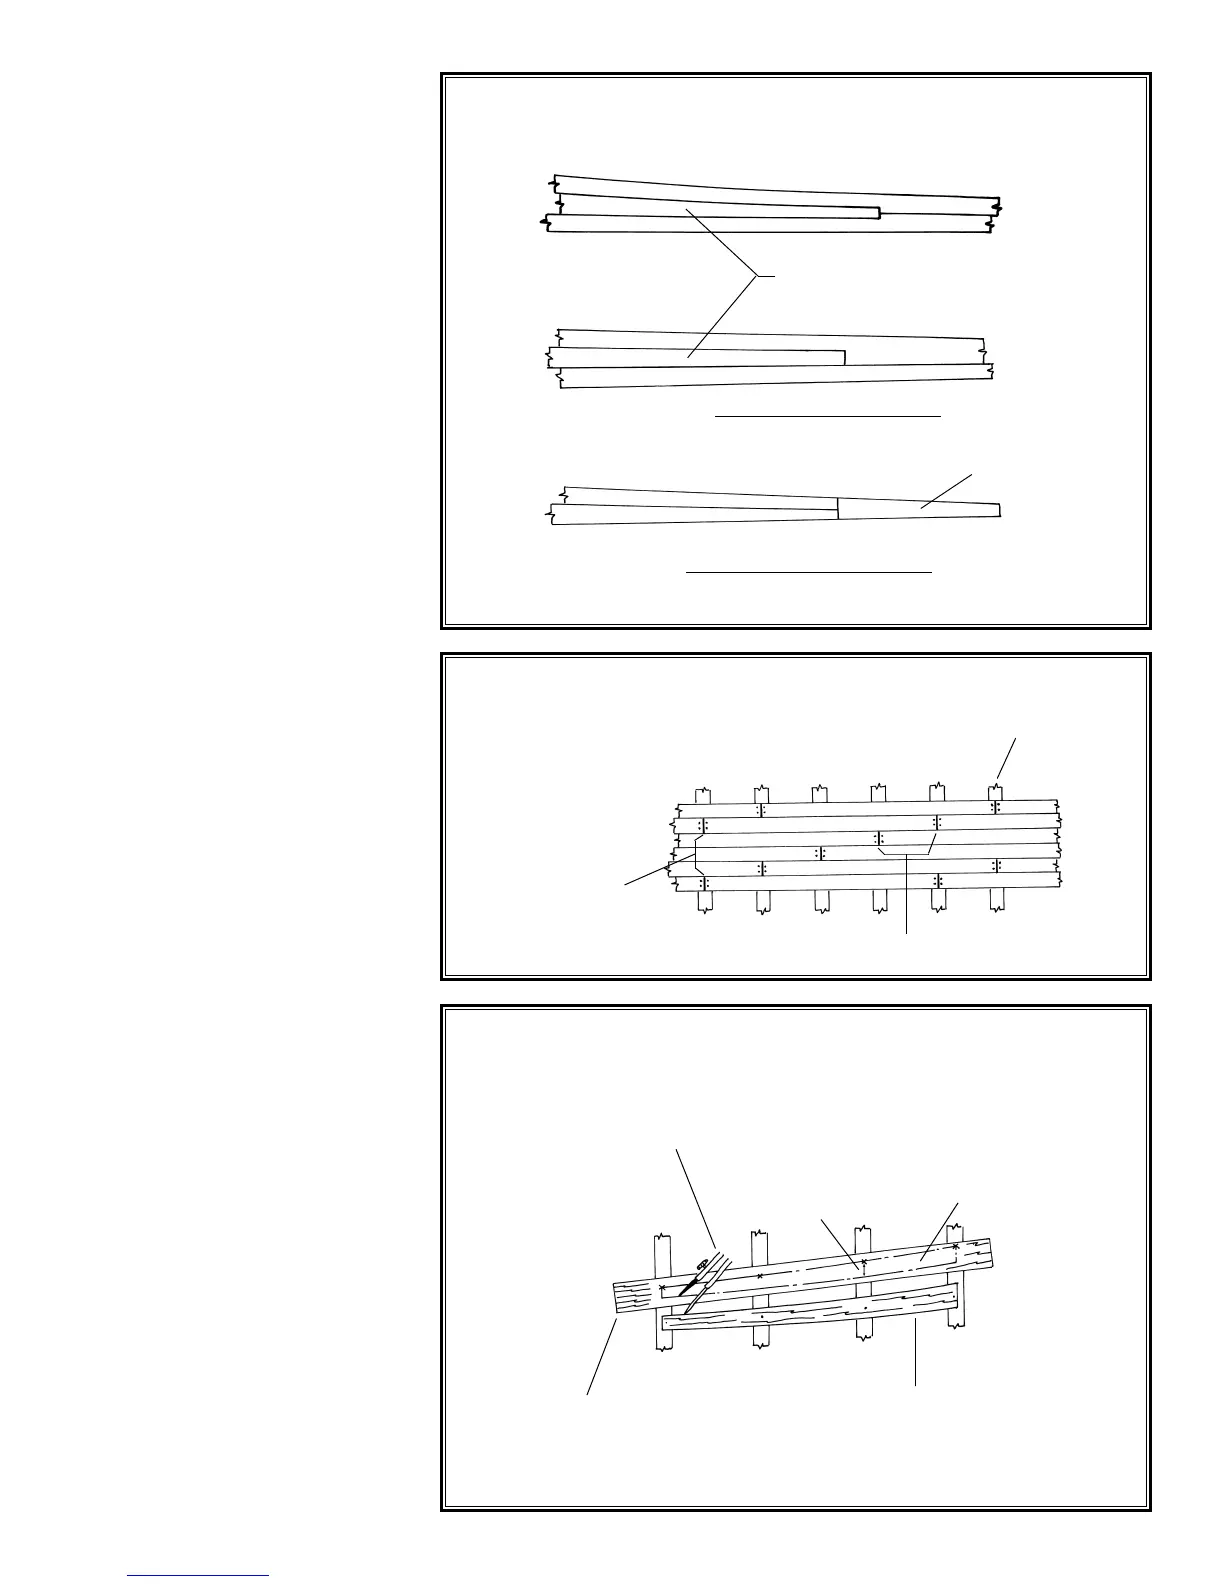
Fig. 2-1 Planking Shown Using Stealer Inserts
Stealer
A. Planks getting too wide
B. Planks getting too narrow
Single plank insert
Fig. 2-2 Staggering the Planking Butts
Real ship: Must have 3 strakes
between butts on same frame
(model meets rule with plank
length selected)
Bulkhead
Real ship must be 5' or more (model meets rule)
Fig. 2-3 Spiling the Planks When Edge
Bending Cannot be Accomplished
1. Plank already in place
2. Wood: lay along bulkheads
without edge bending
3. Use compass–run steel point along plank in place and
mark parallel line on new plank with pencil end
4. Measure width and
mark, draw curve
Cut out plank
 Loading...


