Forward Cubbridge Head
bulkhead in position
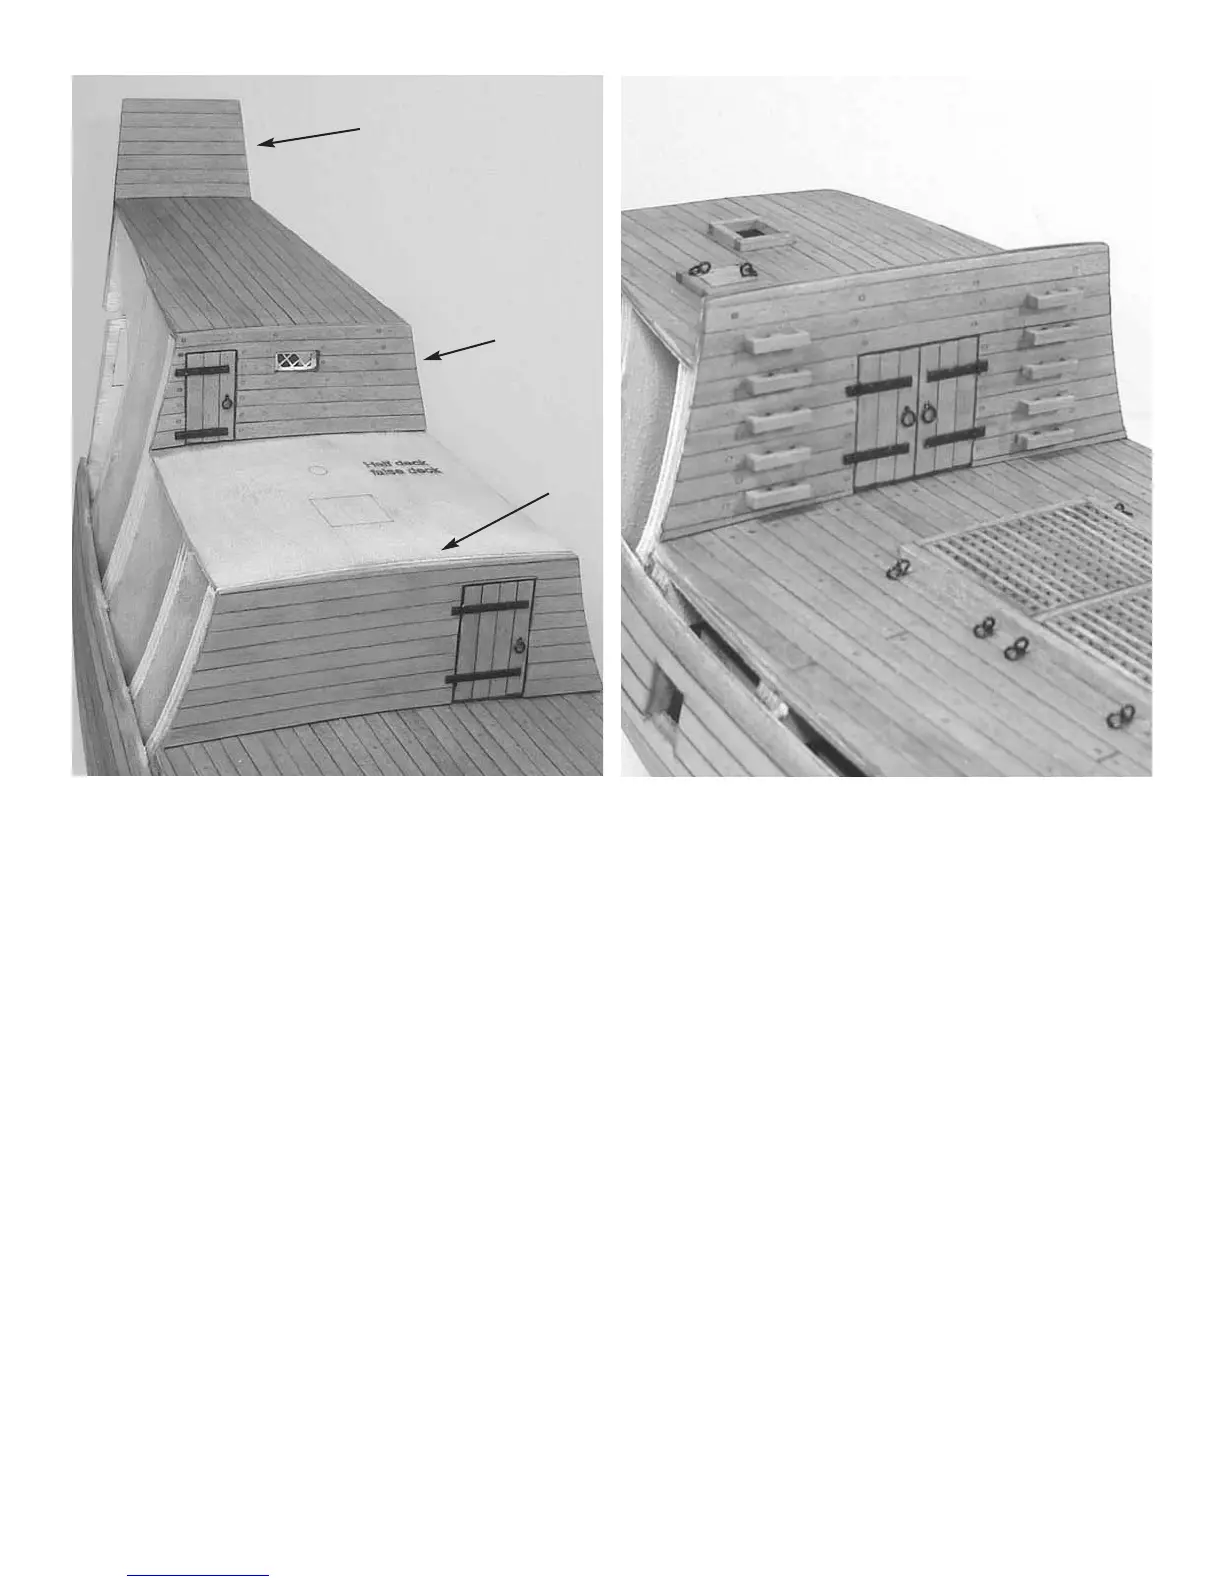
Poop
Bulkhead
Stern Transom
planked inboard
only
Great Cabin
Bulkhead
13
The last bulkhead to address in this step is the STERN TRAN-
SOM. This bulkhead has no details and is pretty straight for-
ward. The outboard side of this bulkhead should NOT be
planked at this time. Simply glue it to the outside of stern piece
(XX). The bottom of the transom should be flush with the bot-
tom of stern piece (XX). It will extend well above the deck
level so be careful not to break it. Plank the inboard side of this
bulkhead instead after you glue it into position. Use 1/8” x
1/32” strips. Sand the bulkhead flush with the sides of the hull
afterwards. NOTE: All of the bulkheads are provided slightly
oversized. This will leave enough room for you to sand them
flush with the sides of the hull after you glue them into place.
When all of the bulkheads are completed you can glue them onto
the model. See the photos showing the four bulkheads glued
onto the model.
Planking and detailing the
bulwark templates…
It is now a good time to plank and install the two bulwark tem-
plates. The bulwark templates are laser cut for you. They are
1/32” thick. Plank the inboard side of each bulwark before you
glue them onto the hull. Start by planking (1/32” x 1/8” strips)
them from the bottom edge of the template upward. This edge
creates the correct run for all of the planking from bow to stern.
There is no need to treenail or stagger the planks inboard. These
features will be added when the outside of the hull is planked
later. However, you may want to simulate the caulking between
each plank as suggested earlier. You can run each strake in one
continuous length across the templates. The two windows (port
and starboard) can be completed using the same techniques
described for the poop bulkhead. You can see them in the photo
on the next page. Both were glued to the inboard side of the bul-
warks after the planking was sanded and stained.
That photo on the next page shows the finished results. Glue the
bulwarks to the hull. Position them along the rabbet (the top of
the 1st planking belt). You should line up the bulwarks with the
Cubbridge head bulkhead. The remaining breaks at each deck
level, including the bow and stern, can be sanded flush after-
wards. They are slightly oversized and will require some light
sanding afterwards for a proper fit. Any gaps left along the rab-
bet should be filled with wood filler and sanded smooth.
Finishing the bow…
The bow can be completed in three steps. See the photo
provided for details.
Step one – Complete the first layer of planking by inserting the
missing plank at the bow. Use a 1/16” x 1/8” strip. Sand it flush
with the deck afterwards.
Step two – Plank the deck for the Beakhead. Use 1/32” x 1/8”
strips. Sand them flush to the shape of the hull when you are
done.
Step three – Detail the bulkhead for the Beakhead. You can do