Stepping the Masts…
All of your mast assemblies are now com-
pleted. It is time to place them on the
hull. The rigging plans show the rake
(angle) of each mast. The fore mast is
nearly vertical. The main mast leans aft
very slightly. The mizzen mast leans
slightly more. Before they are glued per-
manently onto the model you will need to
prepare the mast coats. The masts on
Mayflower would have been held securely
by forcing small wedges around its base
where it travels through the deck. This
group of wedges were wrapped in a can-
vas-like cover and coated with tar. Hence
the term mast coat. In actuality only the
tarred cover was called the mast coat.
Three small washer-like hoops have been
laser cut (1/8” thick) for your use as mast
coats. The top edge of each mast coat
should be rounded off before using them.
They are painted black to simulate the
tarred cover. Slide them onto each mast
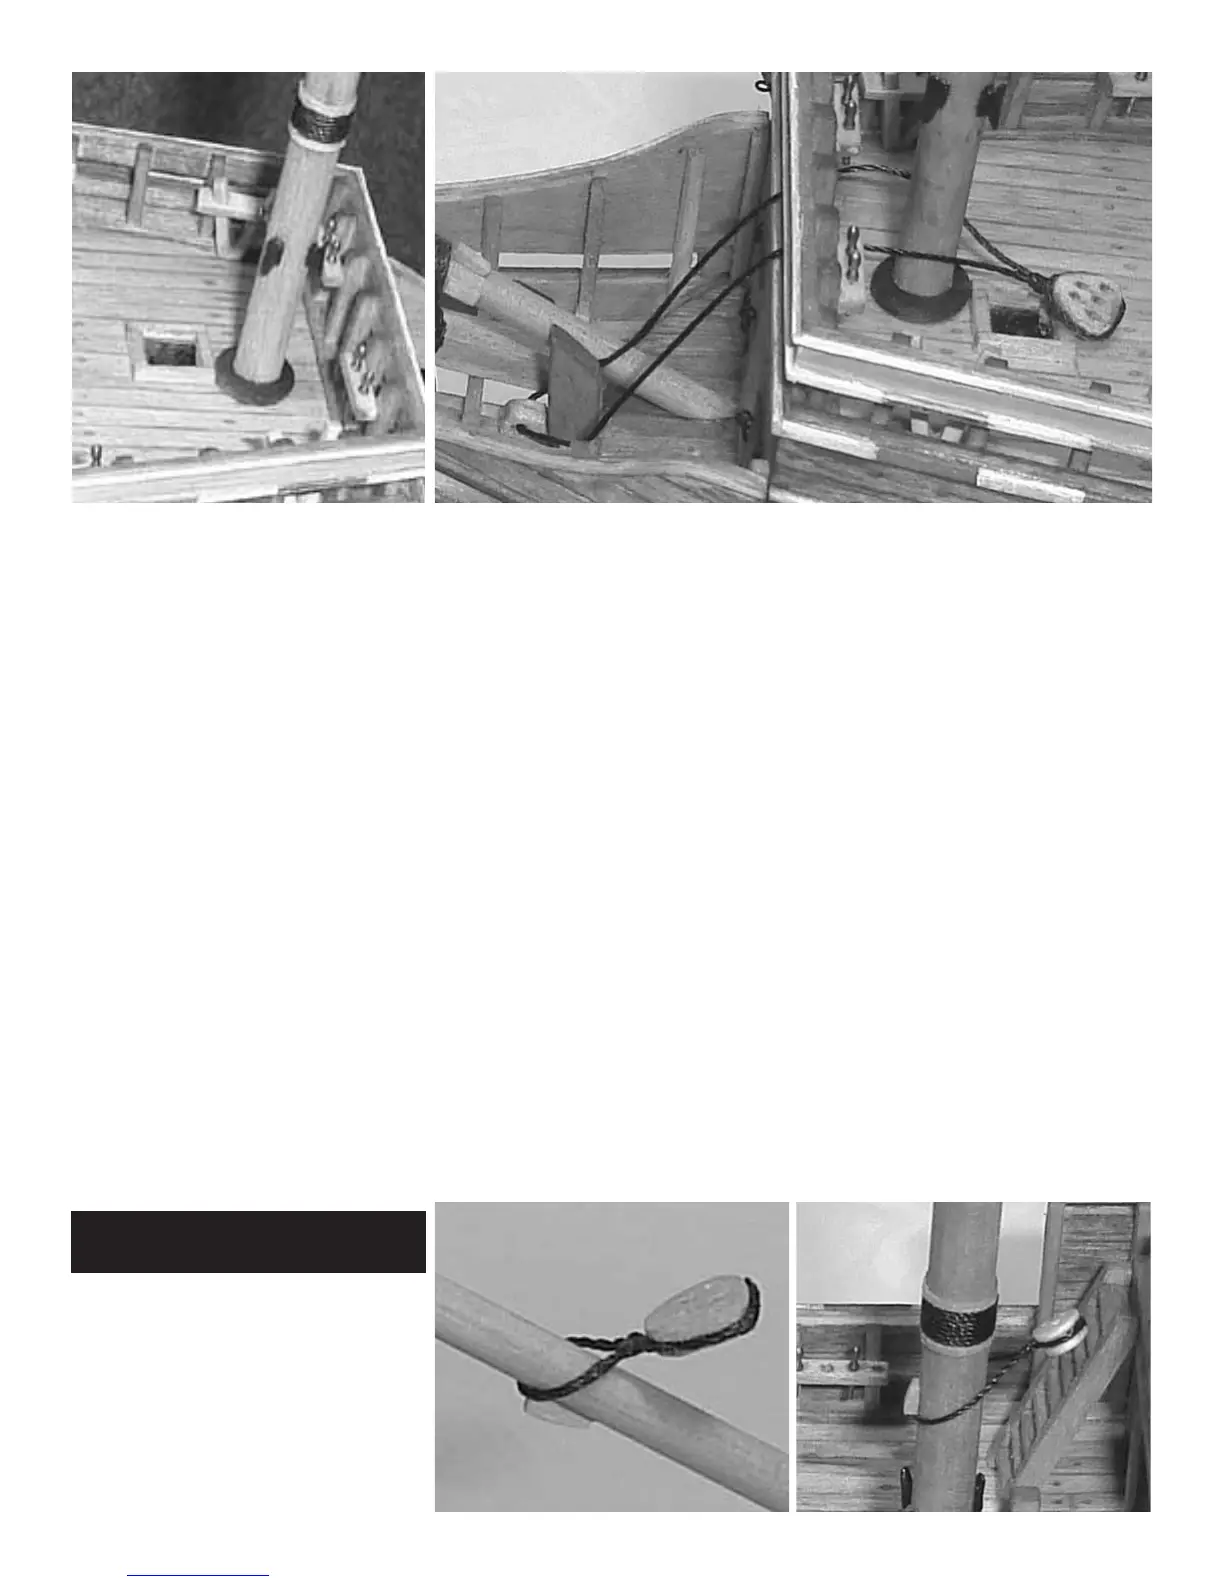
before you glue them into position. The
photo above shows the fore mast on the
model with its mast coat in position.
Standing Rigging
Lower Stay Collars…
Before you start rigging the model some
careful planning is required. You must
think several steps ahead to make sure you
don’t “rig yourself into a corner”. It can
be quite difficult navigating your fingers
and rigging tools through a maze of rig-
ging. To make this as systematic as possi-
ble, the rigging will be presented in the
order used to rig the prototype.
Main Stay Collar – The main stay collar
(.028 black rigging line) was rigged first.
Run the line through the hole in the stem
knee and through the open bulwarks. See
the photo above. Seize the two ends
together on the aft side of the fore mast.
Then secure a deadeye to the collar. This
deadeye is heart-shaped and has five holes.
The deadeyes supplied with the kit (7mm)
are round and only have 3 holes. If you
are up to the challenge, they can be
replaced with the more accurate represen-
tations shown on the plans. They are not
difficult to make. Each deadeye should be
1/16” thick. Use the plans as a guide for
their shape, size and hole configuration.
The photo shows a deadeye made using
the plans as a guide. Four of these will be
needed.
Fore Stay Collar – This is shown in the
photo below (.021 Blk). The line is seized
around the bowsprit against the chock.
Another 5-hole deadeye is seized to it as
shown.
Mizzen Stay Collar – Rigged similar to
the fore stay collar except a 3-hole (5mm)
deadeye is used. (.021 Blk) Once again
round deadeyes are supplied with the kit
and can be sanded to the more accurate tri-
angular shape if desired.
Lower Shrouds…
The shrouds will be rigged next starting
with those for the mizzen mast. The dead-
eyes should be secured along the channel
first with “chain plates”. Black chain is
supplied for this purpose. A photo on the
next page shows the 5 steps used to pre-
pare the deadeyes. A tiny brass nail (sup-
plied with kit) is glued into a pre-drilled
hole in a piece of scrap wood. The head
of the nail is snipped off.
Step 1- Take some 28 gauge black wire
and crimp it around the brass nail as
shown. A needle-nose pliers does the job
nicely.
Step 2- Bend the two ends back while
holding the wire crimped with the pliers.
Slide the wire off of the nail for the next
Stepped fore mast
Main Stay Collar
Fore Stay Collar
Mizzen
Stay
Collar
36