depending on your skill level, you may
want to replace them with some that are
scratch-built. The kevels would have been
made of wood and as such should be
painted to look like wood. Examine the
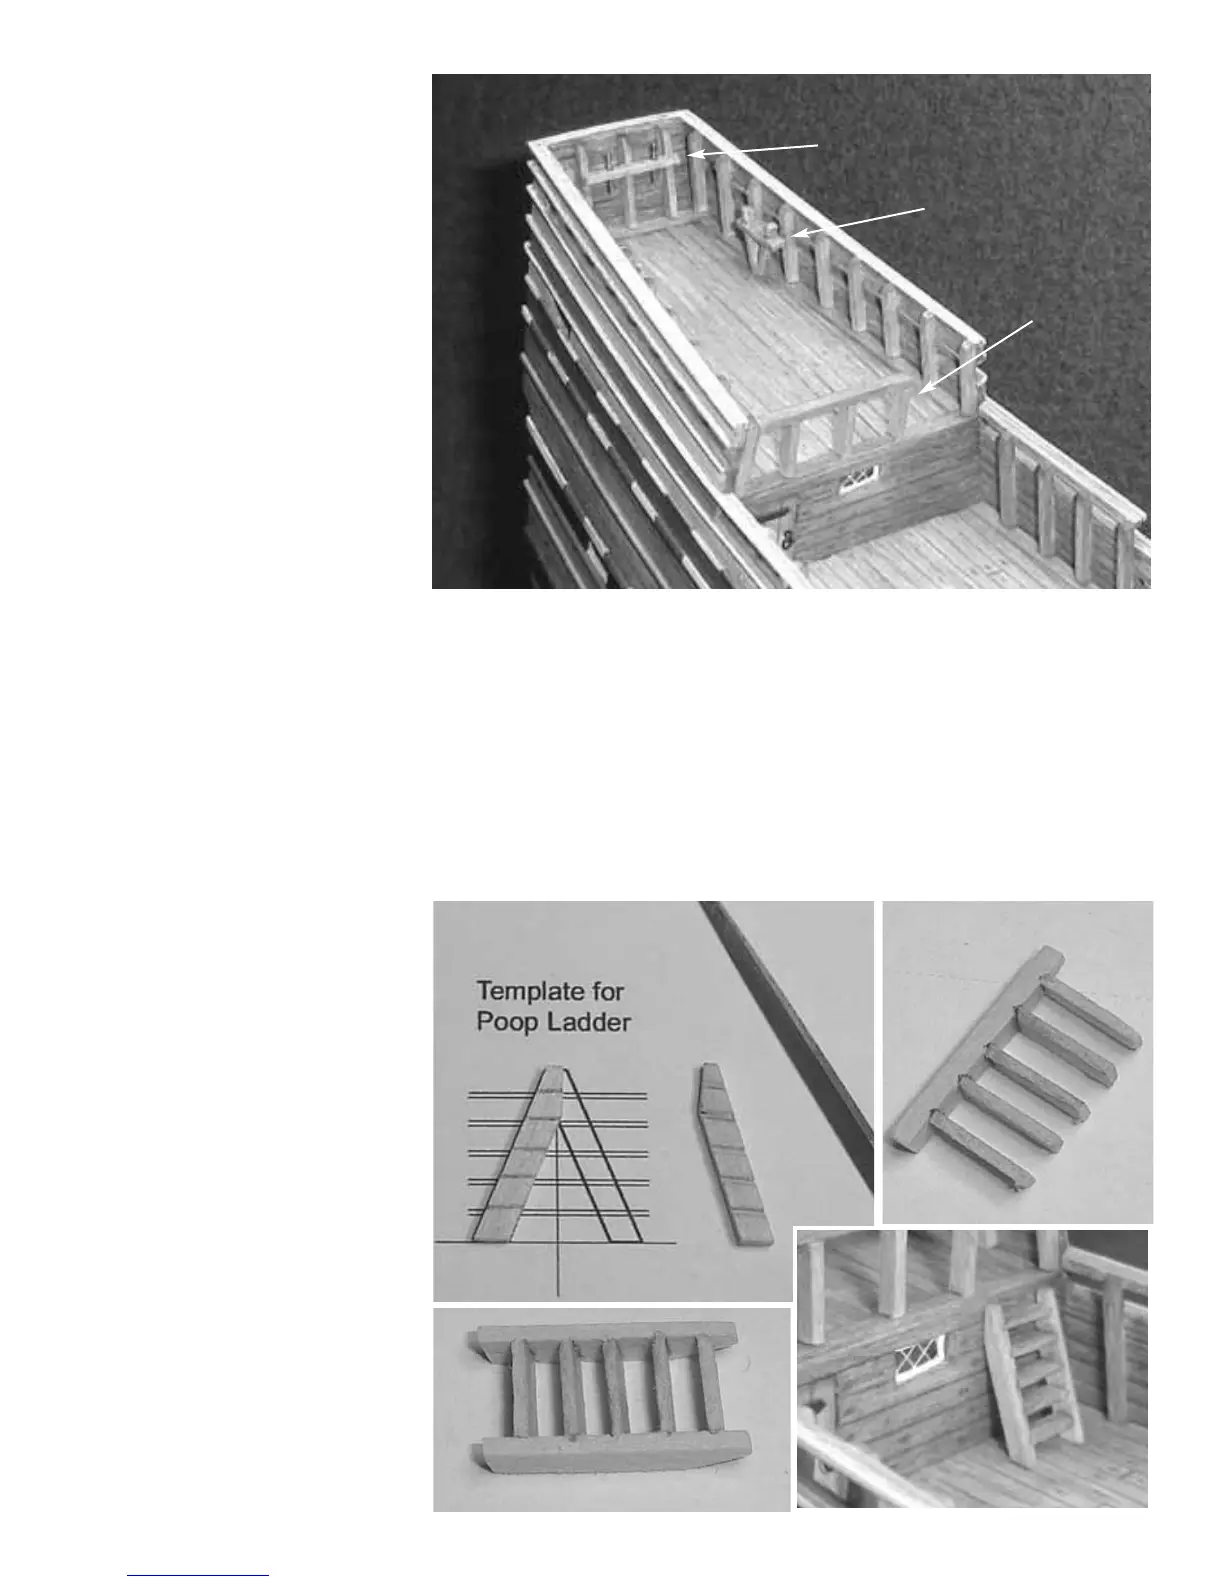
plans for their exact locations and glue
them to the bulwark stanchions. See the
photo provided.
In addition to the kevels you will notice a
pin rail in the same photo. It is located on
the inboard side of the stern bulwarks. All
of the pin rails needed for the model are
made using the 1/16” x 3/32” Bass Wood
strips provided. Cut a strip to length and
drill the appropriate amount of holes as
shown on the plans.
The hand rail located on the edge of the
Poop deck is made using the same Bass
Wood strips. Take the measurements from
the plans and stain them match the rest of
the model. The replica based in Plymouth
MA has the top of this rail painted white.
You can also paint it white, but this is a
subjective decision and should be made
based on your own personal tastes.
The stairs/ladder leading down from the
Poop deck can be made using the template
shown on the plans. Take two small
lengths of 1/16” x 1/8” strips and position
them on top of this template. See the
photo below. The template is used to
establish the shape for each side of the lad-
der. While positioned on the template,
mark the locations for each step on the
face of each wood strip. Using a small file
or your hobby knife, create the small slots
which are used to attach each step. The
1/32” x 1/8” strips are used to create the 5
steps. Cut them to length and glue them
into the slots you made. Examine the
same photos below. Only insert them into
one side of the ladder. Once dry, glue the
other side of the ladder into place.
The Half Deck…
Create and glue the four pin rails on the
Half deck See the plans for their exact
size and location. A knight head is posi-
tioned just in front of the mizzen mast.
Examine the plans and photos for details.
This knight will be used to secure the tie
for the lateen yard. A casting of the knight
is provided with the kit but you may opt to
build one from scratch. It is not difficult
at all, and if made from wood will
improve the overall look of your model.
The knight is made using a length of 1/8”
x 1/8” strip wood. See the photo on the
next page. The head of the knight can be
carved with a sharp #11 blade in your
hobby knife. Afterwards, the three
sheaves can be simulates in the following
way.
Three holes are drilled to represent the top
of each sheave. They should be drilled
straight through to the other side. You can
start drilling each hole from the front of
the knight but only go half the way
through. Then finish each hole from the
back of the knight, drilling each of the
three holes deep enough to meet those
drilled from the front. This method should
help ensure that the holes line up front-to-
back. Repeat this process to create the
three bottom holes that simulate the
sheaves. With the holes completed, use a
sharp pencil to create the groove for each
sheave. You should be able to easily
indent the soft wood between the top and
bottom holes of each sheave. This also
Kevel
Railing
Pin Rail
Poop Deck
26