bulk head templates. These were made
using the plans as a guide to shape them.
Trace the design on a 1/32” thick bass
wood sheet and cut them free with a sharp
blade. Glue them into position. Two addi-
tions strips of 1/32” x 1/8” planking were
glued along the front edge of each bulk
head to simulate the columns you see in
photo #4
Step 5 – The false decking can now be
placed on top of the beams to complete the
extension of the half deck. They are laser
cut for you. It is easier to put the false
deck into position using two pieces. They
approximate the shape of each half need-
ed. Because there may be minor fluctua-
tions with the positions of the bulwark
stanchions you will have to notch them out
of template. Simply rest one half of the
decking on the beams and mark the loca-
tions for each of them. See photo #5.
Once both false deck pieces are glued into
place run a bead of glue down the seam
between each half. Draw the center line
down the length of the half deck in prepa-
ration for final planking. The positions for
the two hatches should be transferred on to
the deck as well. See photo # 6.
Step 6 – When you planked the other
decks on the model you added the water-
way along the bulwarks after the planking
was finished. There were no bulwark stan-
chions on the model yet. Planking around
the bulwark stanchions could be a difficult
and tedious job. Therefore we will add the
waterway now in order to make planking
the half deck easier.
This time you will use a planking strip that
is 1/16” thick x 1/8” wide. This is twice
as thick as the waterway used earlier.
Once the 1/32” thick deck planking butts
up against the waterway, the waterway
will appear to be the correct thickness.
Take a length of this thicker planking and
notch out the bulwark stanchions the same
way you did for the false decking. Glue
these into position. Do not add the water-
way on the forward edge of the half deck.
This will be added after the deck is
planked. See photo #7.
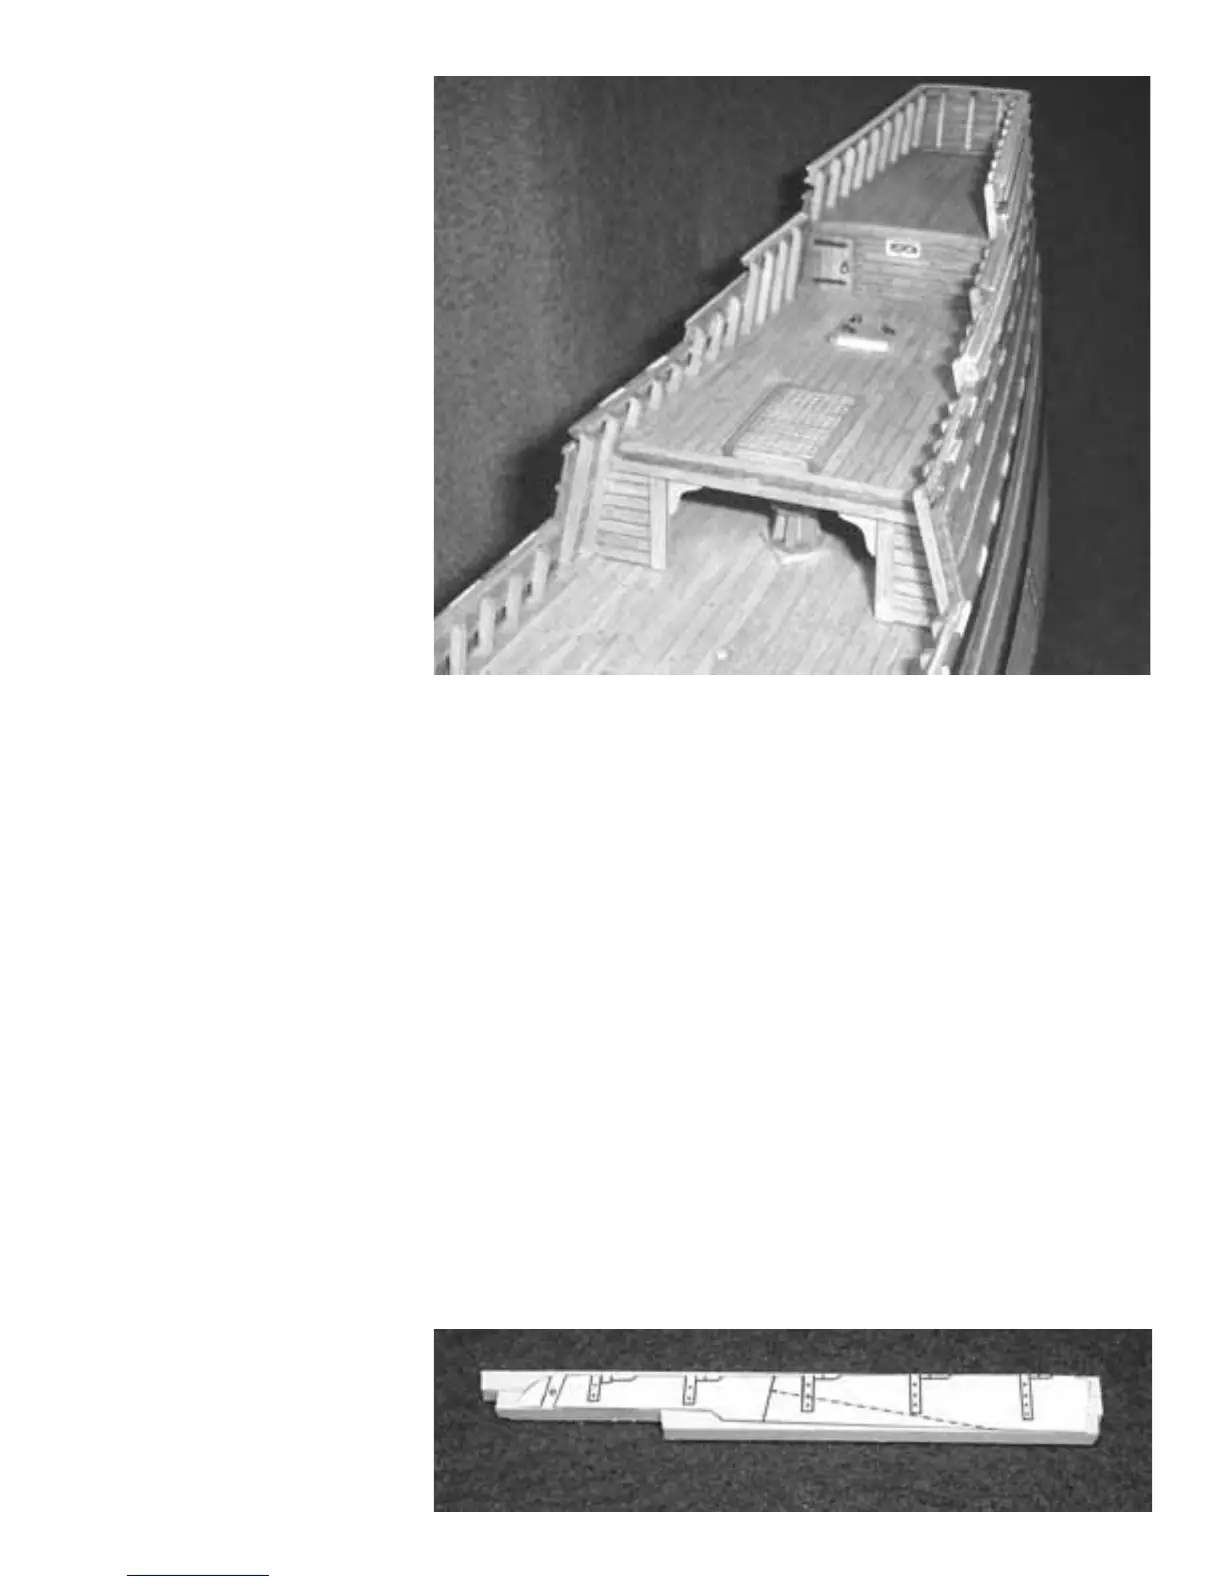
Step 7 – Now you can plank the deck as
you did the others for the model. Create
and install the hatches first. Plank around
them. See the plans for any details. The
coaming or frame for each hatch was made
first using 1/8” x 1/16” Bass wood strips.
The grating is added to finish off the larger
hatch. If the capstan ever needed to be
replaced it would have been hoisted up
through this larger hatch. The smaller
hatch in front of the mizzen mast does not
have a grating. Simple planks (cover
boards) were fitted with handles instead.
They are made using the eye bolts and
split rings supplied with the kit. Photo #8
shows the quarter deck completed. Note
the waterway added to the front edge of
the quarter deck. It is the last wood strip
(1/32” x 1/8”) needed to complete this step
in the project.
Making the Rudder...
Take 3 lengths of the 1/8” x 1/8” strips
supplied and glue them together edge-to-
edge. Paste a photo copy of the rudder on
the top of it and cut it to shape with a
sharp blade. See the photo below.
The photos (1A & 1B) on the next page
show the rudder after it was cut to shape
with a sharp #11 blade. It was sanded
afterwards.
The rudder is attached to the stern post
with hinges called “pintles and gudgeons”.
These are the two halves of each hinge.
The pintle being that which is attached to
the rudder and the gudgeon is attached to
the hull.
The brass strip supplied with the kit can be
used to make the gudgeons and pintles
The photos on the next page show you
how to create the gudgeons and pintles.
The brass strip should be cut into 10
smaller lengths. See the plans for the
approximate sizes. The 10 strips were then
bent around a block of wood that was the
same thickness as the rudder (1/8”). This
created the final shape for our gudgeons
and pintles. They are identical except the
pintles will have a small length of 22
gauge wire glued into the inside of them.
The rudder is painted white below the
wales. Paint the first coat before gluing
the pintles into position. The pintles are
Photo #8
24