Channels – Examine the plans carefully for the shape and loca-
tions of the channels. You will notice that the outside edge of
each channel is shown with a 1/16” thick molding in place. This
molding will help secure the dead eyes and chain plates to each
channel. You should however, initially create them without this
molding strip. The dead eyes and chain plates will be added
later. For now trace the shape onto a 1/16” thick bass wood
sheet and cut them out with a sharp blade. Use a small needle
file to make the small notches along the outside edge of each
channel. You will slip the dead eyes into these notches later and
place the 1/16” molding across the front of them. This wont be
done until after the masts are in position and the rigging is under
way.
Paint the channels black. Two eye bolts are glued into pre-drilled
holes on top of the channels. Only the fore and main channels
have these two eye bolts. They are used to secure the tackles for
the lower fore and main masts. When completed, glue the chan-
nels to the hull. The fore and main channels will sit on top of the
upper wales. The mizzen channels will rest on the top edge of
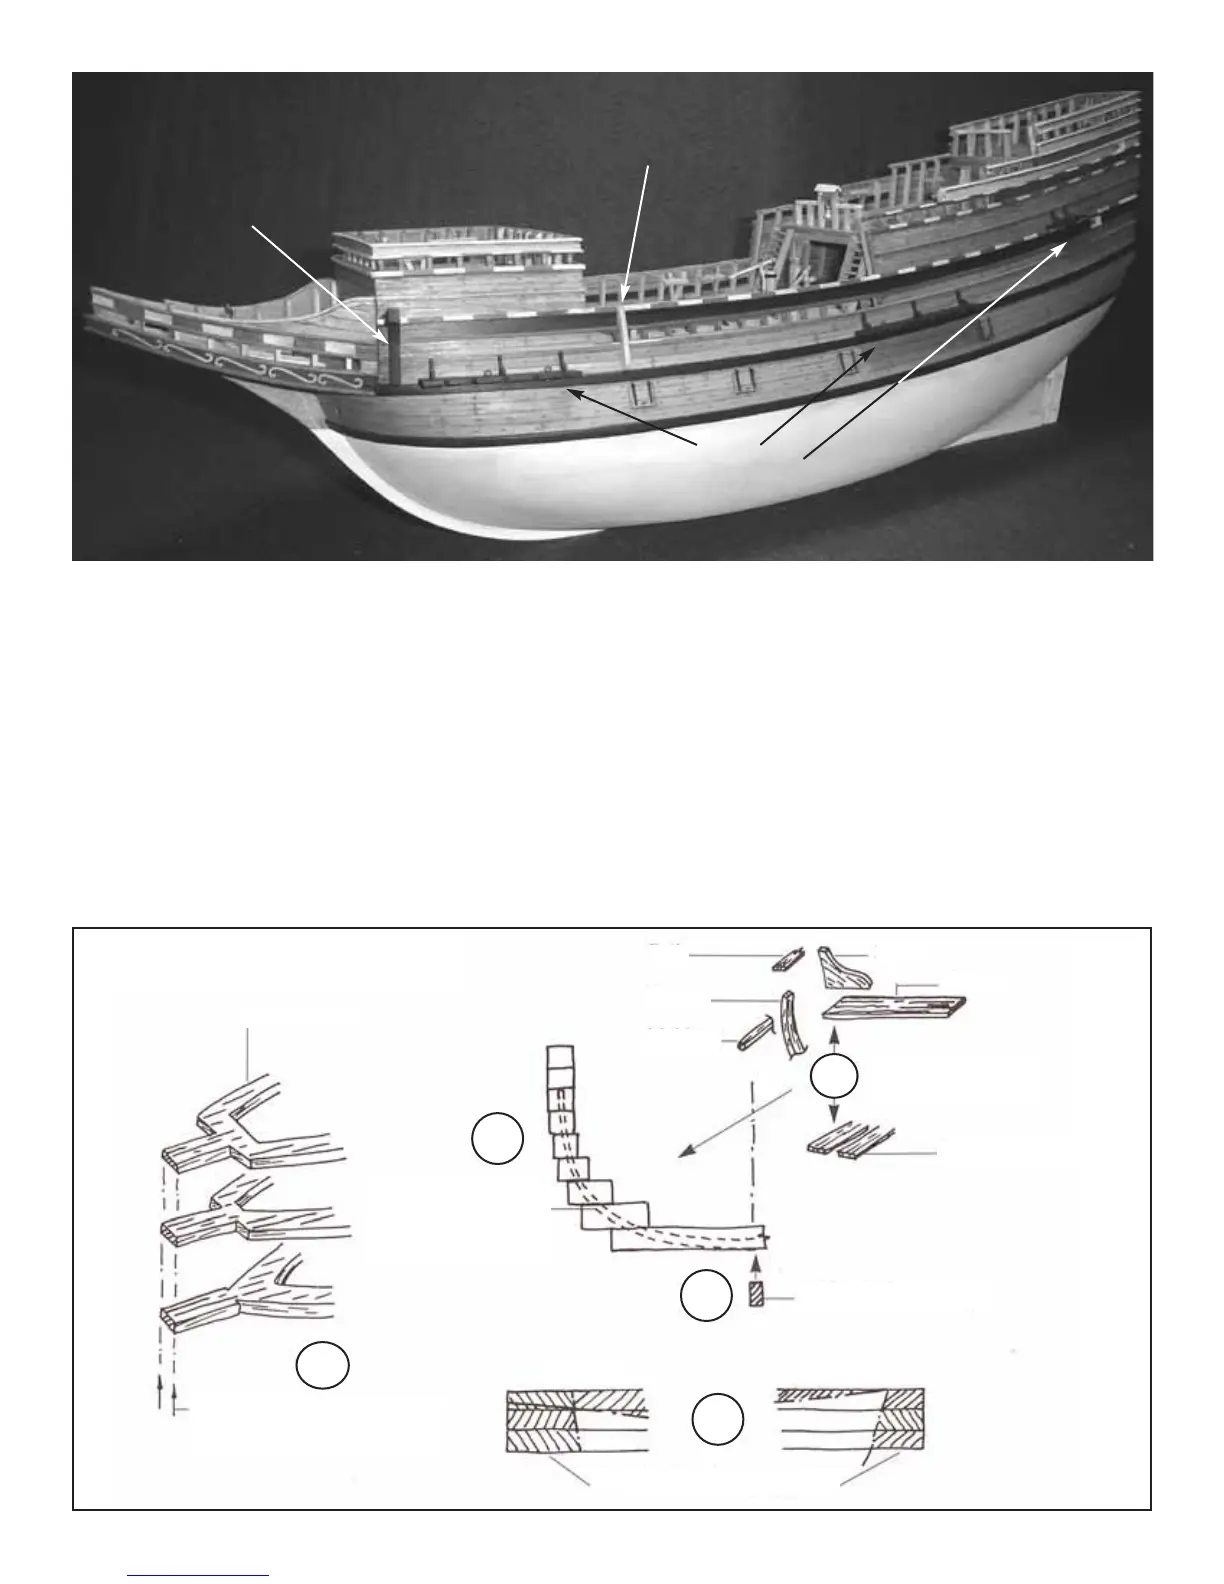
the molding shown on the plans. The photo above shows the
channels in position on the port side of the hull. You will also
notice that several support knees are glued on top of each chan-
nel. These knees are traced from the plans onto 1/32” thick
planking strips (or a bass wood sheet). The mizzen channels
only have two support knees. They are also painted black.
Chesstree
Channels
Cathead
Ships Boat from Lifts
Laser cut lifts
Rail
Knee
Thwart
Add details after
carving the hull
Floor boards
Add keel after carving
Bow
Stern
Cut off tabs and shape profile
Align all tabs on lifts as you
glue them together
Carve/sand interior
and exterior surface to
boat lines carefully!
Frame
Molding
1
2
3
4
5
29