of the beakhead. They should be glued to
the underside of the beakhead beams (floor
timbers). A few more stanchions and
beams will rest atop these to finish off the
initial beak head construction. See the
same photos.
Step 5 - Last you will create and install the
grating inside the beak head. Use 1/16” x
3/32” wood strips to create the frame for
the grating. Test fit a photo copy of the
grating shown on the plans so you can
make any adjustments to its shape before
you begin. Glue the grating into place
when it is finished. Finally a pin rail
stretches across the beak head where the
rigging is belayed. Drill six holes into a
length of 1/32” x 3/32” wood strip. See
the plans for details. The photo provided
shows three belaying pins inserted into the
holes along this rail. Do not glue the pins
into the holes at this time. They are only
shown to demonstrate how it will eventu-
ally be set up. There are also two planks
(1/8” x 1/16”) on each side of the stem.
They lead from the bow to the grating on
the beakhead. These simple planks made
it easier for the sailors to reach the grating.
Extending and Completing the
Quarter Deck…
If you examine the plans you will see that
the quarter deck (also called the half deck)
extends out over the upper deck. An open
bulkhead called the “After Cubbridge
Head” needs to be built followed by the
placement of deck beams. The deck
extension will rest on top of these. Before
you begin the following detailed steps pro-
vided, the capstan should be made and
glued onto the upper deck. A casting for
the capstan is included in this kit. It
should be painted to look like wood.
Another alternative would be to build one
from scratch. Templates are located on the
plans. Either way the capstan is partially
obscured under the half deck and will not
be openly visible.
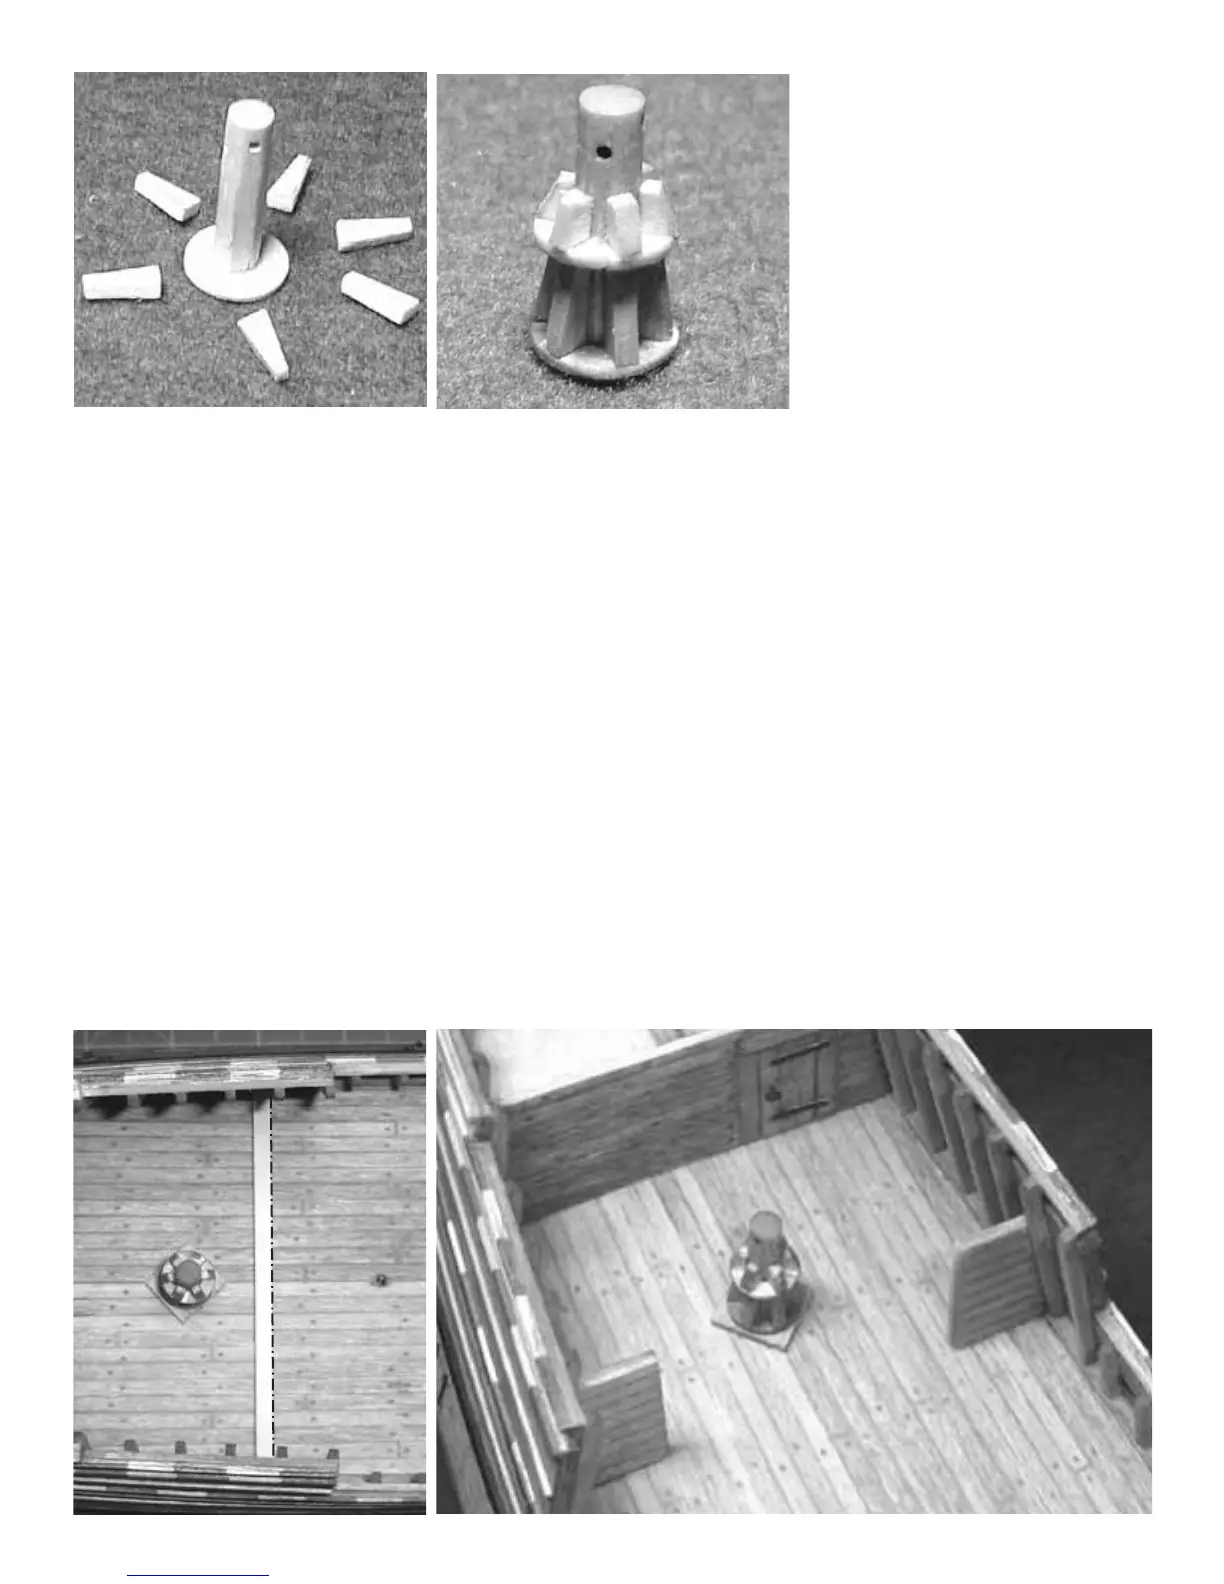
Photo #1
Photo #2
The two photos above show you how to
construct a capstan from the wood sup-
plied in this kit. The first photograph
shows a wooden dowel (3/16” diameter)
cut to length. The bottom portion of the
dowel (capstan drum) was filed to a six-
sided shape. 4 small holes were drilled
into the top of the capstan drum. The crew
inserted two long wooden bars through
these holes and used them as handles to
turn the capstan. You don’t have to drill
your holes through the drum. Because it
will be obscured below deck, drilling the
holes part way through from both sides
will be sufficient. You can darken the
insides of these holes with a sharp pencil.
The holes are square and not round. This
shape can be obtained with a sharp blade
in your hobby knife.
The drum was glued to the center of the
capstan base which is essentially a wooden
disc cut from a 1/32” thick bass wood
sheet. The lower whelps are glued around
the base as shown in the photographs.
They are 1/16” thick.
Then a smaller wooden disc (washer like
in appearance) is slid over the top of the
drum and rests on the lower whelps. This
smaller disc is also shaped from a 1/32”
thick bass wood sheet. The smaller upper
whelps are then placed on top of this inline
with the lower whelps. The capstan is
completed and can be stained and glued to
the base already built on deck.
The First step towards extending the quar-
ter deck will be the completion of the
After Cubbridge Head. Several photos are
22