which will represent the lower wales. This
was a thicker plank as mentioned earlier
and makes sanding this belt so it is
absolutely smooth and flush with the ini-
tial layer below it unnecessary.
STEP FOUR - The wales and molding
strips can now be glued onto the hull. Use
the plans as a guide for their placement.
The wales should be glued into position
first (1/8” x 1/32”). Both the upper and
lower wales are painted black. Glue each
strip directly on top of the first layer of
planking following their run from bow to
stern. See the photos provided.
Remember that the upper wales are placed
over the initial plank from step one and the
lower wales are placed over the final
strake from step two.
The remaining strips of molding will also
follow the run of the planking. There are
two sizes of molding strips (1/32” x 1/32”
and 1/32” x 1/16”). Those that are 1/16”
wide are noted on the plans. All of the
other molding is 1/32” wide. Some strips
will be painted with two colors (green and
white or red and white). The color
schemes for every strip of molding are
shown on the plans. Those not mentioned
will be left natural and stained to match
the underlying hull planking.
Note that some of the molding strips and
the lower wales will continue around the
stern. Some molding can also be seen on
all four sides of the forecastle. Examine
the plans carefully for these features. Keep
in mind how the molding on the port and
starboard sides of the hull need to be
placed at consistent levels so you can posi-
tion these additional strips properly.
Otherwise it will be difficult to prevent a
crooked and wavy appearance for them on
the stern transom and forecastle bulkheads.
18
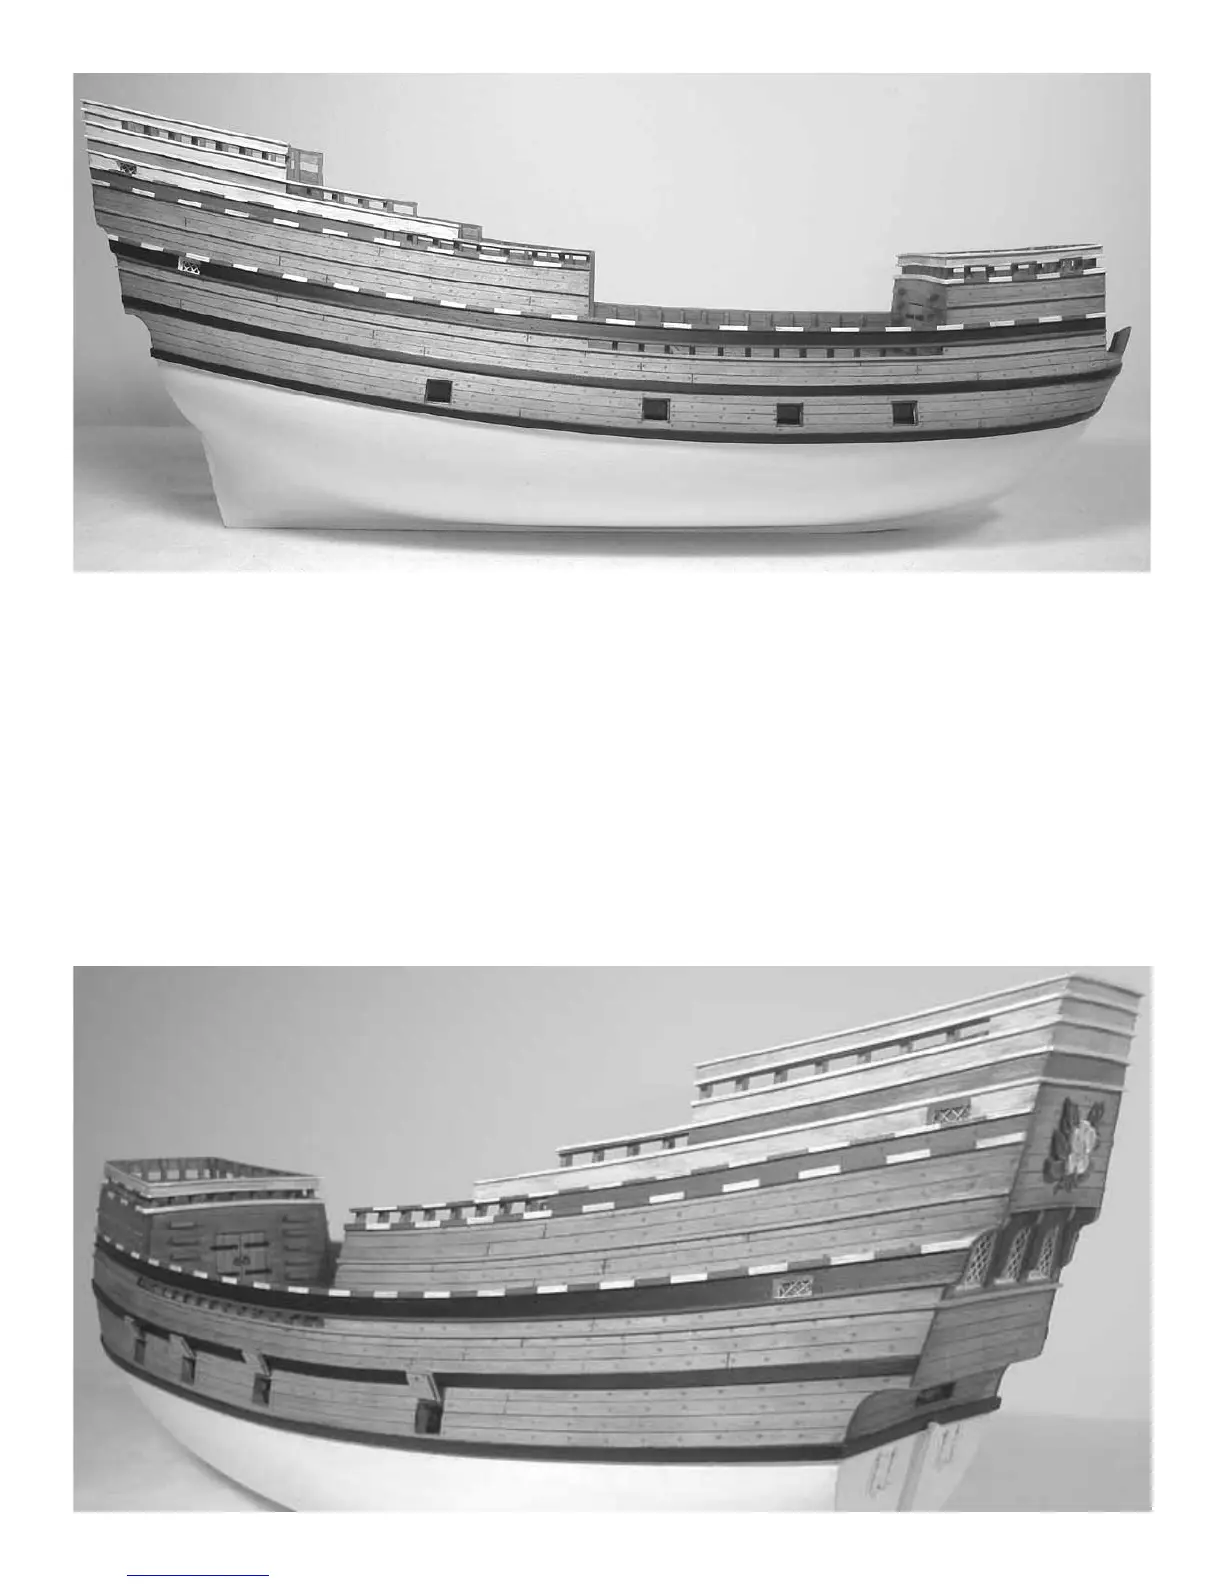
Step 2 is completed. The wales and trim have been glued into position.
The hull has been stained and painted.
Step 2 is completed. The gun ports are detailed. The wales and trim have been
glued into position. The hull has been stained and painted.