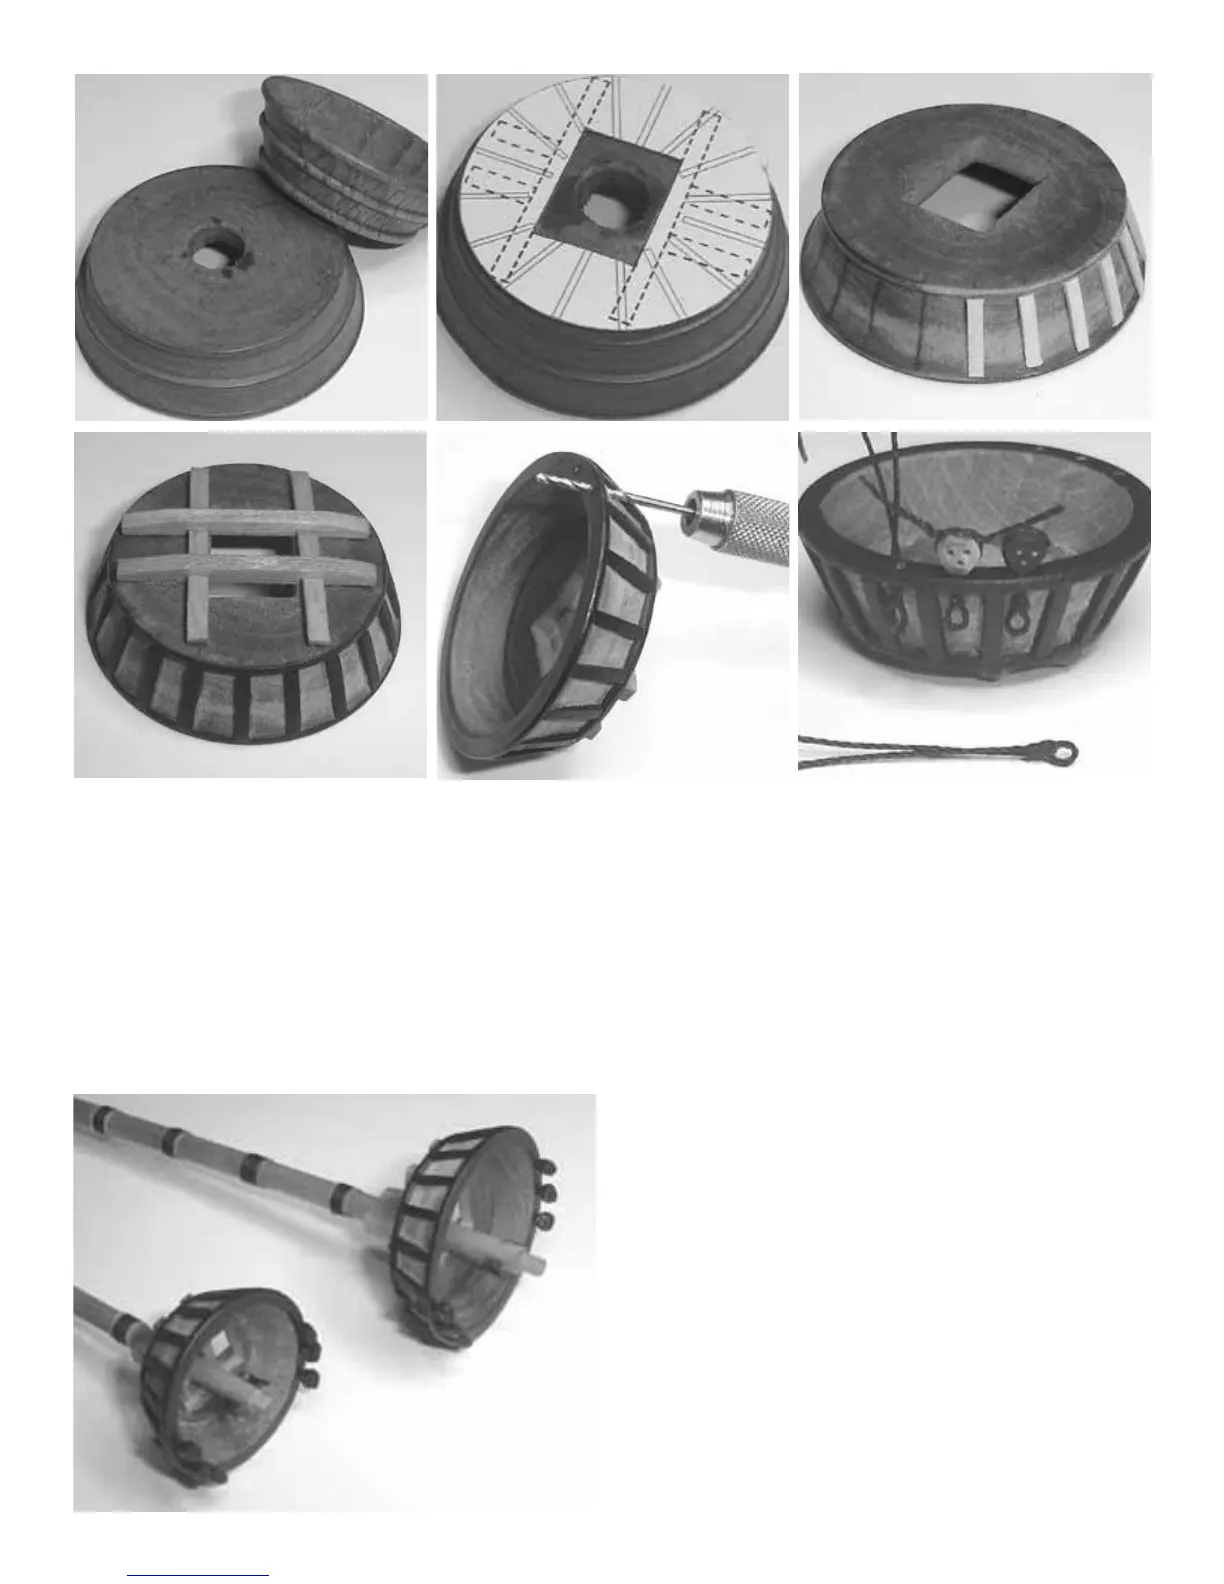
outlined below to complete them. Make a photocopy of the
tops from the plans. In photo #2 you can see how they were
used to mark the squared opening on the bottom of each top.
With the shape of the opening marked in pencil, carve the open-
ing with a sharp blade. A “starter” hole has been drilled to help
you with this process.
You will no doubt see that there are decorative moldings which
have been pre-shaped around the outside of each top.
Depending on your skill level, or how much detail you intend to
add to your model; the tops can be used as is. Simply paint the
molding black and skip the next step. If you are up to the chal-
lenge however, the tops can be modified to more closely resemble
those shown on the plans. The plans show a more accurate depic-
tion of the tops used on the Mayflower. In photo #3 you will see
that the pre-milled molding was sanded down and removed. Thin
strips of wood were cut and glued around the top. The positions
were carefully marked with pencil to ensure equal spacing before
gluing. These strips are painted black along with the top and bot-
tom rims.
Photo #4 shows the cross trees glued into position. Before you do
so, double check that there is sufficient room on either side of the
cross trees for the shrouds and rigging to pass through.
Mark in pencil the locations for the dead eyes along the rim of
each top. Use the plans as a guide to ensure their correct place-
ment. There are three dead eyes on each side of a top. Holes need
to be drilled through the rim at the angle shown in photo #5. The
dead eyes supplied with kit come in three sizes. You will need
twelve of the smaller dead eyes for this task. The dead eyes sup-
plied are round. A ship like the Mayflower had dead eyes that
were pear-shaped or triangular. Again, depending on your skill
level, the round dead eyes can be modified to more accurately
reflect the time period. Simply sand the dead eyes to a triangular
shape and use a small needle file to reestablish the groove around
the outside edges.
Photo #6 shows the sequence used to place the dead eyes into
position. Start by seizing a small eye into some .021 black rigging
line. Use some black sewing thread to create the seizing. A drop
of super glue will stiffen the eye. Before it dries you can also
1.
2. 3.
4. 5.
6.
34