Anchor rigged on the model
late the iron bands. The wood stocks can
be treenailed as shown in the photo above
for even greater detail. Create a ring from
black wire and use it for the anchor ring.
Wrap the wire around a drill bit that is the
diameter you need. Cut off the excess
with some wire snips and place it on the
anchor. Take some .040 Tan rigging line
and use it for the anchor cable. Secure it
on the anchor ring as shown on the plans.
Leave a generous length of this anchor
cable hanging free so you can insert it into
the hawse holes later.
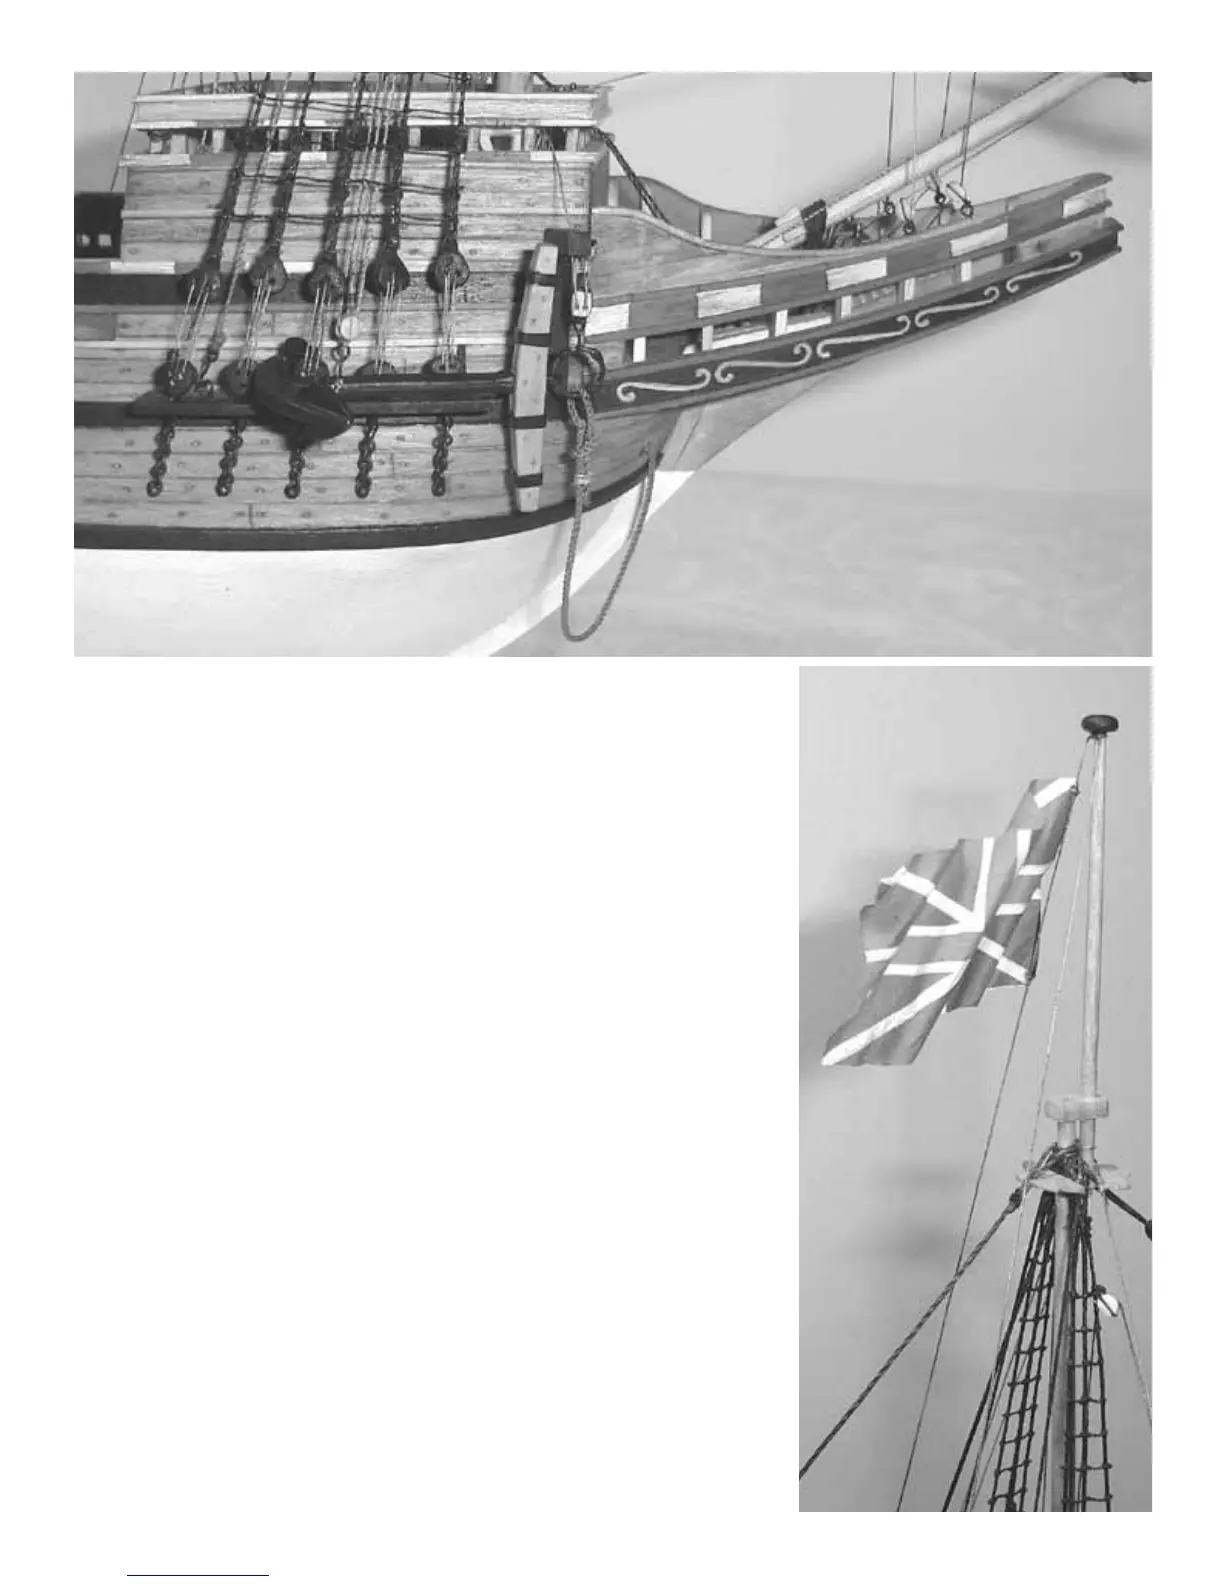
The anchors are lashed on the channels to
a deadeye. If you do this first the anchor
will be held in position so it is easier com-
plete the rigging. With the anchors in
position you should be able to glue the end
of the anchor cables into the hawse holes.
Try to shape them with a natural swag as
shown in the photo above.
Take a 1/8” double block and seize a hook
to it. See the same photo. Then seize
some .018 tan rigging line to the eyebolt
on the side of the cathead. Reeve it
throught the double block and the sheaves
of the cathead creating a tackle. Pull this
tackle tight as you are hooking the block
onto the anchor ring. With everything in
position, apply a drop of glue to the
sheave of the double block to keep it ten-
sioned. Take the loose end of the tackle
inboard and belay it to the kevel on the
forecastle deck. Finish it off with a rope
coil.
The last step in building your model of the
Mayflower is to rig the flags. Place a tiny
hole on the inside corners of the flag.
These will be used to tie the flags to the
flag halyard. The flag halyard is simply
tied around the top of the mast just under
the ball truck. Normally they would be
run through small sheaves in the ball truck
itself. Our little model is too small to cre-
ate these sheaves at scale so gluing the
halyard as shown in the photo is appropri-
ate. Belay the loose ends of the halyard
anywhere on deck which appears feasible.
Any pin rail along the bulwark will suffice
as long as the lines dont interfere with any
of the rigging already in place. The flags
are placed on the main and fore masts.
With the halyards rigged and finished off
with some rope coils you can now tie your
flags to the halyards. Try to shape your
flags by wrapping them around a drill bit
while they are wet. They should appear
like they are waving gracefully in the
wind.
CONGRATULATIONS!!!
Your model is now completed.
50