INS10944 - 4/20
9
K
L
L
M
P
16
1
2
3
K
I
L
4
L
K
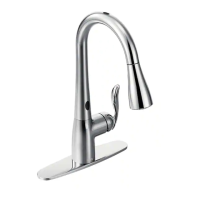
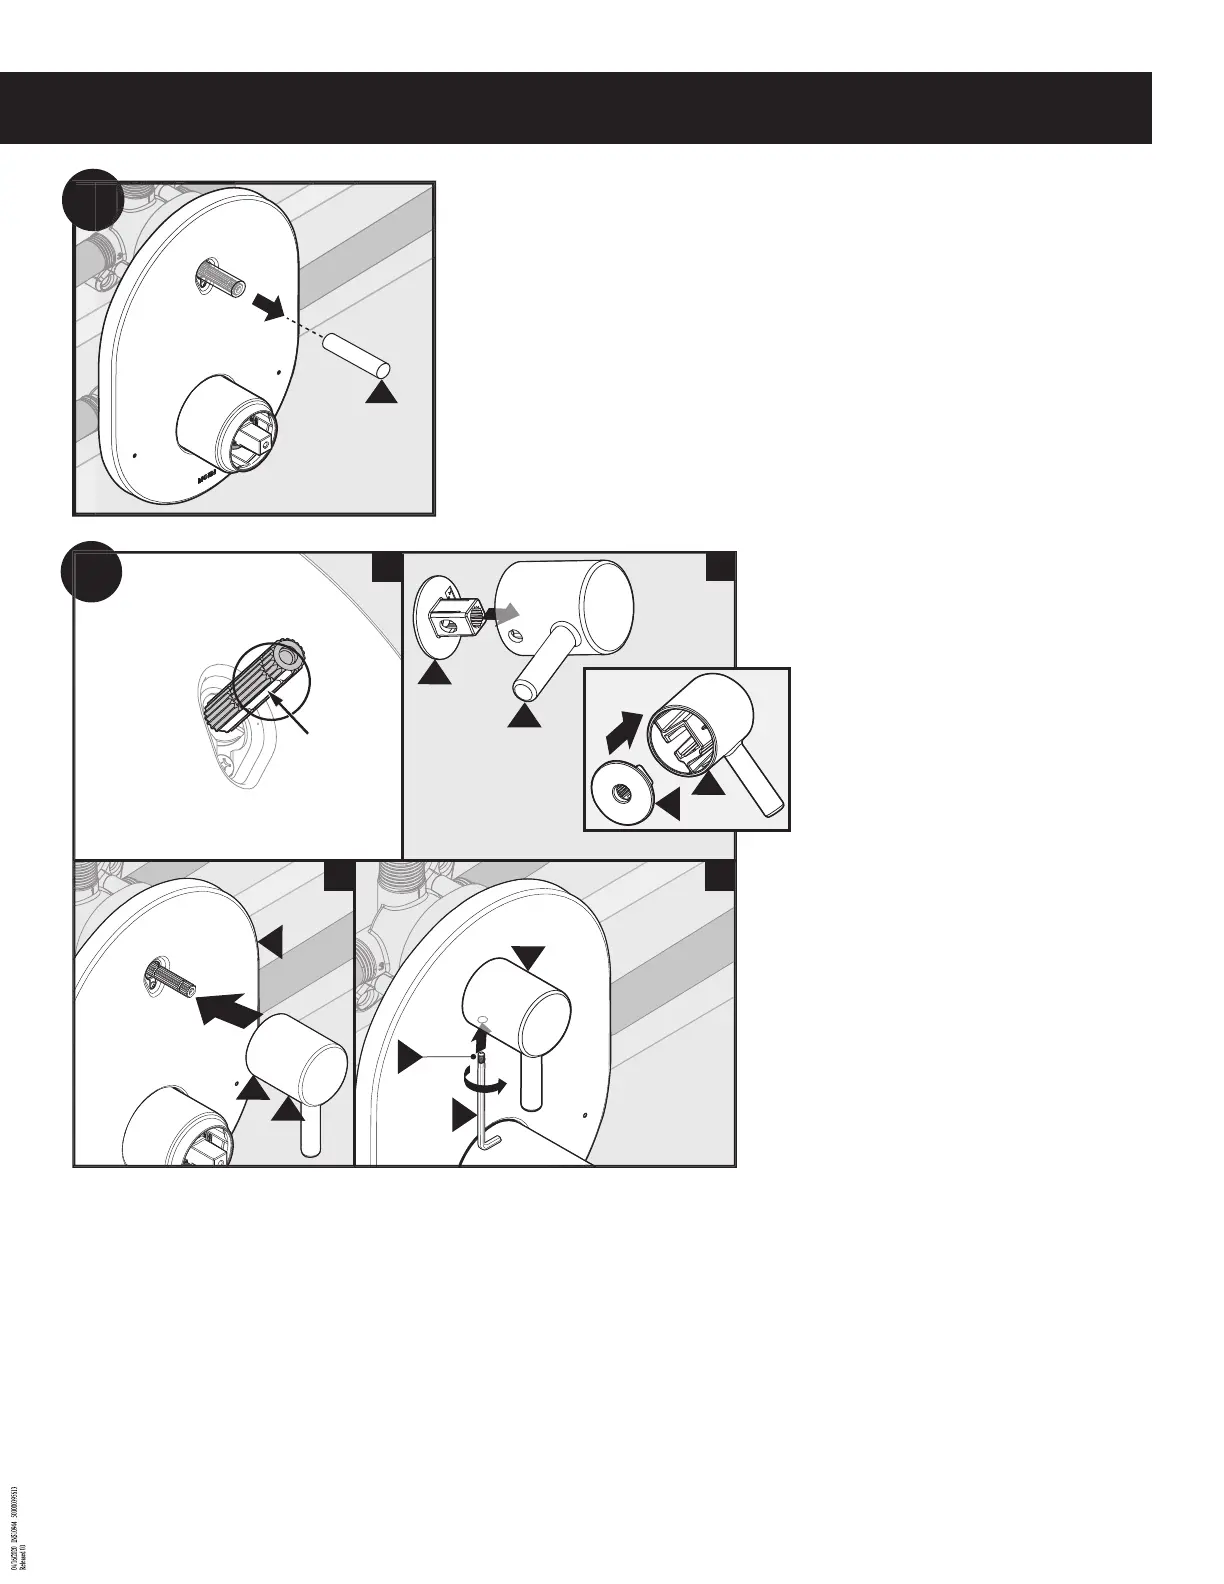
1. Ensure cartridge stem is positioned with the missing tooth pointing straight down.
2. Insert handle bearing (K) into handle (L) with through hole aligning with hole in the handle.
3. Slide handle assembly (K & L) onto cartridge stem and press rmly against escutcheon (I).
4. Tighten set screw (M) into handle (L) using hex wrench (P).
1. Asegúrese de que el eje del cartucho esté colocado con el diente faltante apuntando hacia abajo.
2. Inserte el soporte de la manija (K) en la manija (L) con el ori cio de paso alineado con el ori cio de la manija.
3. Deslice el conjunto de la manija (K y L) sobre el eje del cartucho y presione rmemente contra el escudo (I).
4. Apriete el tornillo prisionero (M) en la manija (L) con la llave hexagonal (P).
1. S’assurer que la dent manquante de la tige de cartouche est orientée vers le bas.
2. Insérer le roulement de la poignée (K) dans la poignée (L), en s’assurant que le trou d’insertion est aligné avec le trou se trouvant sur la poignée.
3. Faire glisser l’assemblage de poignée (K et L) sur la tige de cartouche, puis l’appuyer fermement contre la rosace (I).
4. À l’aide d’une clé hexagonale (M), visser la vis d’arrêt (L) sur la poignée (P).
V
15
Remove dust (V) cover from cartridge stem.
Retire la cubierta antipolvo (V) del eje del cartucho.
Retirer le pare-poussière (V) de la tige de cartouche.
 Loading...