EasyManua.ls Logo

Moen MOTIONSENSE 7565E User Manual

Moen MOTIONSENSE 7565E
17 pages
To Next Page IconTo Next Page
Page #1 background imageLoading...
Page #1 background image
INS10435B - 11/19
S72308E
7565E
PLEASE CONTACT MOEN FIRST
For Installation Help, Missing or Replacement Parts
(USA)
1-800-BUY-MOEN (1-800-289-6636)
WWW.MOEN.COM
(Canada)
1-800-465-6130
WWW.MOEN.CA
POR FAVOR, CONTÁCTESE PRIMERO CON MOEN
Para obtener ayuda de instalación, piezas faltantes o de recambio
011 52 (800) 718-4345
WWW.MOEN.COM.MX
VEUILLEZ D’ABORD CONTACTER MOEN
En cas de problèmes avec l’installation, ou pour obtenir toute pièce
manquante ou de rechange
1-800-465-6130
WWW.MOEN.CA
HELPFUL TOOLS
For safety and ease of
faucet replacement, Moen
recommends the use of
these helpful tools.
HERRAMIENTAS
ÚTILES
Para que el cambio de la
llave sea fácil y seguro,
Moen le recomienda usar
estas útiles herramientas.
OUTILS UTILES
Par mesure de sécurité et
pour faciliter l’installation,
Moen suggère l’utilisation
des outils suivants.
3/32"
(2,38 mm)
MOTIONSENSE™ HANDSFREE
KITCHEN FAUCET
MEZCLADORA PARA COCINA
MOTIONSENSE™ MANOS LIBRES
ROBINET DE CUISINE MAINS
LIBRES MOTIONSENSE
MC
Register Online:
Regístrese en línea:
S’enregistrer en ligne :
www.moen.com/product-registration
Record Purchased Model Number:
Registro del número de modelo comprado:
Consigner ici le numéro du modèle acheté :
_______________________
(Save instruction sheet for future reference)
(Guarde la hoja de instrucciones para futura referencia)
(Garder ces directives pour référence ultérieure)
Image is for reference only
(Style varies by model)
La imagen es sólo como referencia
(El estilo varía por el modelo)
Cette image n'est oerte qu'à titre indicatif seulement
(Le style varie selon le modèle)
Question and Answer IconNeed help?

Do you have a question about the Moen MOTIONSENSE 7565E and is the answer not in the manual?

Moen MOTIONSENSE 7565E Specifications

General IconGeneral
BrandMoen
Model Number7565E
Product TypeKitchen Faucet
CollectionMOTIONSENSE
Handle TypeLever
Number of Handles1
Flow Rate1.5 GPM
Sensor TypeInfrared
Activation TechnologyMotionSense
Installation TypeDeck Mount
WarrantyLimited Lifetime
FinishSpot Resist Stainless
Power SourceAA Batteries
Installation1 or 3 Hole
Spout Reach7.87 in

Summary

Contact and Support Information

Pre-Installation Cautions and Preparation

Old Faucet Removal Safety

Advises turning off water supply and relieving pressure before removing the old faucet.

Faucet Component Diagram and Model Options

Mounting Configuration Options

Recommended Standard Mounting

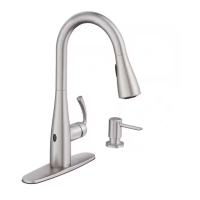
Illustrates the primary and recommended method for installing the faucet.

Control Box Installation Guidelines

Under-Sink Control Box Fit Check

Verify the control box fits under the sink before proceeding with installation.

Step 2: Faucet Body and Data Cable Installation

Install Faucet Body and Data Cable

Installs faucet body, data cable, and deck gasket into the sink hole.

Step 3 & 5: Securing Faucet Assembly

Step 6 & 7: Pulldown Hose Assembly

Step 8 & 9: Spray Wand and Hose Connection

Attach Spray Wand to Pulldown Hose

Installs the spray wand to the upper connection of the pulldown hose, tightening the nut.

Connect Pulldown Hose to Control Box

Connects the pulldown hose to the control box via a quick connect for proper function.

Step 10 & 11: Control Box and Data Cable Connections

Insert Data Cable into Control Box

Connects the data cable to the bottom port of the control box, ensuring full insertion.

Step 12, 13, 14, 15: Hose, Weight, and Battery Installation

Connect Hot and Cold Supply Hoses

Connects the hot and cold water supply hoses to the respective shut-off valves.

Select and Install Battery Holder

Chooses a location for the battery holder and installs it, then installs batteries into the holder.

Step 16, 17, 18: Final Connections and Pre-Startup Checks

Important Clearance Check Before Power

Ensure no obstructions within 3 feet of faucet before connecting power for proper startup.

Step 19, 20, 21, 22: Power Up and Sensor Testing

Connect Battery Holder Cable to Control Box

Inserts the battery holder cable into the control box power port for operation.

Test Wave Sensor Functionality

Verifies wave sensor operation by moving hand over it to test water flow on/off.

Step 23, 24, 25: Sensor and Handle Checks

Test Ready Sensor Operation

Checks the ready sensor by placing a hand in front to ensure water runs correctly.

Step A6, A7, A8: Reassembly and Water Testing

Test Water Flow and Check for Leaks

Turn on water, test flow, tighten connections, and verify there are no leaks.
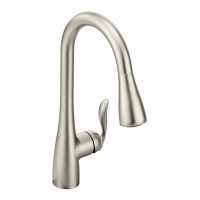
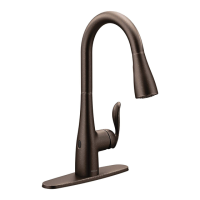
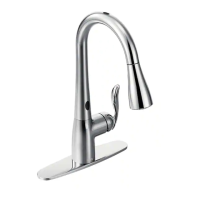
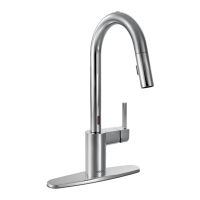
Related product manuals