MONITOR
HEATING
SYSTEMS
Section
4:
Maintenance
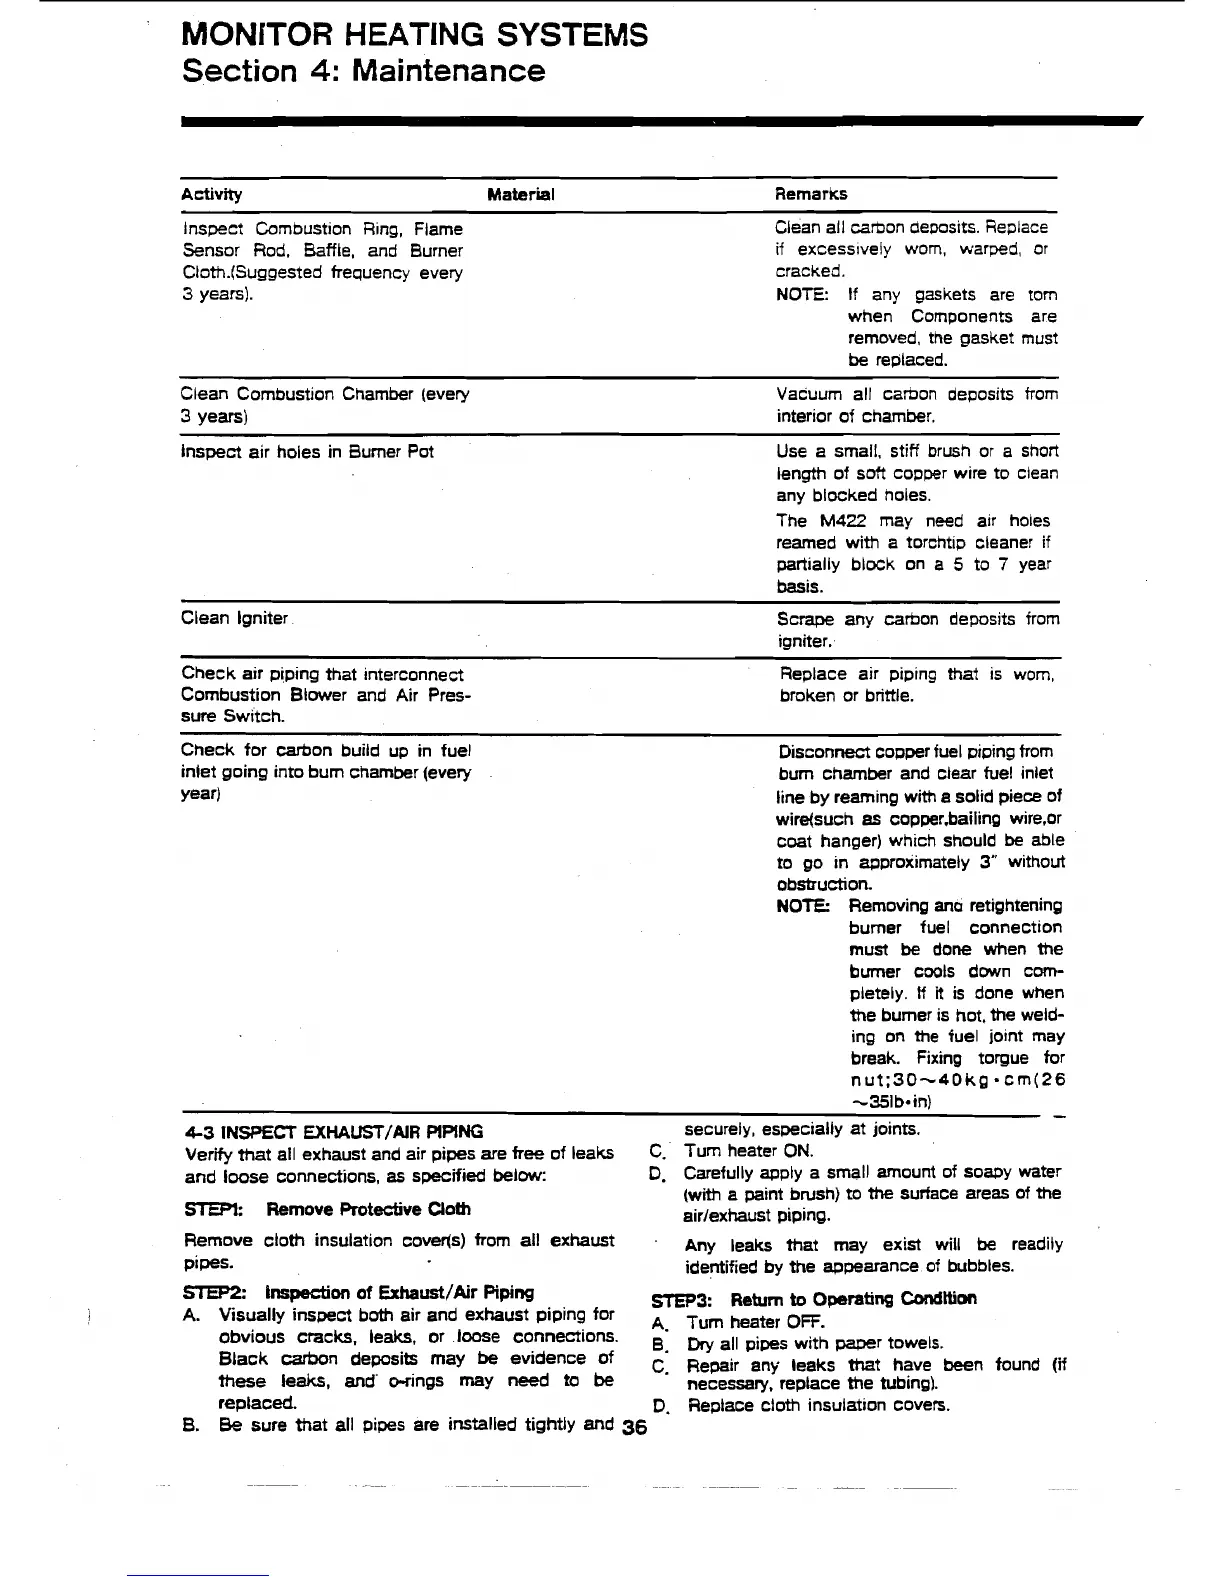
Activity Material Remarks
Inspect
Combust~on
R~ng,
Flame
Clean all carbon dewsrts. Replace
Sensor Rod, Baffle, and Burner
if
excess~vely worn, warped, or
Cloth.(Suggested frequency every cracked.
3
years).
NOTE
If
any gaskets are
tom
when Components are
removed, the gasket must
be
replaced.
Clean
Combustion
Chamber (every Vacuum all carbon deposrts from
3
years)
interior
of
chamber.
Inspect air holes in Burner Pot
Use a small, stiff brush or
a
short
length of
sott copper wire to clean
any blocked holes.
The
M422
may need alr holes
reamed with a
torchtrp cleaner
if
partially block on
a
5
to
7
year
basis.
Clean Igniter
Scrape any carbon deposits from
igniter..
Check air
piping that interconnect
Replace air piping that is worn,
Combustion Blower and Air
Pres- broken or brittle.
sure Switch.
Check for carbon build up in fuel
Disconnect copper fuel piping from
inlet going into bum chamber (every
bum chamber and clear fuel inlet
year)
line by reaming
with
a
solid piece of
coat hanger) which should
be
able
to go in approximately
3" without
obstruction.
NOTE:
Removing
ano
retightening
burner fuel connection
must
be
done when the
burner
cools down cm-
pletely.
H
it
is
done when
the bumer is hot, the weld-
ing on
me
fuel joint may
break. Fixing
torgue for
nut;30-40kg =cm(26
4-3
INSPECT
EXHAUST/AIR
PlPlNG
securely, espec~ally at joints.
Verify that all exhaust and air pipes are free of leaks
C.
Turn heater
ON.
and loose connections,
as
specified below:
D.
Carefully apply a small amount of soapy water
(with
a
paint brush) to
the
sudace areas of the
Remove
Rotedive
Cloth
airlextraust piping.
Remove
~10th insulation COV~~S) from all exhaust
.
leaks mat may exist will
be
readily
pipes.
identified by the appearance of bubbles.
STEP2:
inspection
of
Exhaust/Air
Piping
STEPS:
Return
to
Operating
CondKon
A. Visually inspect both air and exhaust piping for
A.
heater
obvious cracks, Leaks, or loose connections.
B.
Dry
all
pipes
with
paper
towels.
Black
mn
may
be
evidence
Of
C.
Repair any leaks that have been found (if
these leaks,
and'
o-rings may
need
to
be
necessary, replace the tubing).
replaced.
D.
Replace cloth insulation coven.
B.
Be
sure that all pipes are installed tightly and
36