26
ZKHTR1 Trim Kit (For 3/4" Panel)
Support for Custom Handle
• Place the prepared 3/4" custom door panel on the
bottom trim with support bracket tabs inserted into trim
slots.
• Push the panel back against the steel door, making
sure the panel is flush with the hinge side trim.
• Secure the panel to the trim temporarily by driving 2
screws through the backside of the trim at the top.
• Slide the handle extrusion in between the panel and
steel door.
• Temporarily secure the extrusion to the door with 2
screws.
Step 1
Temporarily
mount door
panel
Step 3
Assemble
panel,
extrusion and
handle
• Remove the handle extrusion, the 2 temporary
screws and custom panel.
• Drill 1/16" pilot hole through extrusion.
• Drill clearance holes through the panel and
extrusion.
• Assemble the panel, extrusion and custom handle.
• Install screw(s) long enough to pass through the
extrusion, door panel and into the handle.
Step 2
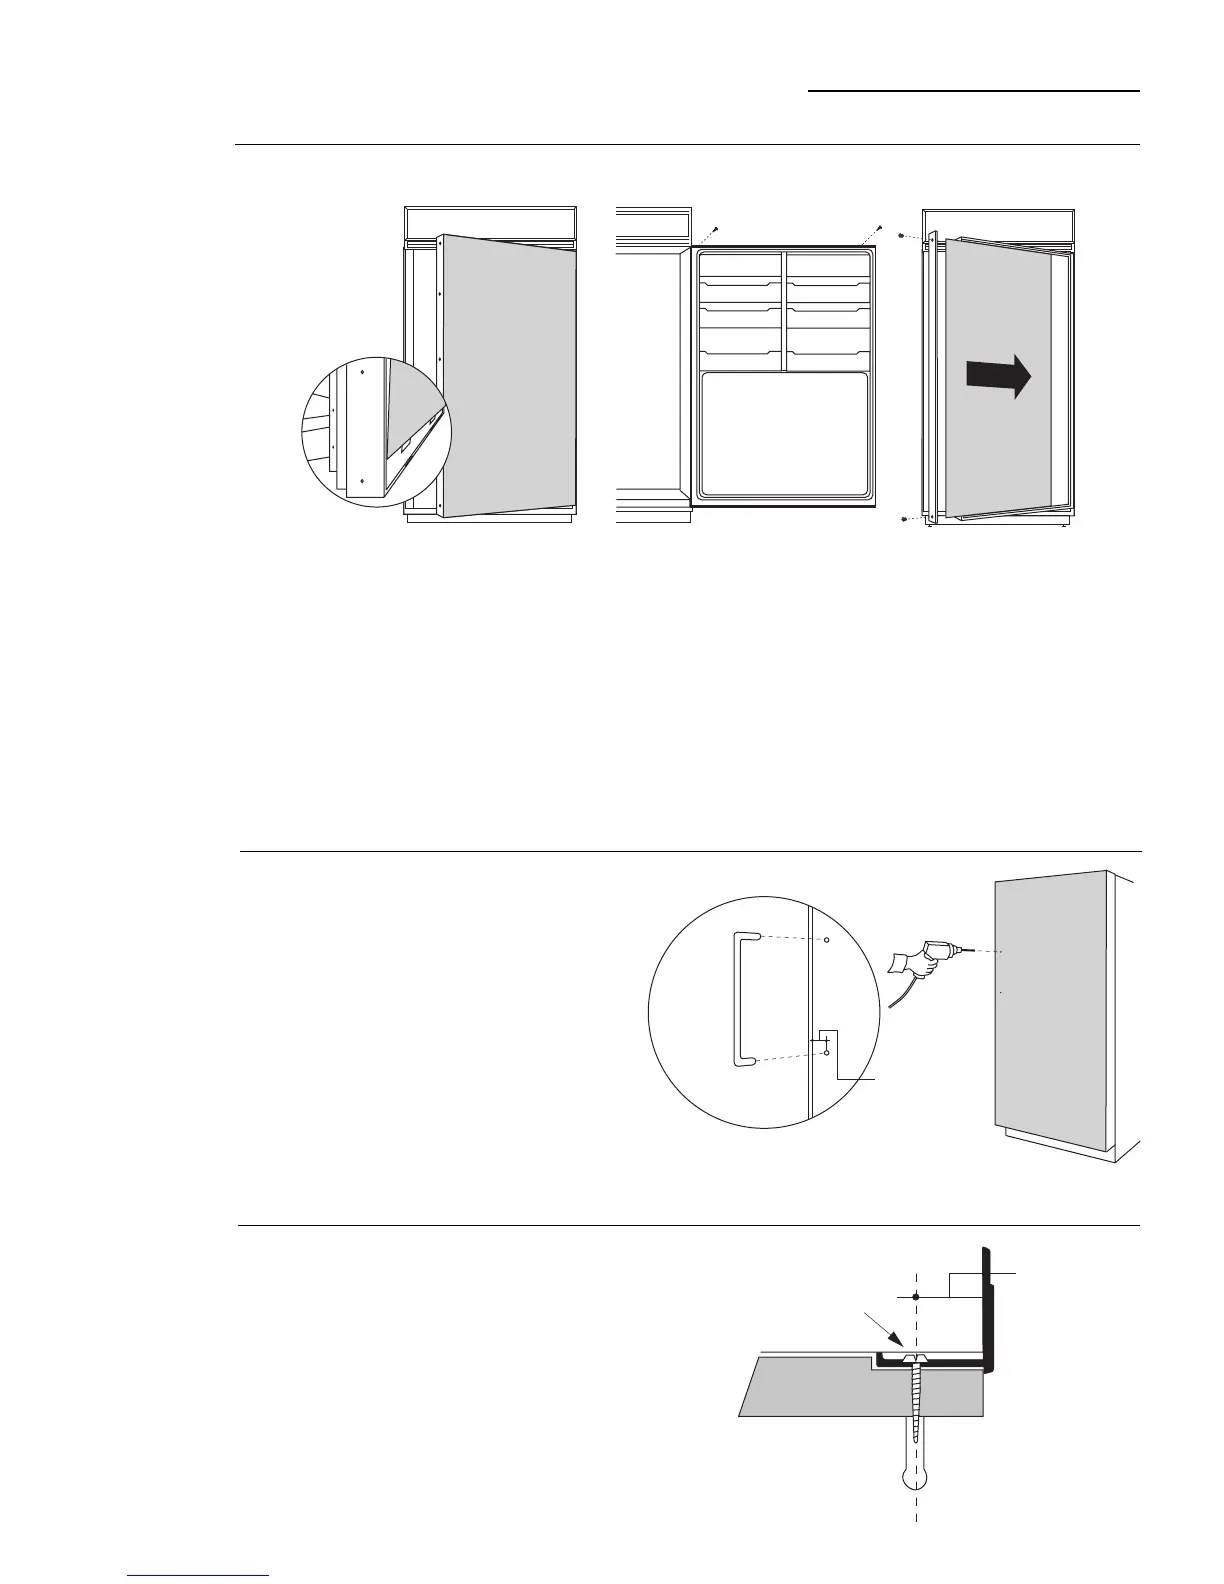
Locate
position
of handle
• Determine the location of the custom handles
and carefully mark centerlines of the screw
holes. The handles must be located 3/4" to
1-1/2" from the edge of the extrusion.
• Drill 1/16" pilot hole through the panel until it
starts into the aluminum extrusion. This will
mark the matching location for drilling a
clearance hole when assembling the
extrusion, panel and handle.
3/4" Min.
1-1/2" Max.
Screw
3/4" Min.
1-1/2" Max.
 Loading...