CAUTION: Do not use solvents, abrasive
cleaners, glass cleaners or all-purpose
cleaning agents to clean your Washer Dryer.
The chemicals they contain may damage the
plastic surfaces.
Drum Use a suitable
stainless steel cleaning
agent, following
the manufacturer’s
guidelines.
External casing Use a mild, non-abrasive
cleaning agent or soap
and water. Wipe dry with
a soft cloth.
Internal deposits –
these deposits may build
up when washes are
mainly carried out at low
temperatures.
Carry out a hot wash
at 70 °C or above once
every 4-6 weeks.
To make sure that your Washer Dryer operates as
intended, we recommend that you regularly carry out
routine maintenance.
Before cleaning or carrying out any maintenance on
your Washer Dryer:
1
Turn the mains power supply o and remove the
plug from the socket
2
Turn the cold water supply o
The table below describes the recommend methods
of cleaning the dierent parts of your Washer Dryer:
Water Inlet Filters
The water inlet lters are located on the rear of the
machine and are designed to stop dirt and any other
unwanted materials from entering your Washer Dryer.
These lters may need cleaning when if your Washer
Dryer does not receive sucient water from the
supply even though the tap is open and the supply
is on.
To clean the water inlet lters:
1
Turn the water inlet hose anti-clockwise to unscrew
it from the Washer Dryer and remove it by gently
pulling.
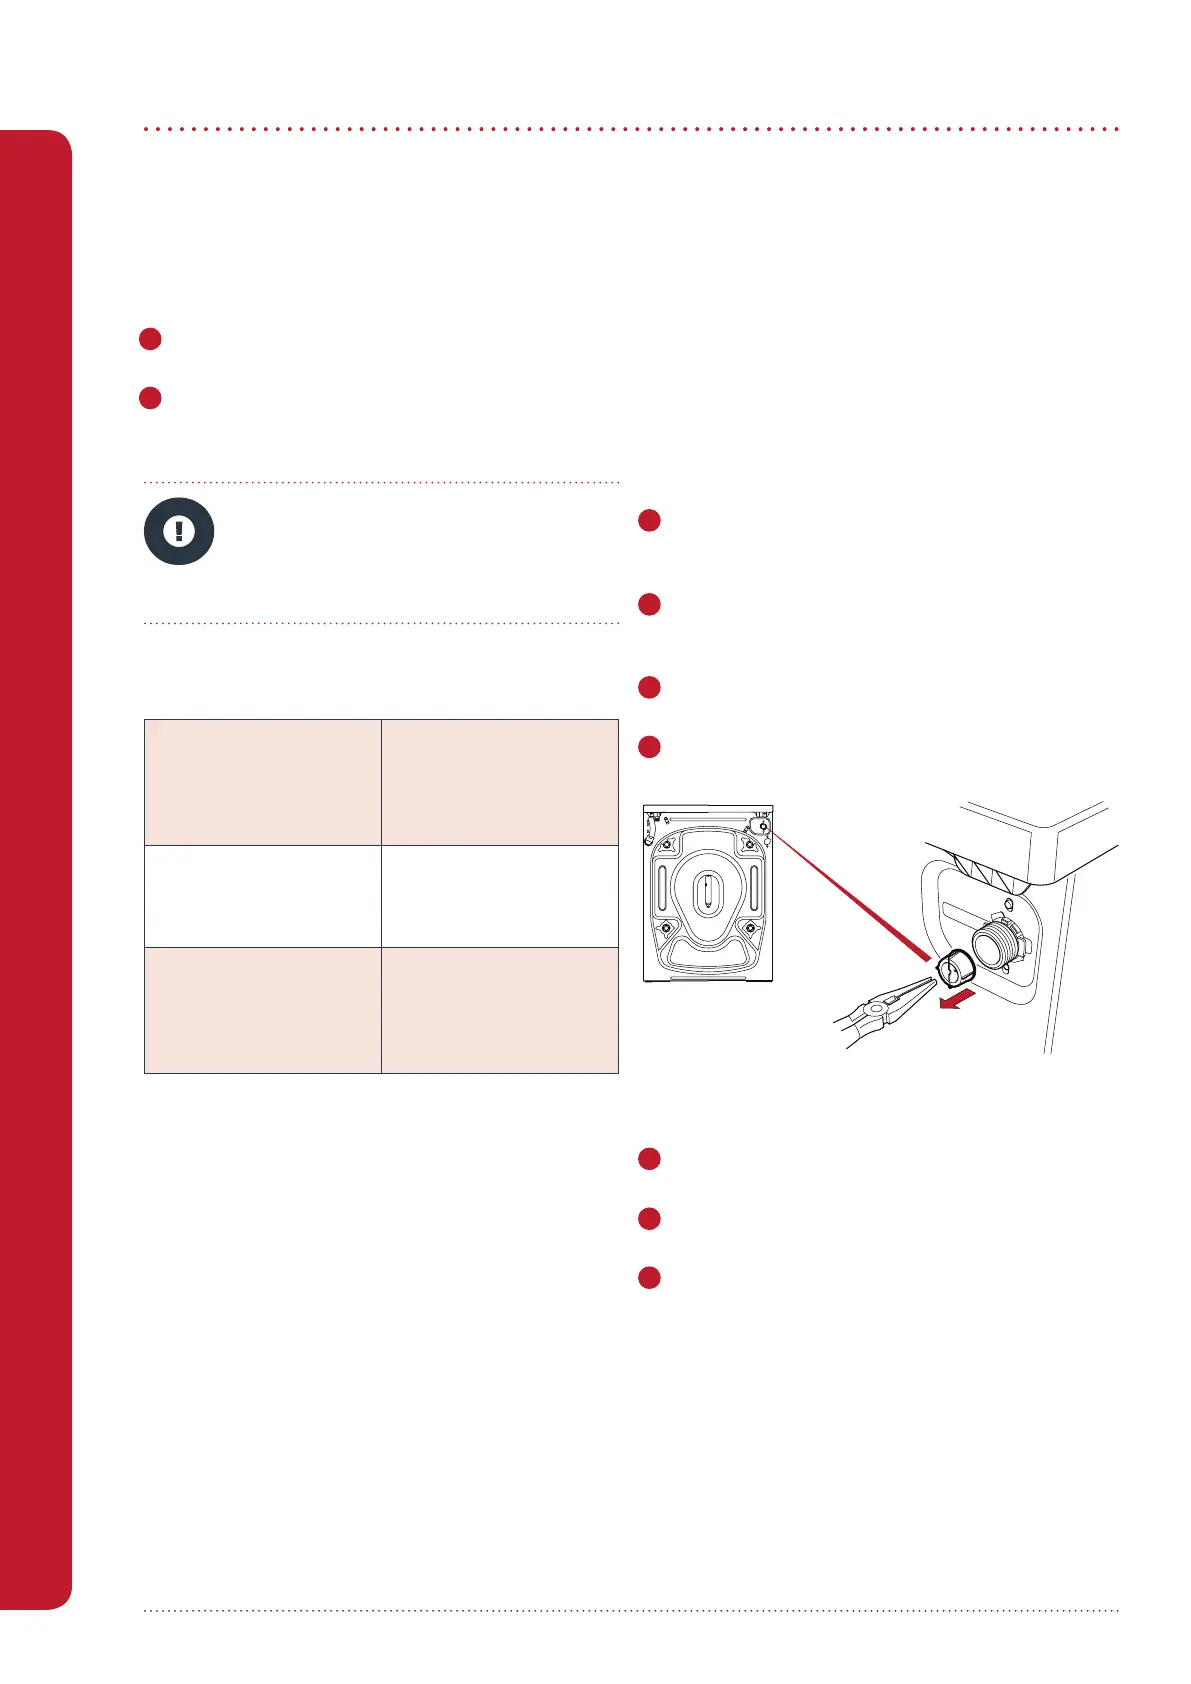
2
Remove the water inlet lter from the water inlet
valve by gently pulling on the plastic bar of the lter
with a pair of long nosed pliers (see Figure 10).
3
Clean the lter using a soft brush and soapy water.
Rinse thoroughly.
4
Gently re-insert the lter by pushing it back into
place.
Another water inlet lter can be found in the tap end
of the water inlet hose. To clean this lter:
1
Remove the lter by gently pulling on the plastic
bar with a pair of long-nosed pliers.
2
Clean the lter using a soft brush and soapy water.
Rinse thoroughly.
3
Gently re-insert the lter by pushing it back into
place.
Taking Care of Your Washer Dryer
Taking Care of Your Washer Dryer
Figure 10
 Loading...